No-Yeast Bread: A Practical, Yeast-Free Baking Guide
Learn to bake bread without yeast using quick leaveners or natural starters. This educational, kitchen-tested guide covers ingredients, step-by-step methods, substitutions, and troubleshooting for reliable, flavorful yeast-free loaves.

To bake bread without yeast, you’ll use a quick-leavening method (baking powder or baking soda) or a natural starter substitute. This guide outlines a yeast-free dough, shaping, and baking process, plus tips for substitutions and texture control. According to Bake In Oven, you can achieve a soft crumb and good rise with precise ratios and resting times.
Why bake without yeast
Baking bread without traditional yeast opens up reliable, time-saving possibilities for home bakers who want consistent results and fewer fermentation steps. Yeast-free loaves can still be delicious, with a soft crumb and a pleasing rise when you use the right leavening method and hydration. According to Bake In Oven, the key is understanding how alternative leaveners interact with flour, liquid, and heat. Quick breads, soda breads, and other yeast-free varieties demonstrate that texture and flavor come from balance more than from long fermentation. This section walks through the fundamentals, including when a no-yeast approach makes the most sense, and how to adjust technique for different flours and shapes. By the end, you’ll feel confident choosing a method that fits your schedule and taste preferences.
In practice, yeast-free baking often relies on powder-based leaveners, dairy acids, or a natural starter substitute. Each option brings a distinct crumb and aroma, so the choice should align with your goals—soft sandwich bread, savory beer breads, or rustic crusty loaves. The Bake In Oven team finds that with careful measurement and timing, yeast-free doughs can be remarkably versatile and forgiving, especially for beginners.
Understanding no-yeast leavening options
No-yeast bread relies on leavening mechanisms other than commercial yeast. The most common options are chemical leaveners (baking powder or baking soda), dairy-acid reactions (using buttermilk, yogurt, or sour cream combined with an acid), and natural starters that don’t depend on commercial yeast. Baking powder contains both an acid and a base and releases carbon dioxide when moistened and heated, giving lift to the batter or dough. Baking soda requires an acidic liquid to activate, which makes dairy or lemon juice vital when used alone. A sourdough starter or other wild-yeast cultures can provide fermentation lift without packaged yeast, though the flavor evolves differently and requires maintenance. The best approach depends on your preferred texture and time constraints. Bake In Oven analyses show that precise hydration, proper mixing, and correct oven temperature are often more impactful than the chosen leavener alone, so calibrate all steps for reliable outcomes.
Ingredient choices and substitutions
Choosing the right flour and hydration is crucial in yeast-free breads. All-purpose or bread flour provides structure, while whole-wheat adds flavor and nutrients but can yield a denser crumb if not balanced with liquids. Typical hydration for yeast-free doughs ranges from moderate to high, depending on flour type; too dry and the loaf will be compact, too wet and it may spread. If you’re using baking powder, aim for a looser batter or soft dough to avoid dense results. For a sourdough-style approach, you’ll rely on a starter with a balanced ratio of flour to water and a shorter rise time. Substitutions like yogurt or buttermilk can add moisture and acidity, which helps with tenderness and lift. Always consider salt, sugar, and fat as you adjust, since they influence crumb, crust, and flavor.
In practice, measuring ingredients accurately is essential. A digital scale provides better repeatability than volume measures, especially for flour. If you’re substituting, record the changes so you can tweak future batches. This section emphasizes practical substitutions that keep the loaf cohesive even when you don’t have the exact ingredients.
Tools and techniques you need
A few practical tools transform yeast-free baking from guesswork into repeatable results. A sturdy mixing bowl, a whisk or spoon for dry and wet components, and a digital scale help with precision. A loaf pan or a sturdy baking sheet is required for shaping, while parchment paper prevents sticking and simplifies cleanup. An oven thermometer ensures accurate heat, crucial for reliable rise without yeast. Good dough handling—gentle folding rather than rough kneading—helps maintain structure without overdeveloping gluten. Finally, cooling racks prevent moisture buildup on the crust, keeping the bread from becoming soggy as it finishes setting. With these tools, you’ll be ready to apply the step-by-step method in a controlled, repeatable way.
Troubleshooting and common pitfalls
Even with careful planning, yeast-free bread can surprise you. Common issues include a dense crumb, uneven rise, and a dry or crumbly texture. Troubleshooting starts with hydration: if the dough is too dry, the loaf will be tough; if too wet, it may spread or collapse. Temperature matters as well—preheating to the right degree and maintaining steady heat during baking helps control rising and crust development. Overmixing can tighten the crumb, while undermixing can leave pockets of dry flour. Flavor is affected by flour choice and fermentation duration when using natural starters. If your first attempts aren’t perfect, adjust hydration by a tablespoon or two per cup of flour and tweak leavening strength to match your preferred rise and texture.
Recipe variants and variations
Yeast-free bread shines with flexibility. For a crusty loaf, use a hotter oven and a steaming method to improve oven spring. For a softer sandwich bread, choose a milder flour and increase hydration slightly. You can add seeds, nuts, or dried fruit for extra texture and flavor. Gluten-free options are possible with alternative flours and binding agents, though they require different hydration and handling. The key is to start with a solid base recipe and then tailor the leavener and hydration to your goals. Practice and small tweaks will yield handsomely varied results.
Quick-start plan for different doughs
If you’re new to yeast-free baking, start with a classic baking powder-based loaf using all-purpose flour and dairy, then experiment with whole-wheat or rye for richer flavor. If you’d prefer a starter-style lift, keep a small starter culture fed and ready, using a consistent feeding schedule and a shorter rise for best results. Record your measurements and outcomes to build a personal yeast-free baking profile. With patience and practice, you’ll develop a pantry-friendly approach that delivers reliable bread without traditional yeast.
Tools & Materials
- Large mixing bowl(Stable, wide bowl for mixing and resting dough)
- Whisk and spatula(Whisk for dry ingredients; spatula for folding)
- Digital kitchen scale(For precise flour and liquid measurements)
- Measuring cups and spoons(For non-scale measurements when needed)
- Loaf pan (9x5 inches) or sheet pan(Choose depending on bread shape)
- Parchment paper(Prevent sticking and facilitate removal)
- Oven thermometer(Ensure accurate baking temperature)
- Baking powder or baking soda(Leavening agents for lift)
- Buttermilk or yogurt (or milk with vinegar/lemon)(Acid for activating leaveners; optional)
- Dairy-free option (optional)(Plant-based milk and acid replacement)
- Cooling rack(Cool bread evenly to set crumb)
- Dough scraper (optional)(Useful for clean folds)
Steps
Estimated time: 75-120 minutes
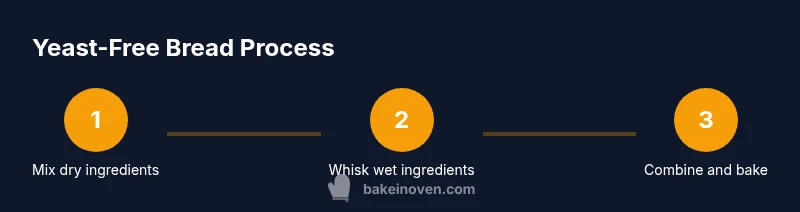
- 1
Preheat and prepare
Preheat the oven to 375°F (190°C) and line the loaf pan with parchment. This ensures even heat and makes removal easy. A proper preheat guarantees consistent rise and crust development.
Tip: Use the oven thermometer to verify heat; small temperature shifts can affect rise. - 2
Whisk dry ingredients
Whisk together flour, salt, and baking powder (or baking soda with acid). Even distribution prevents uneven pockets of leavener and salt in the dough.
Tip: Sift if clumps exist to maximize leavening efficiency. - 3
Combine wet ingredients
In a separate bowl, mix your wet ingredients: eggs, oil or melted butter, and buttermilk or yogurt (or a dairy-free alternative with an acid). The liquids should be at room temperature for best emulsification.
Tip: Whisk until uniform; small lumps are okay for a tender crumb. - 4
Create the batter/d dough
Pour wet into dry and fold gently until just combined. Overmixing can develop gluten too much for yeast-free loaves, resulting in a tougher crumb.
Tip: Stop as soon as you see a cohesive batter; leave some streaks of flour for texture. - 5
Fold in extras (optional)
If adding seeds, nuts, or dried fruit, fold them in now with minimal agitation to keep the dough light.
Tip: Dust add-ins with a little flour to prevent sinking to the bottom. - 6
Shape and rest
Spoon or press the batter/dough into the prepared pan and smooth the top. Rest 10-15 minutes if using a higher-hydration dough to help hydrate flour and relax gluten.
Tip: A short rest improves oven spring in yeast-free doughs. - 7
Score the surface
Lightly score the surface with a sharp blade. This guides expansion and prevents large cracks from forming in unexpected directions.
Tip: Even shallow scores can improve lift and crust texture. - 8
Bake until golden
Bake for 25-35 minutes, until the crust is deep golden and a skewer comes out clean. Internal temp should approach 190-200°F (88-93°C) for denser loaves.
Tip: If the crust browns too fast, loosely cover with foil to finish evenly. - 9
Cool briefly in pan
Let the bread rest in the pan for 10 minutes to finish setting its structure before removing to a rack.
Tip: This short rest helps avoid a crumbly slice. - 10
Cool completely
Transfer to a cooling rack and cool completely before slicing. This preserves crumb structure and prevents steam from making the crust soggy.
Tip: Aim for at least 1 hour of cooling before cutting for best texture.
Frequently Asked Questions
Can I bake bread without yeast at home?
Yes. Yeast-free bread uses chemical leaveners or natural starters to rise. With proper hydration and heat, you can achieve a soft crumb or a crusty crust depending on your method.
Yes, you can bake bread without yeast using quick-leavening agents or natural starters. It’s all about hydration, heat, and the right technique.
What leavening agents work best for yeast-free bread?
Baking powder provides reliable lift in a single step, while baking soda needs an acidic liquid to activate. A sourdough starter offers a natural lift but changes flavor and aroma.
Baking powder gives reliable lift; baking soda needs acid. A starter can also lift bread with a distinct flavor.
Can I substitute sourdough starter for baking powder?
A starter can replace chemical leaveners in some recipes, but you must adjust hydration and rising time. Expect different texture and flavor compared to a powder-based loaf.
Yes, but you’ll adjust hydration and rise time, and you’ll get a different flavor and texture.
What flours work best for yeast-free bread?
Bread flour or all-purpose flour provides structure. Whole-wheat adds flavor and density; blend for balance to keep the crumb tender.
Bread or all-purpose flour gives better structure; mix with whole-wheat for extra flavor.
How should I store yeast-free bread after baking?
Cool completely, then store in an airtight container for up to 2-3 days. For longer storage, refrigerate or freeze slices and reheat as needed.
Cool fully, store airtight for a few days, or freeze for longer keeping quality.
Can I make yeast-free bread dairy-free?
Yes. Use plant-based milk with an acid like lemon juice and a dairy-free fat to mimic the moisture and texture of dairy-based recipes.
Absolutely. Use plant milk with an acid and a dairy-free fat to mimic dairy texture.
Watch Video
Key Takeaways
- Choose a leavening method that fits your schedule.
- Measure ingredients precisely for consistent results.
- Monitor hydration to balance crumb and structure.
- Bake with a hot, stable oven for best crust.
- Bake without yeast is achievable with simple substitutions.