No-Bake Fourth of July Dessert: A Complete How-To Guide
Learn to make a festive no bake fourth of july dessert with patriotic layers, simple ingredients, and fridge-set firmness. This educational guide covers crusts, fillings, assembly, safety, and practical variations for summer gatherings.

Create a festive no bake fourth of july dessert that doesn't require an oven, perfect for hot July gatherings. This guide walks you through a patriotic layered treat, with an easy crust, creamy filling, and vibrant berry toppings. According to Bake In Oven, no-bake desserts can simplify summer party planning while delivering impressive flavor.
no bake fourth of july dessert: Why this no-oven approach suits summer gatherings
A no bake dessert designed for the Fourth of July embraces the spirit of red, white, and blue without stressing the kitchen. By avoiding the oven, you reduce heat in a house already sweltering in July and keep your party on track even if a grill or outdoor stove is the star. The core idea is simple: a crunchy crust, a creamy, stable filling, and vibrant toppings that hold up in warm weather. According to Bake In Oven, no-bake desserts are especially practical for summer gatherings because they set beautifully when chilled and slice neatly for crowd portions. This approach also makes substitutions easier for dietary needs, which is a win for home cooks juggling allergies and preferences. The emphasis here is practical, kitchen-tested guidance that yields professional-looking results with everyday ingredients.
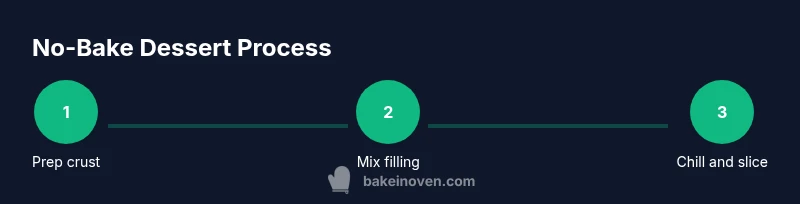
In this guide, you’ll see the process broken into clear steps, with practical tips, safety notes, and variations to match your pantry and guests. You’ll learn how to layer colors to achieve a lauded patriotic look, how to choose a crust that holds up without baking, and how long to refrigerate so every slice comes out clean and sliceable. The goal is a dessert that looks and tastes festive while staying approachable for home bakers. For busy cooks, the no bake method reduces prep stress while delivering a dessert that photographs well for social media and family albums alike.
Key takeaway: a no bake fourth of july dessert is a reliable, summer-friendly option that emphasizes texture, color, and chill-time precision. It’s a crowd-pleaser that travels well to picnics and potlucks. The Bake In Oven team emphasizes planning your chilling window so you can serve with confidence.
Top features to expect in a no-bake patriotic dessert
Patriotic no-bake desserts typically combine a crisp crust, a smooth and stable cream filling, and berry accents that reinforce the red, white, and blue aesthetic. You’ll often see ingredients like graham crackers or shortbread as the crust, cream cheese or whipped cream-based fillings, and fresh berries or fruit sauces for color and brightness. The absence of an oven means you can assemble ahead and chill, which is ideal for large gatherings. Texture becomes a core focus: the crust should stay intact when sliced, the filling should hold its shape, and the toppings should stay vibrant without leaching color onto the cream. In this section, we also discuss substitutions and how to adapt for dairy-free or gluten-free diets, keeping the dessert accessible while preserving the festive look.
For reliability, aim for a filling that sets firmly in the fridge. If you want extra stability, you can use a light gelatin protocol or a chilling technique that helps the filling set more quickly. The result is a dessert that slices cleanly and looks as good as it tastes. The no-bake approach makes this possible even during peak kitchen heat while keeping the celebration spirit intact.
Tools & Materials
- 9x13 inch pan (preferably with parchment lining)(Lined with parchment for easy removal and cutting)
- Mixing bowls (medium and large)(For crust and filling prep)
- Spatula (silicone) and whisk(For folding and mixing without tearing cream)
- Measuring cups and spoons(Accurate sugar, dairy, and flavoring)
- Electric mixer or hand whisk(For whipping cream and smoothing filling)
- Parchment paper or extra parchment for lining(Optional if pan isn’t pre-lined)
- Fresh berries or fruit for topping(Choose a mix of red and blue berries)
- Optional: gelatin powder (unflavored) or agar for extra set(Use only if you want extra firm texture)
Steps
Estimated time: Total time: 2-4 hours (including chilling)
- 1
Gather ingredients and tools
Collect all ingredients and lay out tools before you start. This helps prevent mid-task searches which can interrupt the chilling timelines. Confirm you have enough cold ingredients on hand, especially if you’re preparing for a crowd. Having everything ready minimizes delays.
Tip: Set up a dedicated workspace: one for crust components, one for filling, and a third for toppings. - 2
Prepare the crust base
Pulse graham crackers or cookies into fine crumbs. Melt butter and whisk it into the crumbs until evenly moistened. Press the mixture firmly into the pan to form an even crust, and chill for 15 minutes to set the foundation.
Tip: Use the flat bottom of a glass to press the crust evenly; an even crust prevents cracking when slicing. - 3
Make the creamy filling
Beat softened cream cheese with sugar and vanilla until smooth. Gently fold in whipped cream (or whipped topping) until the mixture is light and airy but holds its shape. Chill the filling briefly to settle any air bubbles.
Tip: If the filling looks runny, chill it for an extra 5–10 minutes before layering. - 4
Layer, color, and texture
Spread the filling over the crust. Add a second color layer by spooning a berry sauce or strawberry jam in stripes and using a toothpick to gently blend for a marbled red-white effect. Scatter fresh berries on top for burst of color and freshness.
Tip: Keep color separation clear for a strong red-white-blue effect. - 5
Chill until set
Refrigerate the assembled dessert for 2–4 hours, or overnight for best results. Cooling time helps the filling firm up so slices cut cleanly. Ensure your fridge stays at or below 40°F (4°C).
Tip: If you’re in a rush, a brief freezer chill of 30–60 minutes can help the filling set faster. - 6
Serve and garnish
Lift the dessert using parchment, cut into even squares, and plate with a few berries or mint leaves for extra color. Keep slices cold until served and store leftovers in the fridge in an airtight container.
Tip: Slice just before serving to maintain neat edges and prevent topping wobble.
Frequently Asked Questions
What ingredients work best for a no bake fourth of july dessert?
Choose a crunchy crust like graham crackers, a creamy filling such as cream cheese with whipped cream, and bright red and blue fruit toppings. These elements balance texture and color without requiring heat.
Best ingredients are a crunchy crust, a creamy filling, and berries for color.
Can I make this dessert ahead of time?
Yes. Assemble the crust and filling, then refrigerate. Finish any toppings shortly before serving to keep them fresh and vibrant.
Yes, you can prep ahead and chill; add toppings before serving.
Is this recipe adaptable for gluten-free or dairy-free diets?
Absolutely. Use gluten-free cookies for the crust and a dairy-free cream cheese or coconut cream for the filling. Check labels to ensure no hidden gluten or dairy additives.
You can adapt with gluten-free crust and dairy-free fillings.
How should leftovers be stored?
Store in the refrigerator, covered, for up to 3-4 days. If freezing, select a filling that freezes well and thaw in the fridge before serving.
Refrigerate for 3-4 days; freeze if needed.
Do I need gelatin or other gelling agents?
Gelatin is optional in most no-bake fillings; rely on whipped cream and chilling for structure. If used, dissolve first and fold in at a cool temperature.
Gelatin is optional; use whipped cream and chilling, or properly prepared gelatin.
What toppings best suit a patriotic theme?
Fresh berries, whipped cream rosettes, and a light berry glaze create a vivid red-white-blue look without overpowering the filling’s flavor.
Berry toppings boost the patriotic look and flavor.
Watch Video
Key Takeaways
- Plan chilling time early to ensure clean slices.
- Choose a crust that maintains form without baking.
- Layer colors boldly for visual appeal.
- Keep the dessert refrigerated for best texture.
- Customize toppings for dietary needs without losing style.