No-Bake Peanut Cheesecake Guide
Master a creamy no-bake peanut cheesecake with a crisp crust, rich filling, and fridge-set goodness. This Bake In Oven guide covers ingredients, substitutions, assembly, chilling, and serving tips for perfect slices.

By the end of this guide you will master a creamy, peanut butter flavored cheesecake that requires no oven. You’ll learn precise ingredient ratios, a no-bake crust method, and chilling times to set the filling firm. This step-by-step approach ensures clean slices and peanut-forward flavor, with tips to customize sweetness and texture.
No-Bake Peanut Cheesecake: The Core Idea
No-bake peanut cheesecake balances a creamy, peanut-forward filling with a crisp, buttered crust, all set in the fridge rather than the oven. This approach is ideal for warm kitchens, dairy lovers, and home bakers who want dessert without turning on the heat. According to Bake In Oven, the structure comes from the way fats and proteins interact as the mixture chills, not from baking temperatures. Start with a sturdy crumb base made from cookies and melted butter; this base provides crunch and helps the filling sit without sliding. The filling itself is a blend of softened cream cheese, peanut butter, a touch of sugar or sweetened condensed milk, and vanilla to lift the flavor. The optional cream or whipped topping adds lightness, but the core is a thick, scoopable center that slices neatly. Achieving this balance requires paying attention to softened ingredients, avoiding over-mixing, and giving the dessert enough time to chill. With the right ratios, you will produce a dessert that tastes like a peanut butter cup in cheesecake form. A well-chilled finish enhances the peanut aroma and keeps slices neat.
Ingredient Essentials and Variations
The backbone of a great no-bake peanut cheesecake is simple: good cream cheese, peanut butter with a pleasant roasted flavor, a crumb crust, sugar for balance, vanilla, and a pinch of salt. For the crust, common choices are graham crackers or digestive biscuits crushed into fine crumbs, then bound with melted butter. If you’re avoiding gluten, swap in gluten-free crackers or use digestive biscuits made without gluten. For the filling, use full-fat cream cheese for richness; light cheese yields a softer final texture. A touch of whipped cream can lighten the center, but don’t exceed 1/3 to 1/2 cup to avoid a runny result. Powdered sugar dissolves more smoothly than granulated sugar in a cool filling, and a splash of vanilla highlights peanut notes. If you like extra peanut flavor, fold in finely chopped roasted peanuts or swirl in a peanut butter ripple after the base has begun to set. Always keep ingredients cold until assembly to prevent the filling from seeping.
Crafting the No-Bake Crust
Crush cookies into fine crumbs using a food processor or heavy resealing bag and a rolling pin. Combine crumbs with melted butter until evenly moistened; the mixture should clump when pressed. Press firmly into the prepared pan to create a dense, even base. A common trick is to use the bottom of a glass or a flat measuring cup to smooth the surface. Chill the crust for at least 15 minutes before filling to help it hold its shape when the filling is added. If you’re making mini cheesecakes, portion the crust into lined muffin cups and press down with a small spoon. For vegan or dairy-free adaptions, substitute plant-based cream cheese and use coconut oil in place of butter, but be mindful of a slightly different texture.
Peanut Filling: Creaminess and Texture
Softened cream cheese blends with peanut butter to create a rich, creamy center. Start by beating the cream cheese until smooth, then add peanut butter and gradually mix in sugar and vanilla. Avoid overworking once the ingredients come together; overmixing can trap air and lead to cracks or a pale, stiff texture. If the mixture looks loose, fold in a bit of whipped cream or a splash of milk to adjust body. For extra peanut character, toast the peanut butter lightly before mixing to deepen the nutty aroma. If using sweetened condensed milk, blend in small amounts and taste as you go to prevent an overly sweet filling. The goal is a thick, spoonable consistency that holds its shape when chilled without being too stiff.
Assembly, Chilling, and Serving
Spread the crust evenly and press firmly. Pour or scoop the peanut filling over the crust, then use a spatula to smooth the top. Tap the pan gently on the counter to release any air pockets, then refrigerate. Chill for at least four hours; overnight is ideal for clean slices. If you’re short on time, a quick freeze for 30-45 minutes can help set the edges, but don’t freeze solid. When ready to serve, run a warm knife around the edge to release the cheesecake from the pan and slice with a clean, hot blade for neat portions. Garnish with chopped peanuts, chocolate drizzle, or a swirl of extra peanut butter for a glossy finish.
Common Pitfalls and How to Fix Them
Cracks often appear when the filling is overbaked or under-set; with no bake, cracks come mainly from rapid temperature shifts or mixing too vigorously. A smooth, glossy top comes from gentle spreading and chilling gradually. If the filling seems too soft, add a tablespoon of powdered sugar or whipped cream to tighten texture, then chill longer. A crumbly crust usually means the butter didn’t bind crumbs evenly; re-melt a little butter and press again. Watery filling can result from using too much liquid (milk or cream). Use full-fat dairy and avoid large amounts of liquid while mixing. Finally, if the peanut flavor is faint, fold in extra peanut butter or roast peanuts for a stronger aroma before pouring.
Flavor Variations and Toppings
Enhance the classic with mix-ins like finely chopped roasted peanuts, malt powder, or a hint of cinnamon for warmth. For a chocolate-peanut twist, drizzle melted dark chocolate over the finished slice or create a peanut butter swirl layer within the filling. A hint of espresso powder can intensify the roasted peanut notes. If you prefer a lighter version, swap in half the cream cheese for Greek yogurt; the flavor shifts, but it still yields a creamy texture. For festive occasions, top with crushed peanut brittle or mini peanut butter cups for visual appeal.
Make-Ahead and Storage Tips
No-bake cheesecakes improve with time; plan to make a day ahead for best flavor and texture. Keep the assembled cake covered in the refrigerator for up to 4 days. If you need longer storage, freeze slices individually wrapped and thaw in the fridge before serving. Do not freeze the entire cake while the filling is soft, as freezing can cause texture changes. When freezing, label with date and contents for easy inventory.
Quick Reference: Ratios, Timing, and Checkpoints
Crust ratio: crumbs to butter around 3:1 by weight, to form a cohesive, non-greasy base. Filling ratio: cream cheese to peanut butter about 2:1 by weight for a balanced bite. Chill time: minimum 4 hours; overnight yields cleaner slices and better flavor integration. Checkpoint cues: crust is firm to the touch; filling is opaque and glossy; edges are set and not jiggly. If you see liquid around the edges, the filling needs longer chilling or a bit more thickening agent.
Presentation and Portions
Serving slices should be 1/8 to 1/12 of a standard cake, depending on pan size. Use a sharp knife warmed under hot water to cut cleanly, then wipe with a clean towel between cuts. Present on a chilled plate with a small dollop of whipped cream or a sprinkle of crushed peanuts. For photos, angle the cake 45 degrees and place a nib of chocolate and a few peanuts on the top. A neat presentation makes the no-bake peanut cheesecake feel premium while keeping the focus on the peanut butter flavor.
Tools & Materials
- Cream cheese, softened (16 oz / 450 g)(Two 8 oz blocks, softened to room temp)
- Smooth peanut butter (unsweetened)(14-16 tbsp or 1 cup)
- Powdered sugar(Adjust to taste)
- Vanilla extract(1 tsp)
- Graham crackers or digestive biscuits, crushed(About 1 1/2 cups crumbs)
- Butter, melted(About 5-6 tbsp)
- Whipped cream or heavy cream (optional)(For lightening the filling)
- Salt(A pinch)
- Springform pan or lined muffin cups(8-inch pan or 12-cup muffin tray)
- Chilled toppings (peanuts, chocolate drizzle)(For serving)
Steps
Estimated time: 60-120 minutes active, plus 4 hours chilling
- 1
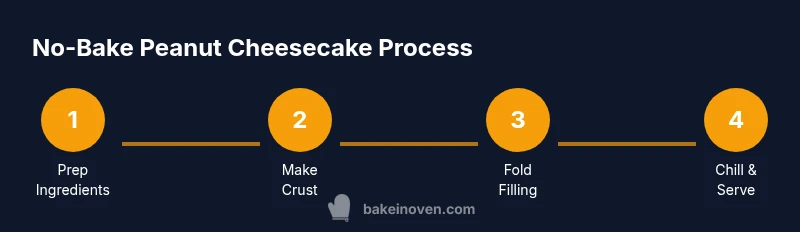
Prepare ingredients
Set cream cheese and peanut butter to room temperature, gather all ingredients, and measure accurately. This ensures a smooth filling and avoids lumps during mixing.
Tip: Softened ingredients mix more smoothly; plan 30 minutes for softening if needed. - 2
Make crust
Crush cookies to fine crumbs and combine with melted butter. Press firmly into the pan to form a dense, even base. This provides bite and helps the filling stay put.
Tip: Use the bottom of a glass to smooth the crust surface for an even layer. - 3
Chill crust
Refrigerate the crust for at least 15 minutes before filling. A cold crust resists crumbling when you pour in the filling.
Tip: If making mini cheesecakes, portion crust into muffin cups and chill briefly. - 4
Cream cheese mixture
Beat cream cheese until smooth, then add peanut butter gradually. Scrape the bowl and mix until evenly combined without overworking.
Tip: Avoid overmixing once the fats emulsify to prevent a dense texture. - 5
Sweeten and stabilize
Add powdered sugar and vanilla; mix until the mixture is thick and uniform. If using whipped cream, fold it in gently to maintain airiness.
Tip: Taste and adjust sweetness in small increments to avoid masking peanut flavor. - 6
Assemble filling
Spread the filling over the crust in an even layer. Use a spatula to create a smooth top and remove any air pockets by tapping the pan gently.
Tip: A steady hand with the spatula yields a professional finish. - 7
Set in fridge
Cover and refrigerate for 4 hours or overnight. The chilling time is essential for slicing cleanly and achieving the desired thickness.
Tip: If short on time, a 30-45 minute pre-freeze can help edges set, but avoid freezing solid. - 8
Slice and serve
Warm a knife under hot water, dry, and slice for neat portions. Garnish as desired with peanuts or chocolate drizzle.
Tip: Wipe the blade between cuts for crisper slices. - 9
Make ahead
Prepare this dessert a day ahead to deepen flavors. Keep it refrigerated until ready to serve.
Tip: Cover tightly to prevent fridge odors from seeping into the cheesecake.
Frequently Asked Questions
How long does no-bake peanut cheesecake take to set?
No-bake cheesecakes typically need at least four hours in the fridge, with overnight chilling delivering the best texture and clean slices.
Most no-bake cheesecakes need several hours in the fridge to set; overnight chilling yields the best texture.
Can I use natural peanut butter in this recipe?
Yes, but natural peanut butter may separate slightly. Stir thoroughly and adjust sweetness to compensate for any extra oil.
Natural peanut butter works fine if you stir well and adjust the sugar a bit.
Is crust gluten-free?
Yes. Use gluten-free crackers or cookies and ensure the butter is unsalted. Grind evenly for a cohesive base.
Absolutely, you can make a gluten-free crust with gluten-free crackers.
Can I freeze no-bake peanut cheesecake?
Yes, slice and wrap individually; thaw in the fridge before serving. Avoid freezing the whole cake when the filling is soft.
You can freeze slices; thaw them in the fridge before eating.
What if the filling cracks?
Cracks are uncommon with proper chilling. If they occur, smooth the top and garnish with toppings to hide imperfections.
If cracks appear, smooth them and cover with toppings.
Do I need gelatin?
Gelatin is optional for no-bake. Most recipes rely on cream cheese, whipped cream, and chilling to set.
Gelatin is optional; chilling and the right fats usually do the job.
Watch Video
Key Takeaways
- Prepare ingredients in advance for smooth mixing
- Crust quality determines slice integrity
- Chill time is essential for a firm, sliceable filling
- Customize with toppings for visual appeal
- Make-ahead options improve flavor development