How Long to Bake Spaghetti Squash: A Kitchen Guide
Learn exactly how long to bake spaghetti squash for fluffy strands. This kitchen-tested guide covers sizes, temperatures, doneness tests, and time-saving tips to help home bakers master oven-baked spaghetti squash.

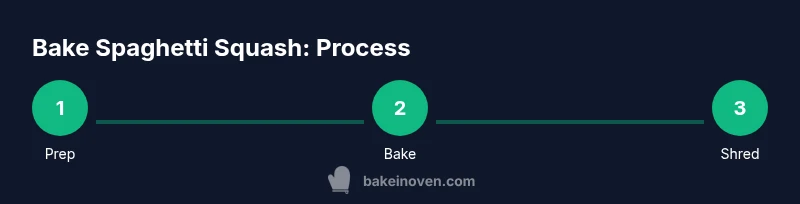
This method shows how long to bake spaghetti squash based on size and cut, using a reliable oven temperature for fluffy strands. Start with a preheated oven, prepare the squash correctly, and follow the recommended bake-time ranges. Doneness is tested with a fork and the strands are shredded for immediate serving or resting to set.
Why timing matters for spaghetti squash
Timing is the single biggest factor in achieving spaghetti-like strands rather than a mushy, waterlogged texture. The goal is to cook the flesh just enough to separate into long, noodle-like fibers while preserving a slight bite. Oven heat, squash size, whether you cut it in half or bake whole, and moisture loss during cooking all influence the final texture. In Bake In Oven’s kitchen-tested approach, you’ll learn how to judge doneness accurately and adjust times for your specific oven and altitude. After baking, allowing the squash to rest for a few minutes helps the strands set and makes shredding easier. If you overcook, you risk a mushy result; if you undercook, the strands may feel firm and difficult to separate. With practice, you’ll dial in the timing for your favorite squash harvest.
Choosing the right spaghetti squash
For best results, choose a squash with firm, dry skin and a dry stem. Look for a pale to warm yellow color and avoid squash with soft spots, cracks, or overly shiny skin, which can indicate underripe fruit or age. A squash that feels heavy for its size often contains more flesh and yields longer strands once cooked. If available, pick two so you can compare texture in one bake or save a backup for a quick follow-up meal. Freshness matters: aim for a squash that will hold up to a straightforward bake without leaking moisture during cooking.
Preparing spaghetti squash for baking
Wash the outside under cold running water and pat dry completely. If you plan to bake whole, preheat the oven first to ensure even heat distribution. If you prefer halves, cut after preheating to keep the knife from slipping and to minimize moisture loss. Place a parchment-lined sheet or baking tray to catch juices and prevent sticking. Keeping the squash dry on the surface helps achieve better browning and easier shredding after cooking.
Oven temperature basics for spaghetti squash
Bake spaghetti squash at a moderate to high oven temperature to balance time and texture. A common range is 375–400°F (190–205°C), with convection ovens often requiring a shorter bake time. If you want a crisper outer surface, you can higher bake briefly or use a convection setting; for softer, silkier strands, stick closer to the lower end of the range and monitor doneness closely. Always preheat so that the squash begins cooking immediately on insertion.
Step-by-step timing by squash size and cut style
Timings vary by whether you cut the squash in half or bake it whole. Halved squash with seeds removed generally bakes faster; whole fruit takes longer and may require a foil tent if the surface darkens too quickly. As a practical rule, plan for roughly 25–40 minutes for halved pieces and around 60–75 minutes for a whole squash at 375–400°F. If you’re unsure, start checking at the earlier end of the range and use the fork test to guide you.
Testing doneness and shredding into spaghetti
The fork-tork test is reliable: the flesh should separate into strands with gentle pressure, and the strands should feel tender but not mushy. When cool enough to handle, use a fork to rake the flesh into long, spaghetti-like strands. If the surface is uneven or dry, reinsert into the oven for a few more minutes and recheck. For some recipes, you may want to drain any excess moisture before tossing with oil or sauce.
Flavor ideas and serving suggestions
Spaghetti squash is versatile and pairs well with olive oil, garlic, herbs, and grated cheese. Toss the strands with a light sauce, a drizzle of lemon, or a spoonful of pesto for a bright finish. For a heartier meal, mix in roasted vegetables, sautéed mushrooms, or cooked sausage. The goal is to keep the squash’s texture as the star while adding complementary flavors that don’t mask the delicate strands.
Troubleshooting common issues
If the strands break apart too easily or feel watery, you may have overcooked the squash or started with fruit that was too ripe. Under-cooked flesh can be dense and resistant to shredding. Burnt edges indicate oven heat that’s too high or the squash resting too close to a heat source. Inconsistent texture often comes from uneven cutting; ensure even halves or portions for uniform cooking.
Batch cooking and storage tips
Leftover spaghetti squash stores well in an airtight container in the refrigerator for several days. Reheat gently, either in the oven or on the stove with a splash of water to rehydrate the strands. You can also freeze shredded strands for longer storage, but note that texture may change slightly upon thawing. Fresh prep yields the best texture when you reheat.
Tools & Materials
- Chef's knife(A sharp knife is essential for clean cuts through a whole squash.)
- Cutting board(Stable surface to prevent slips while cutting.)
- Baking sheet or parchment-lined tray(Contains juices and prevents sticking.)
- Oven mitts(Protection when handling hot squash.)
- Spoon or scoop(To remove seeds from halves.)
- Fork for shredding(To create the spaghetti-like strands.)
- Olive oil or melted butter (optional)(Adds flavor and helps with browning.)
- Parchment paper (optional)(Ease cleanup and prevent sticking.)
Steps
Estimated time: 40-60 minutes
- 1
Preheat the oven
Preheat the oven to 375–400°F (190–205°C) depending on your preferred texture. A properly preheated oven ensures even cooking from the moment the squash goes in.
Tip: Use convection if available to reduce bake time, but keep an eye on texture as it can cook faster. - 2
Prepare the squash
Rinse the exterior and dry completely. If baking whole, skip cutting; if halved, proceed to cut carefully after preheating to avoid slips and to preserve flesh moisture.
Tip: Dry surface helps prevent steam buildup that can hinder browning. - 3
Cut and seed (if halved)
Carefully cut the squash in half lengthwise with a sharp knife. Scoop out seeds with a spoon and discard or reserve for roasting. Uniform halves ensure even cooking.
Tip: Protect your hands with a towel or non-slip grip when cutting. - 4
Season the flesh
Lightly brush or rub the cut surfaces with olive oil or melted butter and season with salt and pepper or your favorite herbs. This helps flavor the strands as they bake.
Tip: A thin coat prevents drying and adds a slight sheen to the finished strands. - 5
Bake the squash
Place halves cut-side down on a lined baking sheet if you want softer surfaces, or cut-side up if you prefer a drier, slightly browner edge. Bake for the recommended range based on size.
Tip: To protect against moisture pooling, avoid crowding the pan. - 6
Check for doneness
Test with a fork: the flesh should separate into strands with light pressure. If resistance remains, bake in 5–10 minute increments until the fork slides through.
Tip: Start checking at the lower end of the range to prevent overcooking. - 7
Shred the strands
When cool enough to handle, use a fork to rake the flesh into spaghetti-like strands. If you baked whole, fork-test a small piece near the rind to gauge texture.
Tip: Keep the strands light and separate for the classic noodle-like texture. - 8
Serve or store
Serve immediately with your chosen sauce or toppings, or let cool and store in airtight containers. Reheat gently to preserve texture.
Tip: Label leftovers with date to track freshness. - 9
Batch and reheat later
If baking multiple squash, cool completely before storing. Reheat portions in the oven or on the stove with a splash of water to rehydrate the strands.
Tip: Avoid reheating too often to prevent moisture loss.
Frequently Asked Questions
How long does it take to bake spaghetti squash?
Timing depends on whether you bake halves or a whole squash. Halved, seeds removed, typically bake in about 25–40 minutes; a whole squash usually takes 60–75 minutes at 375–400°F. Use a fork to test doneness.
Halved spaghetti squash bakes in about 25 to 40 minutes, whole squash 60 to 75 minutes at 375 to 400 degrees, tested with a fork for doneness.
Can I bake spaghetti squash without cutting it open?
Baking the squash whole is possible, but it increases total time and may yield less evenly cooked strands. Cutting in half helps with faster, more uniform texture and easier shredding.
Yes, you can bake it whole, but half it for uniform texture and quicker shredding.
Should I salt the spaghetti squash before baking?
Salting is optional. It can enhance flavor and help draw out a bit of moisture, but it’s not essential if you’re using flavorful sauce or toppings.
Salt is optional but can boost flavor; not required if your sauce is seasoned.
Can I microwave spaghetti squash instead of baking?
Microwaving saves time but may alter texture compared to oven-baking. If you’re short on time, microwave the halves for a quick finish, then finish with a quick oven-broil to brown edges.
Yes, you can microwave to speed things up, then finish under broil if you like browned edges.
How can I tell when spaghetti squash is done?
Texture is your best guide. The flesh should shred into strands easily with a fork and feel tender, not firm or overly mushy. If strands require force, bake a little longer and re-test.
When the fork slides through easily and strands form, it’s done.
How should I store leftover spaghetti squash?
Store cooled leftovers in an airtight container in the fridge for up to several days. For longer storage, freeze shredded strands or portioned halves, then reheat gently to preserve texture.
Cool leftovers and refrigerate; freeze if you need longer storage and reheat gently.
Watch Video
Key Takeaways
- Choose even, firm squash with dry skin for best results.
- Preheat and use the correct bake range to balance texture and time.
- Test doneness with a fork and shred into long strands for serving.
- Store leftovers properly to preserve texture and flavor.