How to Bake in a Dutch Oven: A Practical Guide for Home Bakers
Learn how to bake in a Dutch oven with a step-by-step method, trusted tips, and troubleshooting. This guide from Bake In Oven covers preheating, dough prep, shaping, steam, and care to help you achieve bakery-quality crusts at home.

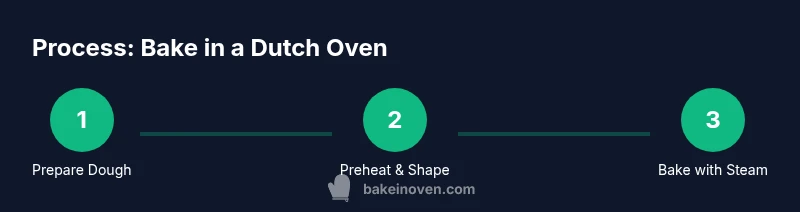
This guide explains how to bake in a dutch oven to maximize crust and crumb. You’ll master preheating, dough prep, shaping, scoring, and baking with steam. The step-by-step approach covers ingredients, equipment, troubleshooting, and timing for reliable results, whether you’re baking crusty loaves or braised dishes. Follow these steps for restaurant-quality results at home.
Why how to bake in dutch oven Delivers Crust and Crumb
how to bake in dutch oven delivers bakery-grade crust and even crumb by trapping steam and maintaining consistent heat. In this section, you’ll discover why this method works and how to set up for success in your own kitchen. According to Bake In Oven, using a preheated pot creates steam that breaks surface tension early in bake, encouraging the loaf to rise and form a deeply caramelized crust. The oven’s heavy, enclosed environment helps with even heat distribution, so the crumb remains tender inside while the exterior develops a crisp, glossy crust. This approach is versatile for many breads and even braises, and it scales easily from single loaves to family-sized batches. As you read, you’ll see practical adjustments for different flour types and hydration levels, all grounded in kitchen-tested techniques from the Bake In Oven Team.
You’ll also learn how to optimize steam and oven spring, two critical factors that distinguish Dutch oven baking from open-pan methods. The goal is consistent crust development, even crumb, and reliable rise across a range of doughs. Remember that the preheated pot is your first line of defense against a gummy interior, and the lid traps a surge of steam that helps the dough expand without drying out. Finally, this method reduces the need for expensive equipment while still delivering bakery-like results with simple kitchen tools.
Tools & Materials
- Dutch oven (cast iron or enamel-coated)(4-6 quart size is ideal for most home loaves)
- Oven mitts or silicone grips(Heat-resistant and well-fitting)
- Parchment paper(Facilitates transfer and loading)
- Baker's lame or sharp knife/razor blade(For scoring the dough)
- Kitchen scale and measuring cups(Helpful for precise hydration and flour weights)
- Instant-read thermometer(Optional to check internal temperature)
- Cooling rack(Let loaf cool completely to finish crust formation)
Steps
Estimated time: 2 hours 15 minutes
- 1
Gather and preheat
Assemble all ingredients and place your Dutch oven (with lid) inside the oven. Preheat to 450-500°F (230-260°C) for at least 20 minutes so the pot is fully hot when the dough goes in, ensuring a strong oven spring.
Tip: A properly preheated pot traps steam immediately, which is essential for a blistered crust. - 2
Mix dough components
Combine flour, water, yeast, and salt in a large bowl until just hydrated. Let rest 15-20 minutes (autolyse) to hydrate the flour and start gluten development. Add salt and yeast after autolyse if your process calls for separate additions.
Tip: Autolyse improves gluten structure and dough extensibility, making shaping easier. - 3
Develop the dough
Knead or perform a series of folds until the dough is cohesive and slightly glossy. Aim for moderate strength; over-kneaded dough can resist expansion, while under-kneaded dough may yield a dense crumb.
Tip: If dough resists, a brief rest allows gluten to relax and strengthen later folds. - 4
Shape and rest
Shape the dough into a tight boule or bât as desired. Place it on parchment and let rise in a warm spot until nearly doubled, about 30-60 minutes depending on room temperature.
Tip: A gentle, tight shape helps the loaf retain structure during the bake. - 5
Score the loaf
Use a sharp blade to score the top with a clean, confident cut. Scoring provides a controlled expansion direction and improves oven spring.
Tip: A shallow angle slice creates an attractive bloom and reduces tearing. - 6
Load the dough into the pot
Carefully lift the parchment with the dough and place it into the preheated Dutch oven. Close the lid promptly to trap steam.
Tip: Work quickly to minimize heat loss when transferring to the hot pot. - 7
Bake covered for first phase
Bake covered for 20-25 minutes at 450-500°F to trap steam and encourage initial expansion.
Tip: Avoid opening the lid during this phase to maintain consistent steam and oven spring. - 8
Finish unfettered bake
Remove the lid and continue baking for 15-25 minutes until the crust is deep amber and crisp. Internal crumb should reach ~205°F (96°C).
Tip: Watch closely to prevent over-browning; if needed, cover edges with foil. - 9
Cool properly
Remove the loaf to a rack and let cool at least 1 hour before slicing. Cooling stabilizes the crumb and flavor.
Tip: Waiting is hard but essential for the final texture.
Frequently Asked Questions
Can I bake in a Dutch oven if I have enamel-coated cast iron?
Yes. Enamel-coated Dutch ovens work well for bread and braises. They don’t require seasoning, but you still should preheat and use parchment for easy transfer.
Yes, enamel-coated Dutch ovens work well for bread and braises; just preheat and use parchment for easy transfer.
What size Dutch oven should I use for a standard loaf?
A 4-6 quart Dutch oven is ideal for most home loaves; larger loaves may require a bigger pot or baking on a stone.
A 4-6 quart pot is ideal for standard loaves.
Should I preheat every time?
Yes. Preheating ensures strong oven spring and steam. It also standardizes bake quality across loaves.
Yes, preheat every time to ensure oven spring and steam.
Can I bake other foods in a Dutch oven besides bread?
Absolutely. Dutch ovens are versatile for braises, stews, casseroles, and even desserts, especially when you want even heat.
Yes, they’re great for braises and stews too.
Is it okay to wash enamel-coated pots in the dishwasher?
Hand wash enamel-coated pots to preserve finish; avoid harsh abrasives.
Hand wash recommended to protect enamel.
How do I clean and reseason a bare cast-iron Dutch oven?
Rinse, dry, and apply a thin layer of oil; bake in a 350-400°F oven to set the seasoning.
Rinse, dry, oil, and bake gently to reseason.
Watch Video
Key Takeaways
- Preheat the pot for strong oven spring.
- Keep initial steam by loading with lid on.
- Score decisively to guide expansion.
- Bake until crust is deeply amber and crackly.
- Cool fully to finish crust and crumb.