No Bake Cookies with Oats: A Practical Guide
Learn to make no bake cookies with oats with kitchen-tested guidance from Bake In Oven. This 1800-word how-to covers ingredients, substitutions, texture tips, storage, and vegan/gluten-free variations.

By following this guide, you will master no bake cookies with oats from start to finish. You’ll learn how to choose the right oats, binders, and sweeteners, plus simple variations to fit vegan or gluten-free diets. The method covers safe handling, chilling times, and how to store batches for freshness. Bake In Oven provides practical, kitchen-tested steps for reliable chewy cookies every time.
Understanding No-Bake Cookies with Oats
No bake cookies with oats offer a quick, satisfying treat without turning on the oven. They rely on the natural chew of rolled oats, plus a binding system that you can customize to taste and dietary needs. According to Bake In Oven, this approach is ideal for busy weeks, school snacks, and last-minute dessert cravings. The key is balancing oats, a binder, and a sweetener so the mixture sticks together yet remains chewy rather than hard. Oats bring fiber and texture, while nut butters or seeds provide binding and richness. Also mindful of ingredient choices, you can tailor sweetness, add-ins, and dietary constraints. This section explains how to think about ingredients, how to choose oats, and how to build a batch that holds together in the fridge. By understanding this foundation, you’ll be ready to experiment with flavors and textures in a controlled way.
Key Ingredients and Substitutions
Choosing the right ingredients is the first step to reliable no bake cookies with oats. Begin with rolled oats for texture and chew, and reserve quick oats if you prefer a finer crumb. A binding duo of peanut butter (or almond butter) plus a sweetener like honey or maple syrup helps the mixture hold its shape as it chills. For vegan versions, swap honey for maple syrup and use a plant-based butter. Optional add-ins include dark chocolate chips, shredded coconut, chia seeds, or dried fruit for texture and flavor. Vanilla extract and a pinch of salt round out the balance. Bake In Oven analysis shows oats contribute fiber and steady energy in these treats, while the binding fats add richness. Keep sweetness in check to avoid overpowering flavors, and remember to choose gluten-free oats if you need a gluten-free version.
Tools and Prep Before You Start
Before you begin, gather a few reliable tools and a clean workstation. You’ll want a large mixing bowl, a sturdy spatula, and measuring cups/spoons for accurate ratios. A microwave-safe bowl or small sauce pot is essential for gently melting the binder, especially if you’re using peanut butter or coconut oil. Line a sheet pan with parchment paper for easy shaping and cooling. Keep a fridge or freezer nearby for quick chilling, which helps the cookies set without heat. Wipe down your workspace and wash hands thoroughly to maintain food safety. Having everything prepped minimizes rough interruptions and helps you keep a steady pace while forming the cookies.
Texture and Binding: Achieving Chewy Cookies
Texture is the heart of no bake cookies with oats. Too little binding and the cookies crumble; too much binder and they feel greasy. The ideal ratio balances oats with peanut butter or almond butter and a binding sweetener. Chewy cookies form best when the mixture is slightly warm when shaping, then chilled long enough to set. If the mixture seems too soft, chill it for 10–15 minutes and recheck. If it’s too dry, add a touch more binder and a splash of milk or water. This balance yields a chewy bite with a pleasant mouthfeel. Remember that resting the dough in the fridge improves cohesion and makes shaping easier.
Flavor Variations and Add-Ins
Experiment with flavors to keep no bake cookies with oats exciting. Classic combinations include peanut butter with chocolate, or almond butter with dried cranberries. Add-ins like cocoa powder, mini chocolate chips, shredded coconut, or chopped nuts can elevate texture and depth. For a seasonal twist, fold in a hint of cinnamon or pumpkin spice. If you’re watching sugar, use a lower-sugar honey or substitute with a sugar-free maple-flavored syrup. The beauty of no bake cookies is the flexibility to tailor sweetness and texture to your preference.
Troubleshooting Common Issues
Crumbly cookies usually indicate too little binder or over-drying oats. Increase the binder slightly and mix until the dough holds together when pinched. If the mixture is too sticky, chill it longer or add a touch more oats. Under-chilling can cause flattening; ensure a minimum setting period in the fridge—usually 20–30 minutes for chewiness. Cross-contamination concerns arise if you substitute ingredients; always verify that add-ins are fresh and gluten-free if necessary. When in doubt, start with a smaller test batch to dial in ratios before scaling up.
Storage, Hygiene, and Food Safety
Store no bake cookies with oats in an airtight container in the fridge for up to a week or freeze for longer storage. Always label batches with date and ingredients to avoid confusion. Use clean utensils and hands when handling dough to prevent contamination. If you plan to share, consider individually wrapping portions for convenient, portion-controlled snacks. Hygiene and proper cooling time are essential to maintain texture and safety.
Healthful Tweaks: Vegan, Gluten-Free, and Allergens
Many homes benefit from vegan or gluten-free adaptations. Use certified gluten-free oats to ensure gluten-free status, and replace honey with pure maple syrup or agave for vegan recipes. Nut allergies can be addressed by using sunflower seed butter or tahini in place of peanut butter. Always check ingredient labels for hidden allergens. For a lower-sugar option, reduce the sweetener by a small amount and rely on ripe bananas or mashed dates for natural sweetness. Customizing lets you create a family-friendly treat that aligns with dietary needs.
Presentation and Serving Ideas
No bake cookies with oats look appealing on a plain plate or in a decorative tin. Dust with a light coating of cocoa powder or drizzle melted chocolate for a glossy finish. Pair with fresh fruit or yogurt for a balanced snack. For kids, set up a mini cookie station where they can add-ins themselves. Presenting cookies in an airtight container keeps them fresh, while a quick chill in the fridge enhances firmness for stacking or gifting.
Quick Recipe Template: Base Formula
Base formula (adjust for taste and texture): 1 cup rolled oats, 1/2 cup peanut butter or almond butter, 1/4 cup honey or maple syrup, 1 tsp vanilla, pinch of salt. Optional add-ins: 2 tbsp mini chocolate chips, 2 tbsp shredded coconut, 1–2 tsp cocoa powder. Mix until just combined, form into small rounds, chill until set, and store in the fridge for up to a week.
Tools & Materials
- Large mixing bowl(Sturdy enough to handle sticky mixtures)
- Measuring cups/spoons(For accurate ratios)
- Spatula or spoon(For mixing and scooping)
- Microwave-safe bowl or small saucepan(To warm binders if needed)
- Parchment paper or silicone mat(Lays out cookies for easy cooling)
- Baking sheet or tray(Optional for multi-batch shaping)
- Refrigerator or freezer(Chill cookies to set texture)
- Plastic wrap or airtight container(Store leftovers securely)
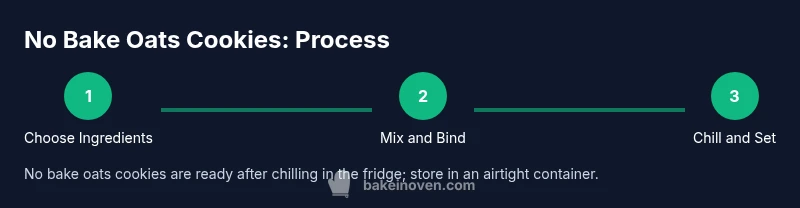
Steps
Estimated time: Total time: 25-35 minutes active + 20-30 minutes chilling
- 1
Gather ingredients and prep workspace
Measure all ingredients precisely and lay out parchment paper. Have a clean surface and ready utensils to keep the process smooth. This reduces dry runs and helps keep the dough consistent.
Tip: Pre-measure the oats and butter to speed up the mixing phase. - 2
Melt or soften binders
Warm peanut butter with honey or maple syrup just enough to loosen; don’t overheat. The goal is a smooth, pourable consistency that coats the oats without making the mix split.
Tip: If using microwave, 15-second bursts on medium power work well; stir between bursts. - 3
Combine oats with binder
Pour the warm binder over the oats and mix until every oat is coated. Add vanilla and salt, and fold in any optional add-ins like chocolate chips or coconut.
Tip: Add extra oats gradually if the dough feels too sticky. - 4
Shape the cookies
Scoop dough in roughly tablespoon-sized portions and roll into balls or flatten into discs on the parchment. Uniform size helps them chill evenly.
Tip: For larger cookies, increase the binder slightly to maintain cohesion. - 5
Chill to set
Place the tray in the fridge for at least 20–30 minutes, or longer for a firmer texture. Chilling helps the dough hold its shape when stored.
Tip: If in a hurry, you can freeze for about 15 minutes to quick-set. - 6
Store and enjoy
Once set, transfer cookies to an airtight container and refrigerate if not eaten right away. Label with date and ingredients for future reference.
Tip: Keep portions in the fridge for a chewy, fresh bite.
Frequently Asked Questions
Can I use quick oats instead of rolled oats?
Yes, you can, but quick oats yield a softer, finer texture and may require slightly more binder to hold together. Expect a quicker set in the fridge.
Yes, you can use quick oats, but expect a softer texture and adjust the binder a bit.
Are these cookies gluten-free?
They can be gluten-free if you use certified gluten-free oats and gluten-free add-ins. Cross-contamination is possible, so read labels carefully.
They can be gluten-free if you use certified gluten-free oats and add-ins, and check labels.
Can I make them vegan?
Yes. Use maple syrup instead of honey and choose a plant-based butter. Ensure add-ins like chocolate chips are dairy-free if needed.
Yes. Use maple syrup and dairy-free butter to keep them vegan.
How long do they keep in the fridge?
Store in an airtight container in the fridge for up to a week. For longer life, freeze in a single layer, then transfer to a bag.
Kept in the fridge, they last about a week; freeze for longer storage.
Can I freeze the cookies?
Yes. Freeze individual cookies on a tray, then transfer to a freezer-safe bag. Thaw in the fridge or at room temperature as needed.
Yes, you can freeze them individually and thaw later.
Why are mine crumbly or too soft?
Crumbly texture usually means insufficient binder; too soft means over-wetting. Adjust binder and chilling time, then test in a small batch.
Crumbly means not enough binder; soft means too much moisture. Adjust and test again.
How can I add chocolate without overpowering oats?
Use a small amount of cocoa powder or mini chocolate chips to balance sweetness without masking oats. Start with a tablespoon and adjust.
Add a little cocoa or chips to balance sweetness without overpowering oats.
Watch Video
Key Takeaways
- Choose the right oats for texture
- Balance binder, sweetener, and add-ins
- Chill to set for best shape
- Adapt for vegan or gluten-free needs
- Store properly for freshness