No-Bake Pumpkin Cheesecake Recipe: Easy and Creamy
Learn a trusted no bake pumpkin cheesecake recipe with a buttery crust, creamy pumpkin filling, and chill-time steps. Simple, pantry-friendly ingredients, and expert tips for perfectly set slices every time.

With this no bake pumpkin cheesecake recipe, you’ll create a creamy, pumpkin-spiced dessert without turning on the oven. Build a graham crust, whisk a pumpkin-spiced cream-cheese filling, and let it chill until set. Gather pantry staples, a 9-inch springform pan, and a little patience for perfect slices. This no bake approach avoids baking, delivering flavor and texture with minimal effort.
Why No-Bake Pumpkin Cheesecake Works
A no bake pumpkin cheesecake recipe is a smart choice when oven space is limited, or you need a dessert that comes together quickly and reliably. The goal is a smooth, luxurious filling that holds its shape after chilling, paired with a crisp crust that provides a satisfying contrast. The pumpkin adds warm spice notes that echo autumn flavors without overwhelming the cheese layer. This method emphasizes balance: creamy filling, lightly sweet crust, and a chill time that lets flavors meld. For home bakers, the no-bake approach reduces the risk of cracks and overbaking, while still delivering a dessert that feels bakery-fine. In practice, the technique hinges on properly prepared crust, well-whipped filling, and a generous chill period to ensure clean slices and sturdy texture. This no bake pumpkin cheesecake recipe is designed to be approachable, pantry-friendly, and forgiving for beginners, yet refined enough for entertaining. Moderate sweetness, subtle spice, and a generous pumpkin presence make every bite a reminder of cozy fall gatherings. Bake In Oven’s guidance emphasizes practical steps and reliable results, so you can enjoy a crowd-pleasing dessert with minimal fuss.
Crust Fundamentals for a No-Bake Base
A strong crust is essential for a no-bake cheesecake because it supports the filling without baking. Start with graham crackers or digestive biscuits, ground to fine crumbs, then bind with melted butter. The butter not only helps the crust hold together but also adds a rich flavor that accents the pumpkin filling. For best results, aim for a 1:2 ratio of crumbs to butter by weight, press the mixture firmly into a 9-inch springform pan, and chill for 15–20 minutes to set the crust before filling. If you prefer a nuttier flavor, swap a portion of the crumbs for finely chopped pecans or walnuts. To prevent stickiness, line the bottom with parchment paper and gently press the sides so the crust is even and level. A well-prepared crust contributes to clean slicing and a satisfying bite from top to bottom.
Cream Cheese Filling: Texture and Flavor
The creamiest no bake pumpkin cheesecake filling comes from softened cream cheese, sugar, pumpkin puree, and vanilla. Beat the cream cheese with sugar until smooth and fluffy, then fold in pumpkin puree and a touch of vanilla. Spices such as cinnamon, nutmeg, and ginger should be added in moderation to avoid overpowering the pumpkin flavor. For a lighter texture, whip some heavy cream to soft peaks and fold it into the pumpkin-cheese mixture. The goal is a filling that is airy yet dense enough to hold its shape when sliced. If you’re using a stand mixer, keep the speed moderate to avoid over-aerating and a light, crumbly texture. Taste as you go and adjust spice levels gradually to maintain balance with sweetness.
Stabilizers and Setting Without Baking
No bake recipes often rely on whipped cream or gelatin to achieve a stable, slice-ready texture. If you opt for gelatin, bloom it in cold water, then dissolve gently and fold into the filling before it fully sets. If you skip gelatin, rely on properly whipped cream and chilled time to gain structure. Whipping cream to soft peaks and folding it in gives a luscious, light mouthfeel while keeping the filling firm in the fridge. The key is to achieve a smooth, cohesive filling without lumps, then chill long enough for the filling to set fully. For most home kitchens, a 4–6 hour chill (or overnight) yields clean slices and a stable finish. As you build the recipe, remember that fat content in your dairy and the balance of pumpkin puree influence the final texture more than you might expect.
Chill Time, Serving, and Make-Ahead Tips
Patience is a virtue with no-bake cheesecakes. After assembling the crust and filling, cover the pan and refrigerate for at least 4 hours, preferably longer, to ensure a firm slice. If you’re making this for a party, you can prepare the crust and filling a day ahead and assemble close to serving time. For make-ahead options, you can freeze the cheesecake for up to a month if tightly wrapped and stored, but plan to thaw slowly in the fridge to maintain texture. Serving ideas include a dollop of whipped cream, a sprinkling of cinnamon or nutmeg, and toasted pumpkin seeds for crunch. This method shines when you want a dessert that tastes special without last-minute oven work, making it a staple for busy bakers and holiday hosts.
Flavor Variations and Topping Ideas
Experiment with variations to tailor the dessert to different tastes. Swap the crust for gingersnap cookies for a spicier edge or add a pinch of vanilla bean seeds to deepen aroma. For a tangier profile, fold in a small amount of cream cheese blended with Greek yogurt. Toppings can range from caramel drizzle and whipped cream to roasted pepitas or a cranberry compote. If you prefer a lighter finish, reduce the cream cheese slightly and increase the pumpkin to maintain body. The versatility of this no bake pumpkin cheesecake recipe makes it easy to customize for seasonal flavors, dietary needs, or crowd preferences. Remember to keep the pumpkin’s spice balance in mind so the topping and crust complement rather than overpower the filling.
Troubleshooting Common Issues and Fixes
If your filling is too soft, ensure the cream cheese is fully softened, fold in whipped cream gently, and chill longer. A crust that crumbles usually benefits from a few more tablespoons of butter and pressing more firmly into the pan. If the filling looks grainy, it may be overmixed or the cream cheese wasn’t soft enough; mix just until smooth, then fold in the pumpkin gradually. For a pale color or mild flavor, check the pumpkin puree consistency and spice balance; adding a touch more cinnamon or vanilla can bring back warmth and depth. Finally, if you notice cracking after slicing, increase chilling time and handle the cake with care when removing the springform ring.
Tools & Materials
- Graham crackers or digestive biscuits(about 1½–2 cups finely crushed (by weight) for crust)
- Unsalted butter(melted, about 6 tablespoons (90 ml))
- Cream cheese, softened(8 oz (225 g) blocks; use 2 blocks for a richer filling)
- Confectioners’ sugar(1/2–3/4 cup (60–90 g) to taste)
- Pumpkin puree(15 oz (425 g) can, plain pumpkin)
- Vanilla extract(1 teaspoon (5 ml))
- Ground cinnamon(1–1 1/2 teaspoons (3–4 g))
- Ground ginger(optional, 1/4 teaspoon)
- Ground nutmeg(optional, 1/4 teaspoon)
- Heavy cream or whipping cream(1–1 1/2 cups (240–360 ml), for whipping and folding)
- 9-inch springform pan(greased and lined with parchment)
- Parchment paper(to line pan and for easy removal)
- Gelatin powder(optional, bloom and melt if using as stabilizer)
- Mixing bowls, spatula, and electric mixer(essential kitchen tools)
- Measuring cups and spoons(for accurate ingredient amounts)
- Plastic wrap or parchment for chilling(to cover while refrigerating)
Steps
Estimated time: 4-6 hours total (including chilling)
- 1
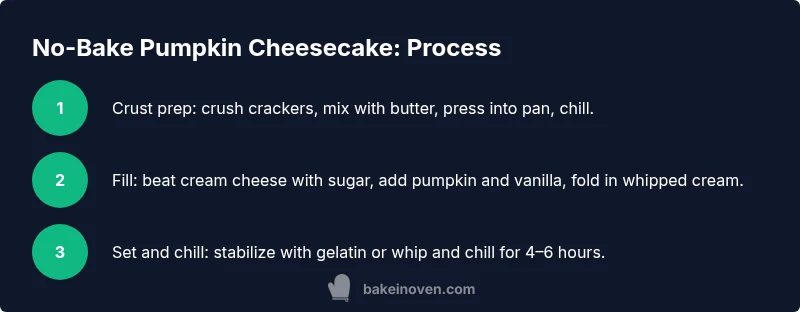
Prepare crust
Pulse graham crackers until fine crumbs. Mix in melted butter and a pinch of salt if desired. Press the mixture evenly into a 9-inch springform pan and chill 15–20 minutes to set the crust.
Tip: Use a flat-bottom glass or measuring cup to press evenly and avoid hollow spots. - 2
Beat cream cheese filling
Beat softened cream cheese with confectioners’ sugar until smooth and creamy. Add pumpkin puree and vanilla; mix until the filling is uniform and free of lumps.
Tip: Take your time to fully soften the cream cheese before mixing to prevent grainy texture. - 3
Incorporate whipped cream
Whip the heavy cream to soft peaks, then fold into the pumpkin-cheese mixture just until combined. This lightens the filling without deflating it.
Tip: Fold gently to preserve volume and a silky texture. - 4
Add spices and adjust sweetness
Stir in ground cinnamon and a pinch of nutmeg or ginger if using. Taste and adjust sweetness or spice in small increments.
Tip: Season gradually; you can always add more spice, but you can’t take it out. - 5
Assemble and smooth filling
Pour the filling over the crust and spread into an even layer. Tap the pan lightly to release any air pockets and smooth the top with a spatula.
Tip: A clean edge around the crust helps with neat slices later. - 6
Stabilize and chill
If using gelatin, bloom it in cold water, melt gently, and fold into the filling before setting. Refrigerate for 4–6 hours or overnight until firm.
Tip: Chilling is the key step—don’t rush this part. - 7
Serve and garnish
Run a knife around the edge to loosen, remove the springform ring, and slice. Top with whipped cream, cinnamon dusting, or toasted pumpkin seeds as desired.
Tip: Chill briefly after slicing to keep slices tidy. - 8
Make ahead and storage
Leftovers keep covered in the fridge for 3–4 days. For longer storage, wrap well and refrigerate up to a week or freeze for up to a month and thaw in the fridge.
Tip: Label with date to track freshness.
Frequently Asked Questions
Can I make this dairy-free or dairy-free-friendly?
Dairy-free adaptations are possible with cream cheese substitutes and non-dairy whipping cream. Expect a slightly different texture and flavor, but a creamy result can still be achieved.
Yes, you can adapt with dairy-free alternatives, keeping in mind possible texture changes.
What if I don’t want to use gelatin?
Gelatin is optional; you can rely on well-chilled filling and whipped cream to help set the texture. If you skip gelatin, ensure ample chilling time for best results.
Gelatin is optional; chilling and whipped cream often suffice.
How long should the cheesecake chill before serving?
Aim for at least 4 hours, with overnight chilling preferred for maximum firmness and sliceability.
Chill for several hours or overnight for the best slice.
Can I use pumpkin puree with spices already added?
Use plain pumpkin puree and add spices in the filling to control flavor balance. Pre-spiced pumpkin may overpower the cream cheese if not adjusted.
Stick to plain pumpkin puree and add spices yourself for control.
What pan size is best for this recipe?
A 9-inch springform pan is ideal; it provides a good crust-to-filling ratio and neat slices.
A 9-inch springform pan gives the best balance and presentation.
Can I freeze this cheesecake?
Yes, you can freeze slices for up to a month if tightly wrapped and stored; thaw in the fridge before serving.
Yes, you can freeze slices for longer storage and thaw in the fridge.
Watch Video
Key Takeaways
- Chill is crucial for a clean slice
- Prepare crust first, then filling for best texture
- Balance pumpkin, spice, and cream cheese for flavor harmony
- No-bake recipe reduces oven use while delivering creamy richness