Should You Pre-bake Pie Crust for Pumpkin Pie? A Practical Guide
Learn whether you need to pre-bake pie crust for pumpkin pie, when to blind bake, and step-by-step techniques to get a crisp crust that holds the custard filling. Practical guidance from Bake In Oven for home bakers seeking reliable results.

Whether you should pre-bake a crust for pumpkin pie depends on the filling and bake time. In most cases, par-baking or blind baking creates a crisp crust that won’t get soggy under custard. This guide covers when to bake, how to do it, and common pitfalls, with practical tips from Bake In Oven.
Do You Need to Pre-bake Pie Crust for Pumpkin Pie? Context and Definitions
Some bakers ask: do you need to pre bake pie crust for pumpkin pie? The short answer is: it depends on the filling and bake time. For many traditional pumpkin pies, a par-baked crust helps prevent a soggy bottom caused by the moisture in the custard. According to Bake In Oven, the goal is to build a stable barrier between the liquid filling and the raw dough, so the crust stays crisp even after the pie finishes baking. This section clarifies what blind baking means, the variations you’ll encounter in home kitchens, and how your dough type, pan size, and oven behavior influence the decision. You’ll also learn how different approaches affect texture, color, and sliceability. The takeaway is practical: choose the method that aligns with your recipe’s moisture level and bake schedule, not a single rule. Remember, precision in rolling, chilling, and handling matters as much as the bake itself.
note nan?null?],
Blind Baking vs Par-Baking: What’s the Difference and When to Use It
Blind baking refers to baking a crust without filling, typically with a barrier (parchment paper) and weights to keep the dough from puffing. Par-baking is a partial bake to set the crust enough to resist moisture without fully cooking it. For pumpkin pie, a par-bake is often preferred when the filling will bake at a high moisture level or for a long time, ensuring the crust remains crisp. If your recipe uses a custard that sets quickly, a shorter blind bake may suffice. Bake In Oven recommends testing with a small crust sample to understand how your oven behaves and adapting timing accordingly. This section also covers crust thickness, pan material, and edge protection to avoid excessive shrinkage and burning.**
tip:
How to Choose Between Crust Types: Homemade vs Store-Bought, Butter vs Shortening, and Pan Size
Choosing the crust type sets the foundation for a successful pumpkin pie. A homemade all-butter crust delivers flavor and a tender crumb, while a butter-shortening blend can offer flakiness and resilience to moisture. Store-bought crusts are convenient but may vary in thickness and fat content, which affects bake time. For blind baking, beware of too-thick dough, which needs longer bake time and may become pale and pale edges before the center sets. Consider pan shape (quiche vs pie) and material (glass vs metal) because heat transfer changes how quickly the crust browns. Bake In Oven’s guidelines emphasize keeping dough chilled until rolling and using a light dusting of flour to prevent sticking.**
tip:
Docking, Lining, and Weighing: The Core Steps to a Stable Crust
Docking the dough (poking small holes) helps steam escape and prevents air pockets. Lining with parchment or foil, then adding pie weights or dried beans keeps the dough from shrinking and puffing. The choice of weights can impact the final texture; beans are a common at-home option, while metal beads give consistent heat. Place a second sheet of parchment if needed to protect the crust edges during baking. The goal is a uniformly baked crust with a golden edge while the center remains pale. Bake In Oven notes that evenly distributed weight yields a flatter bottom and reduces the risk of a soggy, undercooked crust.**
tip:
Blind Bake Timing and Temperature: Getting the Window Right
For most pumpkin pies, an initial blind bake at 375°F (190°C) for 12–15 minutes is a good starting point, followed by a brief second bake after removing weights to finish browning the crust. The total crust bake time depends on dough thickness, pan material, and oven calibration. The crust should look lightly golden around the edges before removing weights. If you see soggy spots in the center, you may need a longer bake with heavier weights or a higher oven temperature for the initial stage. Bake In Oven recommends using a thermometer in the crust center if your oven runs hot or cool to confirm doneness.**
tip:
Cooling, Filling, and Final Bake: The Last Mile
Cool the par-baked crust completely before pouring in the pumpkin custard. A warm crust can lead to steam and moisture seeping into the dough, compromising structure. Once filled, bake the pie until the custard is set and a gentle jiggle remains in the center. Rest the pie on a rack to cool completely; this helps the filling finish setting and prevents cracking. A fully baked, cooled pie is easier to slice neatly and holds its shape better when served. Bake In Oven’s practical approach emphasizes patience: cooling time is crucial for clean slices and even texture.**
tip:
Tools & Materials
- All-butter pie dough (homemade or store-bought)(If homemade, chill dough for at least 1 hour before rolling.)
- 9-inch pie dish(Metal dish heats evenly; glass shows browning progress.)
- Rolling pin(Lightly flour surface; avoid overworking the dough.)
- Parchment paper(Used to line the crust for easy lifting of weights.)
- Pie weights or dried beans(Distributes heat and prevents shrinking.)
- Fork or dough docker(Used for docking to vent steam.)
- Baking sheet(Place pie on sheet to catch any spills.)
- Kitchen timer(Track bake times precisely.)
- Cooling rack(Cool crust and pie evenly for clean slices.)
- Awl or toothpick(Useful to test center doneness if unsure.)
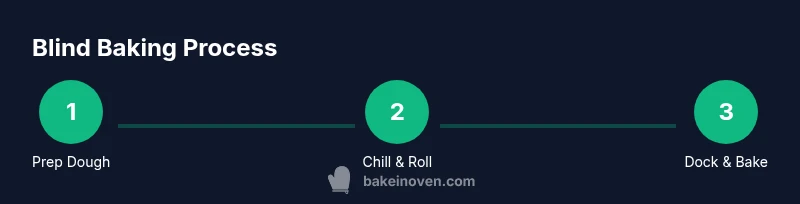
Steps
Estimated time: 1 hour 45 minutes
- 1
Prepare dough and chill
If using homemade dough, bring it to room temperature briefly, then roll into a disk. Chill the dough for at least 30 minutes to relax gluten and prevent shrinking during baking. A well-chilled dough is easier to roll and yields a crisper crust after baking.
Tip: Chill longer if your kitchen is warm; cold dough handles better and reduces shrinking. - 2
Roll out and fit crust
Roll the dough to a 12-inch circle and gently transfer to a 9-inch pie plate. Trim excess, leaving a 1/2-inch overhang, then flute the edge. A neat edge helps with even browning and easier slicing later.
Tip: Move the dough frequently while rolling to prevent sticking and ensure an even thickness. - 3
Chill the crust again
Chill the fitted crust for 15–20 minutes before baking. This extra chill minimizes shrinkage and helps the crust hold its shape during the blind bake.
Tip: A cold crust bakes more evenly and resists warping as the oven heats. - 4
Dock and line with parchment
Dock the bottom with a fork and line the crust with parchment paper. This creates space for steam and prevents air pockets. Add enough weights to cover the bottom but not spill over the edges.
Tip: Use two layers of parchment if you want to shield the edges while the bottom bakes. - 5
Blind bake with weights
Place the crust in the oven at 375°F (190°C) for 12–15 minutes with weights. The goal is a set, pale crust around the edges. Remove weights and parchment and bake 3–5 minutes longer if the edge needs more color.
Tip: If the edges brown too quickly, cover them with foil or a shield to prevent over-browning. - 6
Cool crust before filling
Transfer the crust to a cooling rack and let it cool completely before pouring in the pumpkin filling. A warm crust can trap moisture, ruining texture.
Tip: Even cooling prevents the custard from losing sheen or cracking later. - 7
Fill and bake pie
Pour the pumpkin custard into the cooled crust and bake until the center barely jiggles. The total bake time varies with your oven and filling composition. Allow the pie to cool fully before slicing for clean cuts.
Tip: Avoid over-baking; custards continue to cook a bit after removal from the oven. - 8
Final cooling and serving
Cool the pie on a rack for several hours or overnight for best texture. Slice with a sharp knife, wipe the blade between cuts for clean edges, and serve with whipped cream if desired.
Tip: Cutting cold pie yields neat slices and prevents custard from tearing.
Frequently Asked Questions
Do I need to pre-bake pie crust for pumpkin pie?
Not always, but it’s often recommended when the filling is moist or bakes long enough to moisten the crust. Blind baking or par-baking helps prevent a soggy bottom and ensures a crisp edge. Adjust based on your recipe and oven performance.
Usually yes for moist fillings; blind bake to keep the crust crisp.
Can I use store-bought crust for blind baking?
Yes. Follow the package directions, but typically you’ll dock the crust, line with parchment, and add weights for the blind bake. Some store-bought crusts are already partially baked—verify before baking.
Store-bought is fine; check the package and blind bake as needed.
What temperature should I blind bake at?
A common temperature is 375°F (190°C) for the initial bake, but adjust based on your recipe and crust thickness. The goal is to set the crust’s edges while keeping the center pale.
Around 375°F, but follow your recipe and monitor color.
What if I don’t have pie weights?
Dried beans or uncooked rice can substitute for weights, provided you don’t mind saving them for future use. Use parchment to prevent soil/oil transfer and bake evenly.
Beans or rice can work; use parchment to avoid sticking.
Can I bake the pie with a fully baked crust?
Yes, it’s possible to bake with a fully baked crust if your recipe instructs it. Ensure the crust has enough structure to hold the filling and won’t crumble under moisture.
You can, but ensure the crust is structured enough for the filling.
How do I fix a soggy bottom after baking?
If the crust is soggy after baking, a quick re-blind bake with weights can help. For later batches, ensure thorough chilling and even weights to reduce moisture seepage.
Pre-empt with proper blind bake and chilling; fixes after are limited.
Watch Video
Key Takeaways
- Prepare dough and chill for best handling
- Dock and line the crust to vent steam
- Blind bake with weights for a crisp bottom
- Cool crust fully before filling for clean slices
- Bake filling to just-set and rest before serving