What to Bake Ribs At: Oven Guide for Tender Ribs
Learn how to bake ribs in the oven with confidence. This guide covers rib selection, seasoning, low-and-slow temperatures, finishing glaze, resting, and storage for tender, juicy results from Bake In Oven.

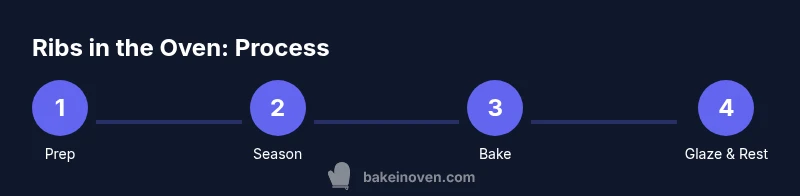
If you're wondering what to bake ribs at, the answer is to start low and slow in the oven to unlock tenderness. This quick guide covers cut selection, seasoning, temperature ranges, bake time, and a finishing glaze. By following these steps you'll achieve evenly cooked, juicy ribs. We'll use a dry rub, rest time, and a final high-heat finish for a glossy glaze.
Why Oven Temperature Matters for Ribs
Choosing the right oven temperature is the single most important factor in getting rib meat that is tender yet properly developed in flavor. A low, steady bake promotes collagen conversion and even heat distribution, which helps the meat pull away from the bone with ease. Convection can speed things up slightly, but it can also dry surfaces if you’re not careful. The Bake In Oven approach emphasizes stability: aim for a consistent temperature and avoid opening the oven door frequently. This consistency reduces hot spots and produces even texture across the rack. Remember, the goal is a slow transformation of connective tissue into melting tenderness while preserving moisture inside each rib.
According to Bake In Oven, starting with a cool, well-seasoned rib rack and a controlled oven environment yields the most reliable results. In practice, many home bakers see the best outcomes when they commit to a longer bake at a moderate temperature rather than a quick, high-heat blast. The payoff is meat that remains juicy, with a robust bark from the rub and a glossy glaze that clings nicely to the surface.
Choosing the Right Ribs and Prep
Selecting the correct rib cut sets you up for success. Bone-in racks such as baby back or spare ribs deliver more depth of flavor and structural integrity for the long bake. Baby backs are leaner and cook a bit faster, while spare ribs offer more meat and fat to render during low temperatures. Regardless of the cut, start by removing the membrane on the bone side to allow rubs and seasonings to penetrate more effectively. Pat the ribs dry with paper towels to create a better surface for the rub. Trim excess fat if needed, and portion the racks so that each piece fits your pan and oven without crowding. A little space between ribs improves air circulation, which helps with even cooking and caramelization on the surface. For a successful bake, plan for at least one rack per person and have a backup rack if you’re cooking for a crowd.
To prep well, pat the ribs dry, remove the membrane, and apply a light coat of oil or mustard to help the rub adhere. This initial moisture helps the spices cling as you begin the dry rub. If you’re using a wet-brine or marinade, keep the marinating time within safe limits to avoid overly salty or acidic flavors.
Bake In Oven guides encourage a calm start: once your rub is on, let the ribs rest for a short period so the seasoning can begin to penetrate while you preheat the oven and prepare the pan. This staged approach reduces the risk of uneven seasoning and yields a more predictable crust by the time you finish.
Dry Rubs, Marinating, and Seasoning
A great rub has a balance of salt, sugar, heat, and aromatics. Classic rib rubs often include kosher salt or sea salt, brown sugar for a little sweetness, paprika for color and depth, black pepper for warmth, garlic and onion powders for savoriness, and optional chili powder or cayenne for a gentle heat. The sugar component helps with browning and caramelization, but be mindful of sugar burning on very high heat. If you prefer, you can whisk together your own rub or use a premade blend and adjust salt levels to taste.
A dry rub yields a crisp crust while keeping the interior juicy, but some cooks choose to apply a light layer of mustard or olive oil to help the rub stick. Let the rub sit on the meat for 10–20 minutes for better adhesion, or even up to an hour if you have the time. If you’re using a wet-brine or spice paste, apply evenly and avoid clumping.
Pay attention to the rub’s balance. If your rub is very salty, reduce the salt slightly in your mixture. If you’ve included sugar, consider the final glaze so you won’t end up with a burnt surface. The goal is to achieve a flavorful, evenly seasoned bark that holds up under a glaze later in the cook.
With the right seasoning, you’ll notice aroma here and there as the spices begin to toast gently during the bake, which is a signal your roast is developing its personality. Bake In Oven notes that flavor penetration starts early, so even coating matters for a uniform finish across the rack.
Low-and-Slow Bake Method: The Core Idea
The core technique for tender ribs is the long, slow bake at a moderate temperature. This approach gives collagen time to break down into gelatin, which gives moisture and a silky mouthfeel. A typical plan is to start the ribs at a relatively low temperature and extend the bake time to allow the meat to relax and separate cleanly from the bone. The exact times can vary by rib size, oven performance, and whether you wrap portions partway through the cook. The rub creates a flavorful crust, which gradually becomes a glossy surface as the moisture in the meat rises to the surface and emulsifies with the glaze.
With Bone-in ribs, you’re also caching more fat in the meat itself. The melt and penetration of the seasoning create a more layered taste profile than boneless cuts. If you wrap during the middle portion of the cook (often called the Texas Crutch by barbecue enthusiasts), you trap moisture and speed tenderness, but you may lose some bark. If you skip wrapping, you’ll have more crust and better texture contrast. The glaze at the end provides a beautiful, sticky finish that clings to every rib.
During the bake, avoid opening the oven door frequently, which can drop the temperature and lengthen cooking time. Use a thermometer to monitor the internal temperature as it rises. The goal is to reach tender rib meat that slides off the bone with a gentle twist and a glowing glaze that sparkles under the oven light.
Finishing Glaze, Resting, and Serving
A finishing glaze adds shine and extra flavor to the surface of baked ribs. The glaze can be a simple BBQ sauce recipe you love, or a tangy-sweet mixture of honey, soy, and fruit-forward flavors. Brush the glaze on the rack during the final 10–15 minutes of cooking, or briefly broil to seal it in and create a more caramelized crust. The glaze should be applied in thin layers to avoid pooling and uneven sweetness.
Resting is essential to allow juices to redistribute. After removing the ribs from the oven, tent them loosely with foil and let them rest for 10–15 minutes before slicing. Resting makes the meat easier to cut and preserves moisture inside each rib. Slice between the bones to keep each rib intact, and serve with extra glaze on the side for dipping. If you’re serving with sides, consider classic accompaniments like coleslaw, baked beans, or cornbread.
Experiment with finishing temperatures: you can finish with a brief high-heat phase for a crisp crust or a gentle glaze-simmer if you want a silkier surface. The Bake In Oven approach supports both styles, depending on your preference for crust vs. glaze intensity.
Troubleshooting Common Issues and Safety
Even with careful planning, you may encounter common issues. If the meat seems dry, verify you pat-dried well initially and kept the oven at a stable temperature. If the ribs appear undercooked and tough, you likely need more time at the low temperature; check for bone-to-meat separation rather than aiming for a single firm interior. Wrapping can help retain moisture but might reduce crust development; adjust the technique to achieve your preferred texture.
Food safety is essential: handle raw pork with clean hands, sanitize surfaces, and store leftovers promptly. If the rib portion has been stored, reheat safely to an internal temperature that’s safe for pork. Keep raw and cooked foods separate, and wash cutting boards between tasks to prevent cross-contamination. Bake In Oven emphasizes patience and precise taking-off of the bone-in racks for uniform cooking across all pieces.
Quality control signals include a fragrant aroma, a crust that releases slightly when tapped, and ribs that pull away from the bone with ease. If your surface browns quickly but the center remains pale, lower the oven temperature slightly and extend the bake time for even cooking.
Storage, Leftovers, and Reheating
Leftover ribs can be refrigerated for up to 3–4 days or frozen for longer storage. Store in airtight containers or wrapped tightly in foil. Reheat gently to preserve moisture; the best approach is to reheat slowly in the oven at a low temperature, covered, or wrapped with a splash of moisture (like a few tablespoons of broth) to avoid drying out. If reheating in a microwave, use short intervals and rest periods to prevent toughening. When reheating, you can brush with glaze again to refresh flavor and glaze integrity. For best results, reheat ribs covered and avoid exposing them to high heat for extended periods, which can dry the meat and make the crust brittle.
If you’re meal-prepping, portion the ribs into meal-sized servings and freeze them with a light glaze applied. Thaw in the fridge overnight before reheating to maintain moisture and texture.
Meat Safety and Internal Temperature (General Guidance)
When cooking pork ribs, aiming for a safe interior while achieving optimal tenderness is a balance. The final texture for ribs is typically achieved with an internal temperature in the higher range that corresponds to tender meat near the bone. Use an instant-read thermometer to monitor progress and remove the ribs when they reach your preferred tenderness level. Always err on the side of a safe interior, and allow the meat to rest after cooking to reabsorb juices. The goal is to keep the meat moist and flavorful while ensuring it’s safe to eat.
Tools & Materials
- Bone-in pork ribs (baby back or spare ribs)(1–2 racks, depending on servings)
- Kitchen towels or paper towels(Pat dry the ribs completely)
- Sharp knife(Trim membranes and excess fat as needed)
- Dry rub blend (salt, sugar, paprika, pepper, spices)(Prepare ahead of time)
- Mixing bowl(For combining rub ingredients)
- Wire rack(Elevates ribs for even heat circulation)
- Rimmed sheet pan(Catches drippings and helps with cleanup)
- Parchment paper or aluminum foil(Line sheet pan and for wrapping if desired)
- Instant-read thermometer(Check internal temperature accurately)
- BBQ glaze or sauce(Brush during finishing for shine)
- Oven thermometer or reliable oven(Maintain steady temperature)
Steps
Estimated time: Total: 2.5–4 hours
- 1
Gather and pat dry
Remove ribs from packaging, pat dry with paper towels, and trim membranes if present. This ensures rubs adhere and moisture is controlled for an even bake.
Tip: Removing the silver skin allows rub to penetrate for better flavor. - 2
Mix rub and apply
Combine your dry rub ingredients and apply a generous, even coat on all sides of the ribs. Let the rub sit for 10-20 minutes to start flavor absorption.
Tip: For deeper flavor, rub ahead and let sit longer, even up to 60 minutes if time allows. - 3
Prepare the pan and rack
Line the sheet pan with parchment or foil and place the wire rack on top to elevate ribs for consistent heat exposure.
Tip: Elevating the ribs helps avoid soggy surfaces and promotes crust development. - 4
Bake low and slow
Place ribs on the rack and bake at a low/moderate temperature for several hours until tender. Avoid opening the oven door frequently to maintain even heat.
Tip: Keep a steady oven temperature to prevent dry edges and uneven cooking. - 5
Optional wrap for moisture
If you want extra moisture and tenderness, wrap the rack tightly in foil for part of the bake, then unwrap for the final glaze.
Tip: Double-wrap to prevent steam from escaping and to maximize moisture retention. - 6
Glaze and finish
Brush a thin layer of glaze on the ribs during the last 10–15 minutes of cooking, and optionally finish under high heat or broil for a glossy crust.
Tip: Watch closely to prevent scorching; glaze dries quickly under high heat. - 7
Rest, slice, and serve
Let the ribs rest 10–15 minutes after cooking, then slice between bones and serve with extra glaze on the side.
Tip: Resting redistributes juices for juicier bites and easier slicing.
Frequently Asked Questions
What is the best temperature to bake ribs in the oven?
A low-and-slow approach around 225–275°F is recommended for tender ribs. The exact time varies with rack size and oven performance, but the goal is to render connective tissue without drying the meat.
Bake ribs slowly at a low oven temperature to ensure tenderness without drying the meat.
Should I wrap ribs during baking?
Wrapping, often called the Texas Crutch, traps moisture and speeds tenderness. If you want a crisp bark, skip wrapping for most of the bake and apply glaze at the end.
Wrapping can help tenderness, but skip it if you want more crust.
Bone-in vs boneless ribs: which to choose?
Bone-in ribs stay juicier and cook more evenly when baked low and slow. Boneless ribs cook faster but can become dryer if overdone.
Bone-in ribs are generally easier to cook evenly for beginners.
Can I cook frozen ribs in the oven?
Cooking from frozen is possible but not ideal. It increases total time and can lead to uneven doneness. Thawing before baking is preferred for consistent results.
Thaw ribs for best results, but you can cook from frozen if needed with extra time.
How long can cooked ribs be stored?
Cooked ribs keep well in the fridge for 3–4 days or frozen for longer storage. Reheat gently to preserve moisture and texture.
Store in the fridge for a few days and reheat slowly for best texture.
What internal temperature should ribs reach?
Pork ribs are safe at 145°F, but for tender ribs many cooks target higher internal temperatures, around 190–203°F, to achieve fall-off-the-bone texture.
Look for tenderness and ease of bone separation, not just a single temperature.
Watch Video
Key Takeaways
- Choose bone-in ribs for flavor and easier handling
- Bake low and slow, keep temp steady for tender meat
- Apply rub evenly and rest before cooking for flavor depth
- Finish with glaze and rest before slicing
- Use a thermometer to guide doneness and safety