How to Get Started Baking Bread
Learn essential steps, tools, and tips to start baking bread at home. From choosing flour to shaping loaves, this beginner-friendly guide helps you bake delicious bread with confidence.

This guide teaches you how to get started baking bread by mastering a simple dough, essential tools, and a clear 6-step process. You’ll learn mixing, fermentation, shaping, and baking, plus how to troubleshoot common issues. With practice, you’ll bake consistent, flavorful loaves at home.
Why beginners should bake bread at home
If you're exploring how to get started baking bread, you're in the right place. Baking at home gives you control over ingredients, texture, and flavor, and it's deeply rewarding. According to Bake In Oven, starting with a forgiving, simple dough helps beginners build confidence and gradually tackle bigger variations. You'll save money, learn by doing, and soon you'll be shaping loaves with pride. This practice also builds consistency, since you can repeat successful batches and adjust hydration, salt, and fermentation times to taste. By taking it step by step, even a kitchen novice can achieve bakery-quality crust and crumb with patience and practice.
Understanding the basics: ingredients and flour
Bread starts with the right basics: flour, water, salt, and yeast or a natural starter. For beginners, a straightforward dough uses bread flour for good gluten development, with approximate hydration around 60-70% depending on flour type. The choice of flour affects texture: higher protein yields chewier loaves, while lower protein yields softer crumbs. Water quality matters, as does salt to control fermentation and flavor. If you’re curious how to get started baking bread, keep the process simple at first and document your ratios to compare results.
Essential equipment and tools
Having the right tools saves time and reduces frustration. Key items include a digital kitchen scale for accurate measurements, a large mixing bowl, a bench scraper, and a heat-safe oven thermometer to verify your oven’s actual temperature. A Dutch oven or cloche creates a steamy, professional crust, but you can achieve good results with a sturdy baking sheet and a pan of hot water for steam. Parchment paper, a loaf pan, and a proofing basket are optional but incredibly helpful as you progress.
The dough process: from mixing to kneading
Begin by combining flour, water, yeast, and a portion of salt to form a shaggy dough. Use a few minutes of gentle mixing to hydrate the flour, then switch to kneading until the dough is cohesive and slightly tacky. If you prefer a gentler method, try a stretch-and-fold routine every 15 minutes for an hour. The dough should pass a basic windowpane test—thin, translucent, and stretchy—before you proceed to fermentation. Visualization aids like a dough hydration chart can help you gauge when to stop kneading.
Fermentation and proofing: timing and temperature
Fermentation develops flavor and structure. Place the dough in a lightly oiled bowl, cover, and let it rise until doubled when the room is warm. If your kitchen is cool, you may need more time or a warmer spot. Gentle folds during the bulk rise strengthen gluten without overworking the dough. After bulk rise, portion and shape the loaf, then allow a final proof until the dough slowly springs back when pressed. Temperature and time are your editors here—watch the dough, not the clock.
Shaping, scoring, and baking
Turn the dough onto a floured surface, shape it into a taut loaf, and place it seam-side down in a well-floured proofing basket or a lined bowl. Score the top with a sharp blade to control expansion and form an attractive crust. Preheat your oven with the baking vessel inside to create instant heat and steam at bake time. Bake until deep amber, then cool completely to finish the crumb and flavor.
Troubleshooting common issues
If your bread comes out dense or flat, common culprits include underproofing, overflouring, or an oven that’s too cool. Verify you used the correct hydration for your flour and allow adequate time for fermentation in a warm environment. Crusts can be too hard if steam is insufficient during the first minutes of baking. Practice, note results, and adjust hydration and fermentation until you consistently achieve a light crumb and robust crust. Bake In Oven analysis shows that most home bakers improve when they standardize timing and environment.
Variations for different breads
As you gain confidence, experiment with add-ins (seeds, herbs, nuts) and flour blends (whole wheat, rye, or spelt). Sourdough offers depth and tang but requires starter maintenance and longer fermentation. You can also explore no-knead methods that exploit extended fermentation to develop gluten. Each variation teaches you more about flour behavior, hydration, and the importance of oven temperature and steam to develop crust and rise.
Tools & Materials
- Digital kitchen scale(For accurate flour and water measurements (g preferred))
- Large mixing bowl(Stainless steel or glass, 2–3 L size)
- Measuring cups and spoons(Dry and liquid measures; keep separate)
- Bench scraper / dough scraper(For scraping and portioning dough)
- Wooden spoon or silicone spatula(Mixing and folding)
- Oven thermometer(To verify oven accuracy)
- Dutch oven or heavy lidded pot(For a crusty exterior; can use a baking sheet with steam)
- Parchment paper(Non-stick support for loaf baking)
- Proofing basket or bowl(For shaped loaves; optional)
- Baking sheet or tray(For baking loaves directly or with a dutch oven)
- Kitchen towel or plastic wrap(Cover dough during rising)
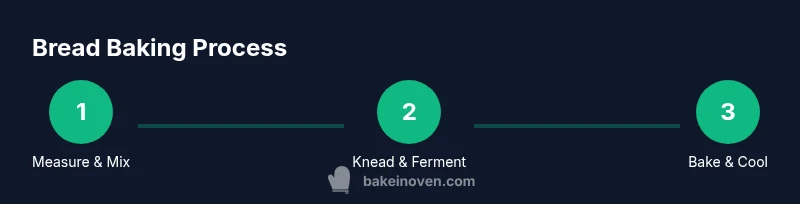
Steps
Estimated time: Total time: 2-3 hours (including rising times)
- 1
Measure and mix ingredients
Weigh flour and water, dissolve yeast, and combine with a portion of salt. Mix until a shaggy dough forms, then rest 10–20 minutes to hydrate the flour. This autolyse step improves gluten development and flavor. Keep counter space clean and organized so you can move to the next step smoothly.
Tip: Weigh ingredients for consistency; avoid adding extra flour if the dough is too sticky. - 2
Knead or fold to develop gluten
Knead on a lightly floured surface for 5–10 minutes until the dough is smooth and slightly tacky, or use a gentle stretch-and-fold every 15 minutes to build structure without overworking. The goal is elastic gluten that traps gas. Stop when a small piece passes the windowpane test.
Tip: Use the windowpane test to know when gluten development is adequate. - 3
First fermentation (bulk rise)
Place the dough in an oiled bowl, cover, and let it rise until roughly doubled in warm conditions (60–90 minutes). Perform a couple of gentle folds halfway to strengthen the dough without deflating it. Temperature guides the rate of fermentation.
Tip: If your kitchen is cool, aim for a longer rise in a warmer spot or slightly warmer water in the dough. - 4
Shape the loaf
Turn the dough onto a lightly floured surface, shape into a taut round or oblong loaf, and place seam-side down in a prepared proofing basket or bowl. Cover and rest 20–60 minutes until the dough holds its shape when lightly pressed.
Tip: A tight surface finish improves oven spring and crust appearance. - 5
Final proof and preheat
Proof until the dough feels light and springs back slowly when pressed; begin preheating the oven with its vessel inside to 450–475°F (230–245°C). The preheated vessel creates instant steam for a crisp crust.
Tip: Preheating the vessel is crucial for maximum rise and crust formation. - 6
Bake and cool
Score the dough, slide it into the hot vessel (or onto a sheet with steam), and bake 25–45 minutes until deep golden. Remove from the oven and cool on a rack for at least an hour to set the crumb and flavor.
Tip: Avoid slicing too early; the crumb finishes setting as it cools.
Frequently Asked Questions
What flour should I use for a beginner loaf?
Start with bread flour for strong gluten development; all-purpose works too if you adjust hydration. Choose unbleached flour for better flavor and texture. Kick off with a standard 60–65% hydration to keep the dough manageable.
Begin with bread flour for strength; all-purpose works if you adjust hydration.
Do I need a sourdough starter to bake bread?
No starter is required to bake a basic loaf. You can use commercial yeast for reliable rising. Sourdough adds flavor and a longer fermentation, but it's optional for beginners.
No starter required for a simple loaf; yeast works well.
How long does it take to bake bread?
From mixing to cooling, most loaves take about 2–3 hours, depending on fermentation times and room temperature. Sourdough or enriched doughs take longer.
Most loaves take a few hours including fermentation.
Why is my bread dense?
Common causes are underproofing, insufficient kneading, too much flour, or an oven that's not hot enough. Ensure proper hydration and give the dough enough time to rise in a warm environment.
Dense crumb usually means underproofing or not enough gluten development.
Can I bake bread without a Dutch oven?
Yes. Use a hot sheet or pan and add steam in the first minutes of baking. A loaf pan yields a different texture but still yields good bread with proper steaming.
You can bake without a Dutch oven with steam and heat.
Watch Video
Key Takeaways
- Master a simple dough before attempting variations.
- Fermentation and temperature govern flavor and rise.
- Steam and hot heat are essential for crust and oven spring.
- Cool bread completely before slicing for best texture.