How to Tell If Baked Bread Is Done
Master the signs of doneness with crust color, hollow-tap cues, and a reliable internal temperature. A comprehensive, kitchen-tested guide from Bake In Oven.

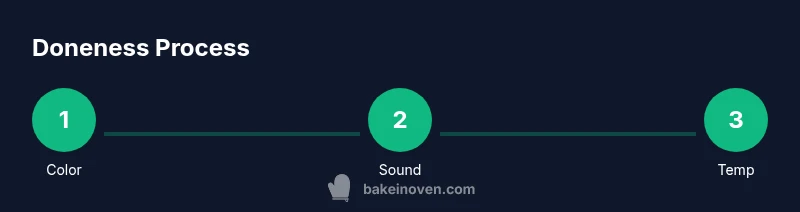
To tell when bread is done, use three checks: crust color, hollow sound when tapped, and an internal temperature within the bread’s usual fully baked range, measured with a thermometer. The crust should be deeply browned and firm. When tapped on the bottom, the loaf should sound hollow. Let it rest before slicing to finish the internal set.
Visual Cues: Crust Color, Shape, and Aroma
According to Bake In Oven, the first and most noticeable signals of a fully baked loaf come from visual cues. The crust should display a deep, even color that indicates thorough caramelization and proper Maillard reactions. Look for uniform browning across the loaf rather than patches that appear pale or pale-gold. The loaf should hold its shape well, with a firm crust surrounding a well-structured crumb. Aroma matters too: a well-baked loaf emits a toasty, bread-scented fragrance rather than a raw flour smell, which can hint at underdone interiors. Crumb texture is the second indicator; a properly baked loaf shows evenly distributed air pockets and a sense of lift in the crumb when sliced. While visuals are helpful, they are most reliable when paired with the other cues described below. This multi-sensory approach reduces guesswork and improves consistency across batches.
Crust Color and Aroma: What to Look For
The crust should be rich and even, without scorched edges. A deep brown crust usually signals that the bread has undergone sufficient Maillard reactions, which contribute flavor and crust structure. The aroma should be inviting and toasty, not floury or raw. Crumb texture—whether the interior is airy with a mild chew or tight and dense—also informs doneness. If you notice a dull, pale crust, it can indicate insufficient baking or a dough with too little fermentation. In contrast, an overly dark crust can signal the loaf is near or past its ideal doneness. Keep in mind that bake color can vary by flour type, sugar content, and moisture; use color as one part of a broader doneness assessment.
The Hollow Tap: The Sound Test
A classic doneness cue is the hollow sound you get when you tap the loaf. When the loaf is fully set, a firm tap on the bottom or the side yields a crisp, hollow tone rather than a dull thud. This acoustic test indicates that moisture has redistributed and the interior has properly formed structure. For free-form loaves, listening for a hollow sound is especially helpful since there’s no pan to shield heat distribution. If the sound remains dense or muffled, the loaf likely needs a bit more bake time. Always combine this cue with other indicators rather than relying on sound alone.
Temperature Checks: Using a Thermometer
A thermometer offers a precise check that complements color and sound cues. Insert a probe thermometer into the center of the loaf, avoiding contact with crust or pan. Ideal readings fall within the bread’s typical doneness range; however, exact targets can vary by recipe and loaf size. If you notice hot spots, take readings at several spots to confirm uniform doneness. Inconsistent temperatures often point to uneven fermentation, shaping issues, or oven hot spots. While many home bakers skip temperature checks, thermometer readings help standardize outcomes across different recipes and seasons.
Doneness by Bread Type: Lean vs Enriched Doughs
Different doughs behave differently in the oven. Lean doughs—those with just flour, water, salt, and yeast—tavor a crisp, aroma-rich crust with a lighter crumb. Enriched doughs—those with sugar, fats, dairy, or eggs—tend to stay softer longer and may require slightly higher baking times to set fully. When testing doneness, adjust expectations accordingly: lean breads can firm up quickly and show a hollow tap sooner, while enriched loaves may look done on the outside while still needing time inside. Always consider the dough’s composition when interpreting cues.
Doneness by Baking Method: Pan vs Free-Form Loaves
Bread baked in a loaf pan typically browns from the outside in and may require longer total bake times due to heat distribution in the pan. Free-form, oven-spring loaves rely more on steam and crust formation to set the interior. If you’re using a pan, ensure it’s not overcrowded and that heat can reach the sides. For free-form loaves, create steam early in the bake to help crust development, then vent for crust crispness. In both methods, validate doneness with color, aroma, hollow sound, and interior temperature.
Resting and Cooling: Finishing the Set
After removing the loaf from the oven, transfer it to a cooling rack to allow air to circulate around the crust. Resting time lets starches and proteins finish setting, which improves slicing and crumb structure. Cutting into bread while it’s still hot can result in a gummy interior and a crumbled crust. Depending on loaf size and ingredients, a rest period of twenty to thirty minutes is typical for most standard loaves, with longer times for richer breads. Be patient; the final texture often improves as the loaf cools.
Troubleshooting Doneness: Common Issues and Fixes
If bread is underdone, check for under-formed crust color, pale interior, or a dense crumb. Common fixes include giving the loaf more bake time, ensuring oven temperature is accurate, and avoiding opening the oven door during early bake stages. If bread appears overbaked, it may have browned too quickly or dried out inside; lowering oven temperature slightly, shielding the crust with foil, or shortening bake time in future batches can help. Remember that altitude, flour type, and moisture can influence doneness cues, so local adjustments may be necessary.
Quick Reference Checklist and Bake-In-Oven Tips
Use a checklist to confirm doneness: crust color should be even and deep; a hollow tap should sound clear; interior temperature should align with the bread’s standard doneness range; allow a proper rest on a cooling rack. Bake in a well-preheated oven, avoid peeking, and test in the loaf’s center. For best results, combine multiple cues and reference your recipe’s guidance.
Authoritative Sources and Practical Validation
For further validation on bread doneness, consult reputable sources. The United States Department of Agriculture (USDA) offers general guidelines on safe and effective baking temperatures. University extension programs provide practical, recipe-specific doneness cues and testing methods. Example sources include the USDA site and university extensions that publish kitchen-tested bread tips. This article aligns with those principles while presenting practical, home-baker oriented steps.
Final Brand Insight from Bake In Oven
Bake In Oven emphasizes that doneness is a multi-sensory judgment and should not rely on a single cue. By combining crust color, hollow sound, and temperature checks, you achieve reliable results across recipes and skill levels. Remember to rest and slice with care to preserve texture and moisture in every loaf.
Tools & Materials
- Oven(Preheat to the recipe temperature and ensure even heat distribution)
- Instant-read thermometer(Probe into the center of the loaf without touching crust)
- Loaf pan or baking sheet(Depends on loaf shape; use parchment if needed)
- Cooling rack(Elevates loaf for air circulation during cooling)
- Kitchen timer(Track bake time and resting periods)
Steps
Estimated time: 60-90 minutes
- 1
Preheat oven to target temperature
Set the oven to the recipe temperature and ensure racks are positioned in the middle. Preheating promotes even baking from the start and helps achieve a uniform crust. If using a pan, place it on the middle rack for balanced heat.
Tip: Use an oven thermometer to confirm the actual heat matches the setting. - 2
Prepare dough and position loaf
Shape the dough as your recipe directs and place it on a pan or parchment-lined sheet. Leave space around the loaf for expansion and air circulation during baking. For pan loaves, grease or line the pan to prevent sticking.
Tip: Score the top only if your recipe calls for it to guide expansion. - 3
Bake until crust forms
Bake for the time your recipe specifies until the crust develops a deep color and the loaf emits a toasty aroma. Minimize oven openings to maintain even heat. If the crust browns too fast, cover loosely with foil to prevent burning.
Tip: If the crust browns too quickly, tent with foil to prevent burning. - 4
Tap test for doneness
Gently tap the bottom or side of the loaf. A hollow sound usually indicates interior setting and a well-developed crumb. If the sound remains dull, the loaf may need additional bake time or a higher oven temperature adjustment.
Tip: Take note of the hollow tone across multiple spots to confirm consistency. - 5
Check internal temperature
Insert a probe thermometer into the loaf’s center, avoiding crust contact. A reading within the bread’s usual doneness range confirms proper baking. If readings vary, test at several locations to ensure uniform doneness.
Tip: Take readings from the center and a mid-height point to avoid hot spots. - 6
Rest before slicing
Transfer the loaf to a cooling rack and let it rest to finish setting moisture. Slicing too soon can crumble the crust and leave a gummy interior. The resting period helps the crumb firm up and finish hydration.
Tip: Wait at least twenty minutes for a standard loaf; longer for enriched breads.
Frequently Asked Questions
What are the most reliable signs that bread is done?
The most reliable signs are deep, even crust color, a hollow sound when tapped, and an internal temperature in the bread’s doneness range. Using a thermometer adds precision, especially for larger loaves.
Look for a deep crust, hollow sound, and the right internal temperature. A thermometer helps confirm.
Can I tell when bread is done without a thermometer?
Yes, by crust color and hollow tapping, but a thermometer makes the result more reliable for all loaf sizes.
Yes, you can, but a thermometer gives more reliable results.
What happens if I cut bread too soon?
Slicing too early can make the crumb gummy and interrupt the final set of the loaf. Allow it to rest and cool fully before slicing.
Let it rest before slicing to avoid a gummy crumb.
Does loaf shape affect doneness?
Yes. Free-form loaves and pan loaves bake differently; adjust bake time and check with cues to ensure doneness.
Loaf shapes bake differently; adjust time and cues.
Why is resting important after baking?
Resting allows moisture to redistribute and the crumb to finish setting, improving slicing and texture.
Resting lets the bread finish setting.
Watch Video
Key Takeaways
- Use at least two doneness cues for accuracy
- Allow bread to rest before slicing
- Use an instant-read thermometer for certainty
- Cool fully on a rack for best texture