What to Bake Japanese Sweet Potatoes At: An Easy Oven Guide
Learn how to bake Japanese satsumaimo in the oven for creamy texture and natural sweetness. Includes temps, times, tools, toppings, and tips.

Goal: Bake Japanese sweet potatoes (satsumaimo) in the oven until tender and creamy. Start with a hot oven around 420°F (215°C). Size will determine time—small potatoes may take 40–50 minutes, larger ones 60–75 minutes. Check tenderness with a fork; skin should be glossy and flesh soft inside. Finish with salt, butter, or miso glaze for extra depth.
Why Japanese Sweet Potatoes Are Special
If you’re wondering what to bake japanese sweet potatoes at, satsumaimo are an excellent choice. According to Bake In Oven, these varieties offer a creamy, fluffy flesh and a natural sweetness that deepens with roasting. Japanese satsumaimo differ from the common orange-fleshed sweet potato in texture and flavor: the flesh is denser, the skin is thinner, and the sugars caramelize into a silky glaze as you cook. This makes them ideal for a simple weeknight side, a cozy baked snack, or a dessert-inspired treat when finished with a touch of butter or miso glaze. In this guide we’ll focus on reliable oven-bake methods that highlight their rich starches without turning them dry or mealy.
Selecting the right potatoes matters. Look for smooth skin, even size, and firm feel with no large bruises. Smaller potatoes bake more quickly and evenly; larger ones benefit from a longer bake or a split-and-wrap approach. If you can’t find satsumaimo, you can substitute other white-fleshed or sweet varieties, but the texture will differ. Prepare to invest a little time for best results, because the reward is a tender, velvety interior with a crisp, slightly syrupy skin. Bake Japanese sweet potatoes at a steady, moderate heat to unlock their best flavor, and you’ll understand why this method is a staple in many home kitchens.
What You Need Before You Bake
Before you start the bake, gather the essentials and set up for success. Choose satsumaimo that are similar in size for even cooking, ideally 2–4 medium tubers per batch. Wash them well under cool running water and scrub the skin with a brush to remove any dirt. Pat completely dry to encourage skin crisping. A light coating of oil (olive or neutral oil) helps the skin become gently crisp and glossy. A pinch of salt at the finish enhances sweetness. Line your baking sheet with parchment or foil for easy cleanup, and have a fork ready to check tenderness. If you own an extra oven thermometer, place it in the oven to verify the temperature for accurate results. These small prep steps set the stage for success.
Temperature and Time: What to Expect
Most home bakers aim for a hot, steady oven when roasting satsumaimo. A typical range is 400–450°F (205–230°C). Lower temperatures yield longer times and more even texture, while higher temperatures help the skin crisp a bit faster. In practice, small to medium satsumaimo often finish in 45–60 minutes, while larger tubers can take 60–75 minutes. The exact time depends on size, starting temperature, and how many you bake at once. Begin checking around the 40-minute mark, and test tenderness with a fork or skewer. When the flesh yields easily, they’re done. For best results, keep the oven closed and avoid overcrowding; space allows heat to circulate and prevents steaming.
Preparing Japanese Sweet Potatoes: Prep Techniques
Wash and dry each potato thoroughly, removing any stubborn dirt. If you like, rub a light coat of oil over the skin and sprinkle a touch of salt for enhanced flavor and texture. Prick the skins a few times with a fork to vent steam as they bake; this helps prevent bursting and ensures even cooking. Position potatoes directly on a baking sheet or on a lightly oiled sheet of parchment. There’s no need to peel; the skin adds fiber and a nice contrast to the soft interior. When ready, slide the tray into the preheated oven and let the magic begin.
Methods: Oven-Bake, Microwave, and Air-Fryer Options
Oven-baking yields the most reliable texture: a creamy interior with a gently crisp skin. If you’re short on time, you can microwave satsumaimo for a head start; finish in the oven to re-crisp the skin and deepen flavor. An air fryer also works well, typically at a slightly lower temperature for a shorter period due to its efficiency. Whichever method you choose, aim for the same interior tenderness—use a fork to test and adjust as needed. After cooking, rest the potatoes for about 5 minutes to let the starches settle and the flavors meld.
Flavor Ideas and Finishers
A simple finish is to split the warm potato and season with a pinch of salt and a pat of butter. For a deeper savory note, try miso-butter glaze: mix a small amount of white miso with melted butter and brush on the exposed flesh. Sweet ideas include a drizzle of maple or honey and a sprinkle of sesame seeds. You can also serve satsumaimo with yogurt, soy glaze, toasted nuts, or a light sprinkle of cinnamon for a dessert-like treat. The goal is to enhance the natural sweetness without overpowering it.
Troubleshooting Common Issues
If the flesh seems dry or crumbly, the potato may have baked too long or been stored too long before cooking. To avoid this, choose fresh tubers and monitor time closely. If the skin is too tough, it may not have roasted long enough—give it a few more minutes and test again. If timing is off due to size variations, rotate the tray halfway through and switch spots if your oven has hot spots. Finally, if you prefer a crispier skin, finish under the broiler for 1–2 minutes, watching closely to prevent burning.
Quick-Reference Bake Plan
- Preheat oven to 425°F (218°C).
- Wash and dry 2–4 medium satsumaimo; pat dry; rub lightly with oil and salt.
- Prick skins and place on a parchment-lined baking sheet, spaced apart.
- Bake 45–60 minutes for small–medium tubers, 60–75 minutes for larger ones.
- Check tenderness with a fork; rest 5 minutes before serving.
- Finish with butter, salt, or miso glaze as desired.
Note: If sizes vary, rotate the tray halfway and test earlier to ensure even cooking.
Tools & Materials
- Medium Japanese sweet potatoes (2–4)(Choose similar sizes for even baking)
- Olive oil or neutral oil(Light coating to help skin crisp)
- Fine salt(For finishing and flavor)
- Parchment paper or foil(Keeps sheet clean and prevents sticking)
- Baking sheet(Flat surface for even heat distribution)
- Fork or skewer(Test tenderness at the end)
- Oven thermometer(Ensures accurate oven temperature)
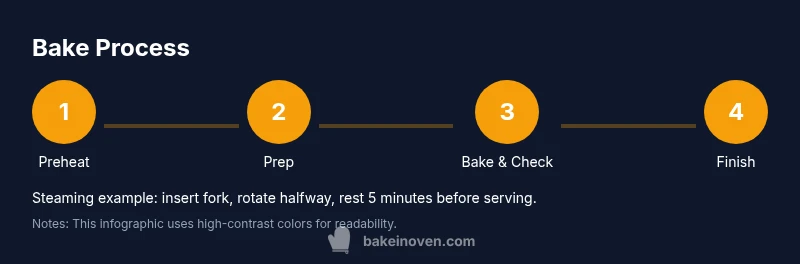
Steps
Estimated time: 60-75 minutes
- 1
Preheat the oven
Set the oven to 425°F (218°C) and allow it to come to temperature before loading the potatoes.
Tip: A properly preheated oven improves even cooking and skin texture. - 2
Prepare the potatoes
Wash and dry the potatoes thoroughly. This removes dirt and helps prevent steam buildup during baking.
Tip: Drying the skin helps oil adhere and crisp the outside. - 3
Oil and season
Lightly coat the skins with oil and sprinkle a pinch of salt to boost flavor and texture.
Tip: Only a thin coat is needed to avoid greasy skins. - 4
Prick the skins
Poke a few holes in each potato with a fork to vent steam safely during roasting.
Tip: Ventilation prevents skin bursts and uneven interiors. - 5
Bake on sheet
Place potatoes on a parchment-lined sheet, spaced apart for air flow, and bake.
Tip: Avoid crowding; air needs to circulate for crisp skin. - 6
Check tenderness
Around the 40-minute mark, test with a fork; continue baking until flesh yields easily.
Tip: Rotate the sheet halfway for even heat exposure. - 7
Rest and serve
Let the potatoes rest 5 minutes after removing from the oven, then serve with toppings.
Tip: Resting helps the starches settle for a creamier interior.
Frequently Asked Questions
Should I soak Japanese sweet potatoes before baking?
Soaking isn’t required. A quick wash is enough to clean the surface; soaking can add moisture and extend cook time. If you do soak, be sure to dry thoroughly before baking.
You don’t need to soak them; a quick wash is enough.
Is it better to bake the potatoes whole or cut them first?
Baking whole preserves moisture and yields a creamier interior, while cutting can reduce overall cook time but changes texture and may dry the flesh slightly. Choose based on how you plan to serve them.
Whole potatoes bake for a creamier center; sliced ones cook faster but drier.
How can I tell when they’re done?
The potatoes are done when a fork or skewer slides in with little resistance and the flesh feels soft and creamy. If you feel resistance, return to the oven in 5-10 minute increments.
They’re done when a fork slides in easily and the flesh is soft.
Can I bake satsumaimo ahead of time and reheat later?
Yes. Bake them, cool completely, then refrigerate. Reheat gently in the oven or microwave, and finish with a quick rest to restore texture.
Yes, you can bake ahead and reheat when ready.
Are satsumaimo sweeter than regular orange-fleshed sweet potatoes?
Satsumaimo typically have a denser, slightly sweeter profile with a more pronounced earthy note. They caramelize nicely when roasted, enhancing natural sweetness without added sugar.
Yes, satsumaimo tend to be sweeter and denser than orange-fleshed varieties.
Watch Video
Key Takeaways
- Choose uniform tubers for even baking.
- Preheat to a hot oven and monitor tenderness.
- Finish with a minimal topping to highlight natural sweetness.
- Rotate and rest for consistent texture across batches.