How to Bake Japanese Sweet Potatoes (Satsumaimo)
Learn a kitchen-tested method to bake satsumaimo, the Japanese sweet potato, for creamy interiors and caramelized skins with practical steps from Bake In Oven.

To bake sweet potato japanese style, start with firm satsumaimo (Japanese sweet potatoes), scrub well, then bake at 425°F (220°C) for about 40–60 minutes until fork-tender. Let cool briefly, then finish with butter or glaze for a glossy finish. This method preserves natural sweetness and helps keep the creamy interior intact, even when you add a glaze.
Understanding satsumaimo and why baking is ideal
Satsumaimo, widely sold as Japanese sweet potatoes, have purple or lavender skins and pale orange flesh. They’re starchier and drier than the orange-fleshed varieties, which makes them ideal for roasting and baking. When baked, their natural sugars caramelize, creating a creamy interior with a lightly crisp skin. A simple, low-maintenance technique like this aligns with traditional Japanese kitchen practice: let the potato carry most of the flavor with minimal additions. For home bakers curious about how to bake sweet potato japanese, this approach emphasizes time and temperature that respect the potato's natural sweetness and structure. By starting with firm tubers and giving them space on the pan, you’ll achieve even cooking and a superior texture. Bake In Oven’s guidance helps you get consistent results every time.
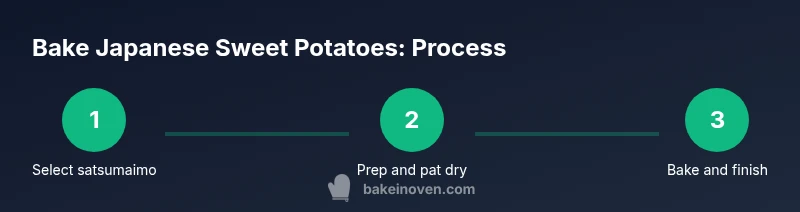
Selecting, washing, and prepping satsumaimo
Choose satsumaimo with smooth skin and no major bruises; smaller to medium tubers tend to bake more evenly. Rinse under cold running water, using a brush to remove embedded dirt. Pat thoroughly dry to reduce steam inside the skin, which helps create a crisp edge. Trim any ragged ends if needed, but avoid removing more flesh than necessary. Leaving the skins on is traditional and contributes to texture and nutrition. If you plan a glaze, keep the interior visible by lightly scoring the top; otherwise, skip scoring for a whole-cream interior.
Oven preparation and equipment for even roasting
Preheat your oven to 425°F (220°C). Prepare a baking sheet lined with parchment paper or a silicone mat to prevent sticking and ease cleanup. Have a pair of oven mitts ready and a spatula or tongs to handle the hot potatoes. For the best results, space the potatoes with at least 1 inch between them to promote even heat circulation. If you intend to glaze, gather butter or a light miso glaze and a pastry brush for even application.
Flavor pairings and finishing touches
Japanese sweet potatoes shine with minimal seasoning. A small pat of butter after roasting adds velvety richness; a touch of salt can enhance sweetness. For a more Japanese-inspired finish, whisk a tiny amount of miso with maple or honey and brush onto the hot potato. Sesame seeds, a drizzle of sesame oil, or a spoonful of yogurt can elevate texture and depth. Remember that the flavor should come from the potato itself, so avoid heavy toppings that mask the delicate sweetness.
Common mistakes and how to avoid them
Overcrowding the pan causes uneven cooking; give potatoes room to breathe. Baking at too low a temperature can result in pale skins and underdeveloped sweetness; stick with 400–425°F. Not patting dry leads to soggy skins; ensure skins are dry before baking. Opening the door too often during baking causes heat loss; resist peeking unless necessary. Finally, using potatoes that are too large or uneven in size will create an uneven bake; choose evenly sized tubers when possible.
Serving ideas and storage tips
Serve warm right after baking to enjoy creamy interiors. If you want to use leftovers, refrigerate in an airtight container for up to 4 days. Reheat gently in the oven at 350°F (175°C) until warm through or in a microwave in short 30-second bursts to preserve texture. Leftover baked satsumaimo are excellent mashed or folded into a breakfast hash. For a complete meal, pair with soy-glazed greens or a miso-butter topping.
Health considerations and storage safety
Satsumaimo are a good source of fiber and vitamin A; baking preserves most nutrients when done properly. Avoid burning or charring the skin, which can create acrylamide formation; keep an eye on time and temperature. For long-term storage, store in a cool, dark place or refrigerate after cooking to extend shelf life. If you notice any off smell or mold on tubers, discard.
Tools & Materials
- Satsumaimo (Japanese sweet potatoes)(Choose firm tubers with smooth skins; avoid bruised or soft specimens)
- Vegetable brush(For thorough cleaning under cold running water)
- Sharp kitchen knife(Trim ends if needed; optional for top trimming)
- Baking sheet(Line with parchment paper or a silicone mat)
- Parchment paper or silicone mat(Optional for nonstick surface and easier cleanup)
- Oven mitts(Heat protection when handling hot sheets)
- Oil or butter for finishing(Optional finishing touch for extra richness)
Steps
Estimated time: 60-75 minutes
- 1
Choose and prep satsumaimo
Select firm satsumaimo with smooth, unblemished skin. Rinse under cold water and scrub with a brush to remove all dirt. Pat dry completely to minimize steam inside the skin for crisp edges.
Tip: Dry skin helps edges crisp during roasting. - 2
Preheat oven and prepare pan
Preheat the oven to 425°F (220°C). Line a baking sheet with parchment paper or a silicone mat to prevent sticking and ease cleanup. Have your oven mitts ready for handling hot trays.
Tip: Lined sheets prevent sticking and simplify cleanup. - 3
Prick skins and lightly oil
Pierce several holes around each potato with a fork to vent steam. Lightly coat the skins with neutral oil if you want crisper surfaces and to aid browning.
Tip: Ventilation prevents bursting and promotes even browning. - 4
Roast until tender
Place potatoes on the prepared sheet and roast for 40–50 minutes. Rotate the sheet halfway through for even heat distribution. Check tenderness with a fork; they should slide in with gentle resistance.
Tip: Rotating ensures uniform texture across the batch. - 5
Finish tenderness and glaze (optional)
If using a glaze or butter, remove the potatoes when most are fork-tender and brush with glaze or a light butter. Return to the oven for an additional 5–7 minutes to set.
Tip: A light glaze enhances shine without masking potato flavor. - 6
Rest and serve
Let potatoes rest 5–10 minutes after baking. Slice open and fluff with a fork, then add finishing toppings if desired.
Tip: Resting helps the interior to settle and finish cooking gently. - 7
Store leftovers
Cool completely and store in an airtight container in the fridge for up to 4 days. Reheat gently to preserve texture.
Tip: Reheat in the oven for best texture rather than microwaving repeatedly. - 8
Meal prep ideas
Use baked satsumaimo in bowls, salads, or mashed into savory hashes for quick, comforting meals.
Tip: Chop into uniform pieces for even reheating.
Frequently Asked Questions
What is satsumaimo and how does it differ from regular sweet potatoes?
Satsumaimo are Japanese sweet potatoes with a purple skin and a dense, starchy interior. They are drier and more clump-free than orange-flesh sweet potatoes, which makes them excellent for roasting and baking to a creamy center.
Satsumaimo are Japanese sweet potatoes with purple skin and dryer flesh, great for baking to a creamy center.
What oven temperature is best for baking satsumaimo?
A temperature of about 400–425°F (200–220°C) is ideal for even cooking and good caramelization. Start checking around 40 minutes for smaller tubers.
Bake at 425 degrees Fahrenheit and check tenderness after about 40 minutes.
How can I tell when the potatoes are done?
They are done when the skin feels crisp and a fork slides easily into the flesh, revealing a creamy interior.
When the fork goes in easily and the interior is creamy, they’re done.
Can I bake multiple satsumaimo at once?
Yes, space potatoes with at least 1 inch between them on the sheet and rotate the sheet halfway through for even cooking.
Yes, just give them space and rotate halfway through.
How should I store and reheat baked satsumaimo?
Store chilled in an airtight container for up to 4 days. Reheat in the oven at 350°F or in short bursts in the microwave to preserve texture.
Refrigerate up to 4 days and reheat gently in the oven for best texture.
What toppings pair well with baked satsumaimo?
Butter, a light miso glaze, sesame seeds, or a touch of yogurt complement the natural sweetness without overpowering it.
Butter or a light glaze with sesame seeds complements the sweetness.
Watch Video
Key Takeaways
- Choose evenly sized satsumaimo for even baking
- Roast at 425°F to develop caramelization and creamy interiors
- Keep toppings light to let potato flavor shine
- Store leftovers properly for quick future meals