No-Bake Banana Split Cake: A Complete Step-by-Step Guide
Learn to make a no-bake banana split cake with an easy crust, banana cream, and whipped topping. This kitchen-tested guide from Bake In Oven covers ingredients, tools, steps, and storage tips.

With this guide, you’ll master a no-bake banana split cake from crust to topping in a simple fridge-friendly process. You’ll assemble a cookie crust, a creamy banana filling, and a lush whipped topping, then chill until set. The method emphasizes accessible ingredients, reliable timing, and easy cleanup—ideal for warm days, potlucks, and beginner bakers.
Why the no bake banana split cake Works
According to Bake In Oven, the no bake banana split cake design minimizes oven heat while delivering bold banana flavors, creamy textures, and a visually appealing slice. The approach is ideal for warm seasons, busy weeknights, and bakers who want reliable results without a heated kitchen. In this section we’ll explore why this format resonates with home bakers and how the core components come together to deliver balance between crust, cream, and fruit. You’ll also find practical variants to suit dietary needs or ingredient availability while preserving the signature banana-split flavor profile. The no bake method also helps maintain a bright banana note and a light, airy topping that contrasts well with a crisp crust. Throughout, keep in mind that cooling time is essential for clean slicing and stable layers.
Core Components and Variations
A successful no bake banana split cake relies on three pillars: crust, banana cream filling, and whipped topping. For the crust, popular choices include crushed cookies (graham crackers, vanilla wafers, or chocolate cookies) mixed with melted butter to form a compact base. Banana cream should be smooth, not overly heavy; a blend of cream cheese or whipped cream with mashed bananas and a touch of vanilla often yields a creamy yet sliceable filling. The topping can be whipped cream, stabilized whipped cream with a splash of vanilla, or a light vanilla yogurt mixture for tang. Variations exist: swap cookies for biscuit crumbs, use dairy-free cream alternatives, or add a caramel drizzle for a richer finish. The result remains adaptable, forgiving, and crowd-pleasing while preserving the essence of a banana split.
Ingredient Sourcing and Substitutions
In assembling a no bake banana split cake, choosing high-quality ingredients makes a noticeable difference in texture and flavor. Ripe bananas provide natural sweetness and a gentle banana aroma that shines in the filling; underripe bananas can be chalky, while overripe ones may be too sweet or brown. For a dairy-free option, swap traditional cream cheese and whipped cream for coconut cream-based substitutes and a dairy-free cream cheese substitute. If gluten is a concern, use gluten-free cookies or almond meal to form the crust. For sweetness control, consider using a lighter sugar amount in the crust and a stabilized whipped topping with a small amount of sugar or honey. Bake In Oven analysis shows that banana-forward desserts resonate with home bakers and can be adjusted to suit seasonal availability and dietary preferences while preserving the signature flavor.
Equipment and Prep Steps
A smooth no bake banana split cake hinges on having the right tools and a clean workspace. Essential items include a springform pan or rectangular dish for easy unmolding, a food processor or heavy-duty zip-top bag for crushing cookies, a mixing bowl for filling, a spatula for smoothness, and a whisk for topping. Line your pan with parchment to prevent sticking and for easy removal. Pre-measure ingredients to streamline assembly, and have a cooling rack ready if you’re chilling a crust that needs to set before filling. The prep stage is quick but benefits from organization, so you can assemble layers efficiently and maintain clean lines between components.
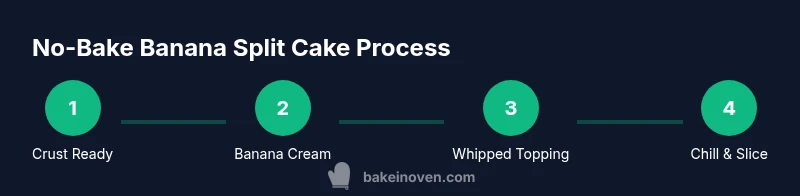
Assemble and Chill: Step-By-Step Overview
The key to a clean, sliceable no bake banana split cake is layering with intention and chilling long enough for the layers to set. Start with a compact crust, followed by a thick, creamy banana filling, then a generous whipped topping. Add fresh banana slices and finishing touches just before serving. The chilling step is not optional; it ensures the cake holds its shape when sliced and prevents the layers from sliding. In the next sections you’ll find a detailed step-by-step guide that walks you through each action with practical tips and timing cues.
Troubleshooting Common Issues
If your crust crumbles when you lift the cake, press it more firmly into the pan and chill briefly before adding filling. A runny filling usually signals too much liquid or insufficient setting agents; in that case, fold in a little extra whipped cream or cream cheese to stabilize. If bananas oxidize and brown too quickly, brush the slices with a light lemon juice solution to slow browning. For a crust that feels too soft, chill it longer or press with a flat object to compact further. Remember: accuracy with measurements and patience during chilling are your best allies in achieving a clean, even slice.
Safety, Hygiene, and Storing Leftovers
Follow basic kitchen hygiene: keep dairy products refrigerated until use, wash fruits before slicing, and sanitize surfaces between steps to prevent cross-contamination. Once assembled, cover the cake tightly and refrigerate for at least 2 hours, preferably longer, to allow the layers to set. Leftovers can be stored in the fridge for 3–4 days or frozen for longer storage, though freezing may slightly alter texture. If you plan to serve later, slice the cake while cold and re-chill slices for best presentation.
Tools & Materials
- 9x13 inch pan or springform pan(Choose a size that allows a comfortable crust-to-filling ratio; parchment lining helps removal)
- Food processor or rolling pin and sturdy bag(For crushing cookies into fine crumbs; alternatives include blender or mortar and pestle)
- Mixing bowls (2+)(One for crust mixture, one for filling and topping)
- Spatula and whisk(Spatula for leveling; whisk for smooth mixing and air incorporation)
- Measuring cups/spoons(Essential for accurate proportions of ingredients)
- Parchment paper or parchment sheets(Line the pan for easy release and clean slices)
- Plastic wrap or lid for chilling(Prevent odors and moisture loss while setting in fridge)
- Knife and cutting board(Slice bananas and portion the finished cake)
- Mixing spoon or spatula for layering(Helps create clean, defined layers)
- Refrigeration space(A cool fridge or chilled environment is essential for setting)
Steps
Estimated time: 2 hours 45 minutes
- 1
Prepare crust
Pulse cookies into fine crumbs and mix with melted butter until the mixture resembles wet sand. Press firmly into the prepared pan to form an even base. Chill briefly to set the crust before adding filling.
Tip: Use a flat-bottomed glass to press the crust evenly for a uniform layer. - 2
Make banana cream filling
In a bowl, blend softened cream cheese (or dairy-free alternative) with mashed ripe bananas and a splash of vanilla. Lightly fold in whipped cream to create a creamy, airy texture for easy spreading.
Tip: Avoid over-mixing to keep the filling light and fluffy. - 3
Whip topping
Whip cream with a touch of sugar and vanilla until soft peaks form. Stabilize with a teaspoon of gelatin or a small amount of cream cheese if you want longer hold.
Tip: Chill the bowl and beaters for a few minutes before whipping to achieve better volume. - 4
Layer crust and filling
Spread the banana cream evenly over the crust, smoothing the surface. Create a clean boundary between crust and filling by using a spatula to seal the edges lightly.
Tip: Work quickly but gently to avoid disturbing the crust's edge. - 5
Add banana slices and toppings
Arrange banana slices in a decorative arc or grid pattern atop the filling. Drizzle with caramel or chocolate if desired and finish with a thick layer of whipped topping.
Tip: Dip sliced bananas in lemon juice to minimize browning if arranging in advance. - 6
Chill until set
Cover and refrigerate for at least 2 hours, preferably 4–6 hours or overnight for best sliceability. This step allows the layers to firm up and hold their shape when cut.
Tip: If you’re in a hurry, freeze for 1–2 hours to set more quickly, then refrigerate before serving. - 7
Serve and store leftovers
Slice with a warm knife for clean cuts. Serve chilled and store any leftovers in the fridge, tightly covered, for up to 3–4 days.
Tip: Wipe the knife between slices to keep edges neat.
Frequently Asked Questions
Can I bake this cake or is it strictly no-bake?
This recipe is designed as a no-bake cake that relies on chilling to set. Baking would alter the texture and is not recommended for this specific method.
This recipe is no-bake and relies on chilling to set the layers.
Can I make this ahead of time?
Yes. You can assemble the crust and filling a day in advance and refrigerate, then finish with toppings and chilling just before serving.
Yes, you can assemble ahead and finish with toppings before serving.
What bananas work best for the filling?
Use fully ripe to very ripe bananas for maximum sweetness and smooth texture in the filling.
Ripe bananas are ideal for sweetness and texture.
Are substitutions allowed if I’m dairy-free?
Absolutely. Use dairy-free cream cheese and whipping cream alternatives; coconut cream works well as a substitute.
Yes, dairy-free options work great with coconut cream and plant-based cream cheese.
How long does the cake keep in the fridge?
Leftovers can be stored up to 3–4 days in a covered container in the fridge. For longer storage, freeze for best results.
Store in the fridge for 3 to 4 days, or freeze for longer.
Can I add caramels or chocolate sauce on top?
Yes. A caramel drizzle or chocolate sauce adds flavor depth. Drizzle just before serving to keep topping texture intact.
Drizzle caramel or chocolate right before serving for best texture.
Watch Video
Key Takeaways
- Chill layers thoroughly for clean slices.
- Choose ripe bananas for best flavor and texture.
- Prepare crust with evenly pressed crumbs for stability.
- Customize with toppings for personal preference and dietary needs.