How to Bake Dry Clay: A Complete Step-by-Step Guide
Learn how to bake dry clay safely and effectively. This educational guide covers prep, baking, cooling, finishing, and troubleshooting for durable, professional-looking clay projects.

According to Bake In Oven, you can bake dry clay to a hard, durable finish by using an approved oven-bake formula or letting air-dry clay fully set before finishing. Key requirements include a clean, dry workspace, accurate temperature control, and following the clay’s manufacturer guidelines. Preheat to the recommended temperature (usually around 265–275°F / 130–135°C) and bake until fully hardened, then cool completely.
Understanding Dry Clay and Curing Methods
Dry clay encompasses both oven-bake formulas and air-dry formulations, each with its own curing mechanism. Oven-bake clays require heat to cross-link and harden, producing durable pieces that resist bending. Air-dry clays harden over time as their binders set, but may remain more porous and susceptible to moisture. For many crafters, the goal is to bake dry clay into a durable piece that can be finished with paints and sealants. According to Bake In Oven guidance, always start by confirming the clay type and its recommended curing method. This ensures you choose the correct temperature, bake time, and handling steps to avoid cracks or warping. Keep in mind that thick pieces and thin edges cure differently, so plan your design accordingly. The term “bake dry clay” is commonly used in hobby projects, and following the right method will yield the best results with minimal cleanup.
Choosing the Right Clay and Firing Guidelines
Choosing the right clay is foundational. Oven-bake clays (polymer clays) come with explicit baking temperatures and times on the packaging. Air-dry clays, while not baked, still require proper drying conditions to prevent cracking. Always read the label and stick to the manufacturer’s recommendations. Consider piece thickness, pigment choices, and whether you’ll add paints or finishes after curing. In general, keep thinner sections well-supported to avoid sagging during curing. Bake times vary with thickness; smaller pieces cure quickly, while larger items need longer exposure to heat. Bake dry clay properly by aligning your design with the clay’s guidelines and testing a small sample first if you’re unsure. Bake In Oven emphasizes verifying temperature accuracy and avoiding deviations that can cause cracking or discoloration.
Prep Work: Surfaces, Tools, Safety, and Brand Guidance
A clean, flat workspace is essential. Use parchment paper or a silicone mat to prevent sticking and to simplify cleanup. Line a sturdy baking sheet and place a cooling rack nearby for even airflow after curing. Safety matters: work in a well-ventilated area, especially if you’re painting or sealing after baking. Have an accurate oven thermometer to verify that your oven actually reaches the target temperature, as many home ovens run hotter or cooler than labeled. Bake In Oven notes that confirming these details reduces the risk of undercured or overbaked pieces and helps you reproduce results consistently. Keep utensils and tools clean to avoid introducing dust or oils to surfaces that will be baked.
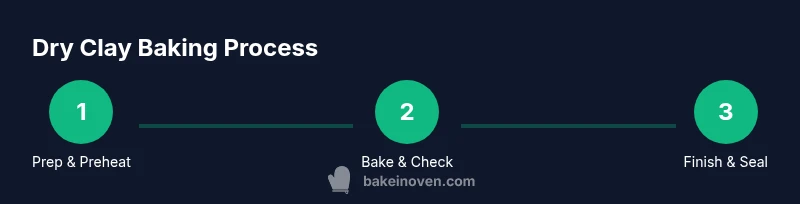
Step Overview (What to Expect)
Before you begin, gather your materials and set up your workspace. Expect the process to involve prep, baking, cooling, and finishing. The exact timing depends on piece size and clay type. You’ll check the piece for doneness by hardness rather than a clock, then allow a full cooling period before sanding or sealing. This overview is designed to give you a solid roadmap so you can approach each project with confidence. Remember, patience yields stronger, more durable results when bake dry clay.
Finishing and Maintenance
After cooling, you can lightly sand any rough edges for a smoother appearance. If you plan to paint, ensure surfaces are fully dry before applying sealants. Sealants (acrylic or polymer varnish) can improve moisture resistance and color longevity, especially on pieces exposed to moisture or handling. When sealing, apply in thin layers and allow each coat to dry completely. Store finished pieces in a dry, dust-free environment. Regular maintenance includes cleaning with a soft brush and re-sealing as needed to maintain vibrancy and protection.
Troubleshooting Common Issues
Cracks can form if the piece is too thick, overheated, or cooled too quickly. Warping occurs with uneven heat distribution or improper support; ensure pieces lay flat and heat circulates evenly. If a piece remains tacky, it may need longer curing time or a second bake at a lower temperature, depending on the clay type. Discoloration often results from overheating or chemical interactions with paints or sealants. Always test finishes on a small sample before applying to your main piece to avoid ruining your project.
Tools & Materials
- Oven (conventional home oven)(Set to manufacturer-recommended temp for your clay)
- Oven-safe baking sheet(Line with parchment paper to avoid sticking)
- Parchment paper or silicone mat(Prevent sticking and fumes)
- Cooling rack(Cool pieces evenly after baking)
- Fine-grit sandpaper (600-1000 grit)(Smooth edges after cooling)
- Acrylic sealant or varnish(Protect finish after curing)
- Clay-specific tools (loop tools, cutters)(Shape pieces cleanly)
- Oven thermometer(Verify oven accuracy)
Steps
Estimated time: 60-90 minutes
- 1
Read clay instructions and preheat
Check the clay’s label for the correct baking temperature. Preheat your oven to that temperature and prepare your workspace.
Tip: Always verify the clay’s guidelines before baking. - 2
Prepare workspace and baking sheet
Line a baking sheet with parchment paper and set up a clean, dust-free area.
Tip: Keep your workspace dry and dust-free to prevent surface imperfections. - 3
Position pieces with space
Arrange clay pieces on the sheet with at least 1/4 inch (6 mm) of space between them to prevent sticking or uneven baking.
Tip: Spacing ensures even heat distribution. - 4
Bake until hard to the touch
Place pieces in the oven and bake per manufacturer guidance. Check hardness by pressing gently with a fingertip.
Tip: Do not overbake; overbaking can cause cracking or discoloration. - 5
Cool completely on a rack
Remove from oven and cool on a rack until room temperature. Do not handle while hot.
Tip: Cooling is essential to prevent warping. - 6
Finish with sanding and sealing
Lightly sand rough edges and apply a sealant for durability.
Tip: Seal for moisture resistance and color retention.
Frequently Asked Questions
What is dry clay and how does it cure?
Dry clay can harden either by baking in a home oven (oven-bake clay) or by air-drying, depending on the product. Always follow the label for curing methods and temperatures.
Dry clay hardens either with heat or by air-drying, depending on the product, so check the label.
Can all clays be baked in a home oven?
Only clays labeled for oven-baking should be used in a home oven. Read the manufacturer’s directions and avoid regular modeling clays not designed for heat.
Only oven-bake clays should be baked at home; read the directions carefully.
How do I know when it's fully baked?
A piece is fully baked when it feels hard to the touch and does not indent under gentle pressure. If in doubt, follow the product’s suggested time and temperature.
It should feel hard to the touch when it's done.
Is it safe to bake clay with paints or sealants?
Paints and sealants may require additional curing times or separate steps. Use products labeled for bake-safe use and ensure proper ventilation.
Use bake-safe paints and sealants and vent the area.
Can I bake multiple pieces at once?
Yes, as long as there’s adequate space between pieces for even heat distribution and you maintain the correct oven temperature.
Yes—just give each piece room to heat evenly.
How should I finish baked clay?
Lightly sand rough edges and apply an appropriate sealant for durability and moisture resistance.
Sand edges and seal to protect the finish.
Watch Video
Key Takeaways
- Check clay instructions and temperature before baking.
- Space pieces evenly to prevent sticking and uneven heat.
- Bake until hard to the touch, then cool completely.
- Seal baked pieces to improve durability and moisture resistance.
- Bake dry clay safely, per Bake In Oven guidance.