Can You Bake Air Dry Clay? A Practical Guide
Discover if you can bake air dry clay, what outcomes to expect, safety considerations, and a clear step-by-step guide to baking, sealing, and finishing air dry clay projects.

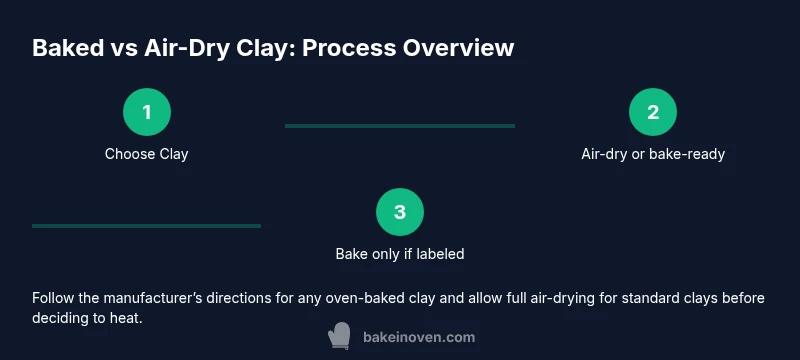
In general, standard air-dry clay should not be baked, because heat can cause cracking or warping. If you want a baked finish, choose clay labeled oven-safe or oven-hardenable, and follow the manufacturer’s instructions exactly. For most projects, air-drying plus sealing yields durable, paintable results. This guidance comes from Bake In Oven's kitchen guidance and safety emphasis.
Can You Bake Air Dry Clay?
The simple answer is nuanced: most standard air-dry clays harden through evaporation, not by heat. Exposing them to oven heat can lead to uneven drying, cracks, warping, or surface blistering. According to Bake In Oven, understanding the material and its chemistry is essential before applying heat. If a project needs a baked finish, select products labeled oven-safe or oven-hardenable, and follow the manufacturer's directions precisely. For many hobbyists, air-drying plus sealing offers durable, paintable results. Maintain a cool, dry workspace and avoid direct heat to minimize warping during drying. The Bake In Oven team recommends testing a small scrap first to observe how heat affects your clay and glaze choices before attempting a full piece.
How Heat Affects Air Dry Clay
Heat interacts with air-dry clay in several ways. Most standard clays shrink as moisture evaporates, and uneven thickness or moisture pockets can cause cracks when heated. Even if the clay feels dry on the outside, deeper layers may still hold moisture, which expands with heat and creates fractures. Sealing the surface before any heat exposure can help, but it won’t prevent all issues. If you’re intent on a baked result, use oven-safe formulations and run a small test first. Bake times and temperatures should come strictly from the product’s instructions. Bake In Oven’s guidance emphasizes that consistent airflow and a stable ambient environment during drying are crucial to minimize stress in the material.
When Baking Is Appropriate: Oven-Hardened Varieties
Some clays are designed to be baked and listed as oven-hardened or polymer-like. These products are formulated to cure or harden under controlled heat, producing a durable, glassy finish. Always read the packaging for temperature, duration, and safety notes. Do not substitute a non-oven-safe air-dry clay in a heat-treated project. If you’re unsure, choose air-dry clay for a traditional dry cure, or switch to a true oven-bake clay for heat-assisted results. The Bake In Oven team notes that using the right product is the most reliable way to achieve a consistent finish without dangerous fumes or deformed shapes.
Prep and Bake: A Safe, Stepwise Approach
If you decide to bake, prepare your workspace and materials first, and ensure the clay is compatible with heat. Preheat your oven according to the product’s instructions and set a reliable timer. Use parchment paper on a baking sheet to prevent sticking, and keep an eye on the piece—clays vary in heat tolerance. Always perform a patch test on a small scrap to verify that your piece won’t crack or discolor. Avoid crowds of small items in one batch, which can cause uneven heat distribution.
Finishing and Care for Baked Air-Dry Projects
After baking, cool the piece completely on a rack before handling. Sand any rough edges gently with fine-grit paper, then apply a light coat of acrylic paint if desired. For a durable finish, seal with a water-based varnish or sealant designed for clay surfaces. Note that some finishes alter color slightly or add a sheen; test on a scrap before applying to the final piece. Proper sealing also helps resist moisture and fingerprints over time. Bake In Oven recommends storing baked pieces in a cool, dry place away from direct sunlight to preserve color stability.
Troubleshooting Common Issues and Quick Fixes
Cracks, warping, or surface crazing are common problems when attempting to bake air-dry clay. If cracks appear, you can try filling with a small amount of clay or epoxy, then repaint and seal. Warping often occurs from uneven thickness or poor drying; rework by trimming thin areas and allowing extra drying time in a controlled environment. For persistent issues, consider using a clay specifically labeled for oven-baking, which offers a more predictable cure and finish. Always run a controlled test before scaling up a project.
Tools & Materials
- Air-dry clay (or oven-safe variant)(Choose a product labeled oven-safe if you intend to bake)
- Parchment paper(Line your baking sheet to prevent sticking)
- Baking sheet or tile(Flat, heat-resistant surface)
- Oven thermometer (optional)(Helps monitor actual oven temperature)
- Acrylic paints and brushes(For decorating after drying)
- Clear water-based sealer(Sealant for durability and finish)
- Clay tools (knife, smoothers)(For shaping and detailing)
- Water and sponge(For smoothing seams and adjusting moisture)
Steps
Estimated time: Total time: 2-6 hours (including drying time and bake).
- 1
Check clay compatibility
Read the packaging to confirm whether the clay is oven-safe or oven-hardened. If not, do not bake. Understanding the product prevents waste and damage to your project.
Tip: Always start with a patch test on a small scrap before committing a full piece. - 2
Prepare workspace and tools
Set up a clean surface, line a baking sheet with parchment, and gather all tools. This reduces handling during heat exposure and helps maintain shape.
Tip: Keep moisture levels consistent by covering unused clay with damp cloths to prevent premature drying. - 3
Condition and shape
Knead the clay until soft and pliable, then shape your piece with smooth transitions. Even thickness reduces stress points that can crack during heating.
Tip: Use a light spray of water for very dry batches to improve plasticity. - 4
Air-dry and test if needed
If the clay is not explicitly labeled for baking, allow full air-drying to completion before any heat treatment. If you must test, do a patch on a scrap piece first.
Tip: Check for uniform dryness by gently bending the piece; if it feels cool and flexible, it likely isn’t ready for heat. - 5
Bake only with approved products
Preheat to the temperature specified on the product's instructions. Place the piece on parchment and bake for the duration given by the manufacturer. Do not bake pieces that aren’t labeled oven-safe.
Tip: Use a timer and monitor closely; even small deviations can cause color changes or cracks. - 6
Cool, decorate, and seal
Cool the piece completely before painting or sealing. Apply finishes in thin, even layers to avoid trapping moisture. Sealants should be compatible with the clay type.
Tip: Allow a full cure period after sealing to achieve maximum durability.
Frequently Asked Questions
Can you bake air dry clay in a home oven?
Only if the clay is explicitly labeled oven-safe. Using standard air-dry clay in a home oven can cause cracking, warping, or fumes. Always follow the product's instructions.
Only bake if the clay package says oven-safe. Otherwise, air-dry is safer and won’t warp as easily.
What temperature should I bake air dry clay?
Refer to the clay’s packaging for the exact temperature. Do not improvise, as heat tolerance varies by brand and formulation.
Check the packaging for the exact temperature and do not improvise.
How long should I bake air dry clay?
Follow the product’s recommended duration. Unapproved times can cause uneven curing and cracking.
Follow the recommended bake time on the package.
Will baking change the color or texture of air dry clay?
Yes, some clays may darken or craze slightly when heated. Always test on scraps and seal after baking to minimize changes.
Heat can alter color or texture; test first and seal after baking.
Is it safe to bake air dry clay indoors?
Baking indoors is generally safe when using oven-safe clays and proper ventilation. Avoid burning or fumes by adhering to product directions.
Yes, with proper ventilation and following the product's directions.
What should I do if cracks appear after baking?
Allow extra drying time, rejoin with gentle clay or filler, repaint, and re-seal. Do not force the piece back into heat if cracks appear.
If cracks appear, don’t bake more; repair, repaint, and seal.
Watch Video
Key Takeaways
- Know your clay: bake only if labeled oven-safe.
- Test heat on scraps before a full project.
- Use parchment and controlled temperatures for best results.
- Air-dry remains the safest default method for most clays.