Bake Kitchen Basics: A Practical How-To Guide
Learn to set up a functional bake kitchen, choose essential gear, master precise measuring and timing, and follow a reliable, step-by-step workflow for confident home baking.

You will learn how to set up a functional bake kitchen, select essential equipment, and follow a practical, step-by-step workflow to bake reliable results at home. This guide covers preheating, measuring, mixing, pan prep, and timing, plus safety tips and simple troubleshooting for common issues. By the end, you’ll bake with confidence.
Why Bake Kitchen Setup Matters
A well-designed bake kitchen reduces friction, speeds up your progress, and improves the quality of your desserts, breads, and pastries. According to Bake In Oven, the most important gains come from a thoughtfully organized space, reliable temperature control, and a workflow that minimizes back-and-forth. Start by defining a dedicated baking zone: a clean, uncluttered workspace with a nearby shelf for ingredients, a timer, and a heat-safe surface for hot pans. When you plan your bake kitchen, consider three core priorities: temperature consistency, accessible tools, and clean, safe surfaces. Preheating is critical; even brief delays can alter texture, rise, and final coloration. Clear counter space prevents accidental spills and helps you measure accurately. Food safety is essential: separate raw ingredients from finished bakes, wash hands, and store leftovers promptly. In this section you’ll learn how to map your space, select compatible appliances, and establish routines that keep your bake kitchen efficient, safe, and enjoyable, whether you’re whipping up cookies or a full loaf.
Essential Equipment for Baking in the Kitchen
To bake kitchen masterpieces, you don’t need a showroom—just the right handful of versatile tools. Start with a sturdy set of mixing bowls, measuring tools, and a reliable oven thermometer. Invest in a few quality pans and liners (parchment paper or silicone mats) that fit your oven size, plus a cooling rack to set loaves and cookies as they rest. A stand mixer or a good hand mixer helps with larger batches, while a whisk and wooden spoon handle smaller tasks. Prairie levels up: a digital scale makes precision easy for recipes that rely on grams. A timer, silicone spatulas, and a heat-resistant glove complete the core kit. With these items, you can execute most baking projects—from quick cookies to delicate chiffon cakes—without hunting for gear. As Bake In Oven emphasizes, durability and ease of cleaning matter just as much as a bright kitchen.
Ingredient Prep: Measuring, Timing, Temperatures
Successful bakes begin with precise ingredient prep. Start by weighing dry ingredients on a digital scale, then measure liquids with graduated cups. Room temperature ingredients mix more predictably; if a recipe calls for butter, let it soften evenly to avoid lumps. Bake In Oven analysis shows that consistent pre-measurement and mise en place reduce the likelihood of overmixing or underhydration. Preheat your oven to the target temperature before you begin, and confirm the dial reads properly with your oven thermometer. Keep salts and sugars separated to prevent accidental misdosings, and scale sugar sweetness using a standard approach—avoid sugar substitutes unless the recipe specifies. Finally, prepare your pans and liners in advance: parchment on sheet pans, nonstick sprays where appropriate, and a light dusting of flour for non-stick surfaces when needed. With correct temps and precise measuring, texture and rise become predictable, not guesswork.
Understanding Oven Techniques and Temperatures
Ovens come in many flavors: conventional, convection, steam-assisted, and combination units. The core rule is to preheat fully: a cold oven can lead to uneven browning and poor leavening. If you have a convection oven, reduce the recipe temperature by 20-25% or follow the manufacturer’s guidance to prevent excessive browning. Bake times can vary with rack position, pan size, and ingredient density, so use a timer and an internal thermometer when possible. The Bake Kitchen workflow benefits from knowing when to use each method: use convection for crisp edges on cookies and pies, standard bake for most cakes, and a brief steam burst for crusty bread. This section breaks down typical temperature ranges for common categories: cookies (350-375°F), cakes (325-355°F), bread (350-450°F depending on loaf), and savory items that need higher heat. Remember that oven dynamics change with altitude and humidity, so adjust based on results and keep notes in a baking journal.
Mixing Methods and Batter Consistency
Texture depths in baking arise from the mixing method. Creaming butter and sugar introduces air; sifting dry ingredients can prevent clumping; and folding versus stirring maintains the most delicate structure. Always beat wet ingredients until smooth and integrate dry ingredients gradually to avoid toughness. For cookies, average creaming times yield uniform spread; for cakes, air incorporation is critical to crumb. The Bake In Oven approach favors clarity: measure all components, mix on low speed to avoid overdevelopment, and scrape the bowl to ensure complete incorporation. If your batter looks streaky, stop and remix briefly. Temperature matters here too: too-warm butter can melt too quickly, while too-cold butter resists emulsification. When adding leavening agents, sift them with dry ingredients and distribute evenly. Finally, rest the batter if a recipe calls for it; rest allows gluten to relax and flavors to meld, yielding a more reliable bake.
Pans, Liners, and Shaping for Consistent Results
Choosing the right pan shapes and sizes directly affects bake time, texture, and even browning. Use parchment paper or silicone liners to prevent sticking; grease if required, then tap out excess to avoid slick exteriors. For uniformity, select pans that fit your oven racks with space around edges for heat circulation. Silicone molds can help with delicate shapes, while metal pans provide crisp crusts and consistent color. When filling pans, follow recipe guidance on batter depth to prevent overflow and uneven rise. Place pans on the middle rack for even heat distribution, rotate halfway through bake if the recipe calls for it, and avoid opening the door too often. Finally, store pans cleanly and dry to prevent rust and odor transfer.
Troubleshooting Common Bake Failures
Even experienced bakers encounter hiccups. A cake that falls in the center may indicate overmixing, too much leavening, or the oven being too hot; a sunken center in cookies hints at underbaking or over-pressing edges. A domed top on bread often suggests too-rapid oven temperature or insufficient scoring. If exteriors brown too quickly, use an oven thermometer to check actual vs. set temps and adjust as needed. A dry crumb means overbaking or too much flour; a dense texture can result from insufficient aeration or moisture loss. In all cases, keep notes on your oven's performance, adjust times by a few minutes, and rotate pans to ensure even exposure. Bake with patience, and use a light dusting of flour or sugar to enhance surface texture when appropriate. The key is to observe the bake and adapt for future batches.
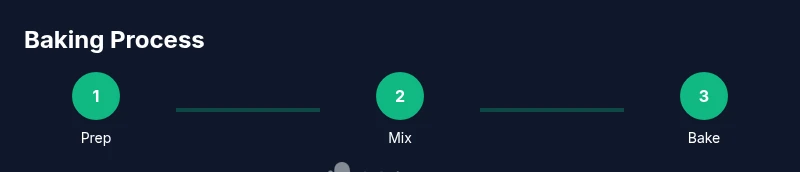
Baking Workflow: From Prep to Finish
A streamlined workflow helps you manage time and reduce stress. Begin with mise en place: gather ingredients, scale, and line up tools. Preheat the oven, prepare pans, and line up wet and dry ingredients in order. Mix dry ingredients in one bowl, wet in another, then combine just until integrated. Fill pans to the recommended depth and slide into the oven, using a timer to track the bake. Check for doneness with a toothpick or thermometer as the recipe suggests, then remove from heat when appropriate and allow to rest. Cool on racks to prevent sweating and soggy bottoms. Clean up as you go: wipe surfaces between tasks, wash utensils, and store cooled items properly. This systematic approach keeps you focused, minimizes guesswork, and improves consistency.
Bake Kitchen Safety and Clean-Up
Safety comes first in any kitchen operation. Wear heat-resistant gloves when handling hot pans; avoid loose clothing, and keep a clear path to the oven to prevent accidents. Work with dry hands when handling electrical cords and use a stable step stool for difficult-to-reach cabinets. After baking, turn off appliances, unplug mixers, and promptly clean up spills to prevent slip hazards. Clean, sanitize surfaces after raw ingredients, and store any leftover dough or batter in sealed containers in the refrigerator. A clean bake kitchen reduces contamination risk and ensures you’ll be ready for your next project quickly. Bake In Oven recommends establishing a safety checklist that covers knives, hot surfaces, and allergen cross-contact.
Storage and Storing Baked Goods
Proper storage preserves texture, moisture, and flavor. Cool bakes completely before packaging, then store in airtight containers or wrap tightly to prevent drying. For bread and cakes, slice gradually and freeze portions to extend freshness. Use parchment between layers to minimize sticking when stacking baked goods; label containers with date and contents. Understand shelf life: cookies often stay fresh for several days in an airtight container; cakes with frosting may last longer when refrigerated. If you have leftovers, reheat gently to avoid soggy or burnt edges. This section equips you to keep your bake kitchen organized, and to maintain quality for days after your first bake.
Tools & Materials
- Stainless steel mixing bowls (set of 3)(Sizes: 1, 2, 4 quarts; nested for storage)
- Digital kitchen scale(Precision to 1 g for dry ingredients)
- Measuring cups and spoons set(Metric and imperial measurements)
- Oven thermometer(Place near center rack to verify temperature)
- Parchment paper or silicone baking mats(Fits typical 9x13 and 8x8 pans)
- Silicone spatulas (set)(Heat resistant for scraping bowls)
- Wooden spoon and wire whisk(For mixing and blending without overworking)
- Stand mixer or hand mixer(Optional: speeds up large-batch mixing)
- Cooling rack(For air circulation on baked goods)
- Nonstick baking pans (various sizes)(Rectangular, round, and mini formats as needed)
- Muffin tin(For even heat distribution in individual servings)
Steps
Estimated time: 1 hour 15 minutes
- 1
Gather ingredients and tools
Collect all ingredients and ensure you have the required tools within easy reach. This minimizes interruptions and helps you follow the recipe precisely. Check that you have at least two bowls ready for dry and wet components.
Tip: Do a quick mise-en-place check to prevent mid-bake scrambles. - 2
Preheat oven and prepare pans
Turn on the oven to the recipe’s specified temperature and allow it to come to temperature before mixing. Line pans with parchment or silicone mats to prevent sticking and set up cooling racks nearby for post-bake resting.
Tip: Use an oven thermometer to confirm your oven actually reaches the target temperature. - 3
Mix dry ingredients
Whisk dry ingredients together until evenly distributed. Sift if the recipe calls for it to remove lumps and ensure leavening agents are evenly incorporated.
Tip: Sifting prevents density pockets that can affect rise. - 4
Cream butter and sugar
If your recipe uses butter, cream it with sugar until pale and fluffy to introduce air for a lighter texture. This step helps with volume and crumb structure.
Tip: Avoid over-creaming; stop when the mixture looks smooth and slightly pale. - 5
Combine wet ingredients
Whisk wet ingredients separately, then gradually add to the dry mixture. This reduces gluten development and helps maintain tenderness.
Tip: Add liquids in intervals to maintain emulsion and prevent curdling. - 6
Fold in dry ingredients
Gently fold the dry mixture into the wet until just combined. Over-mixing can develop gluten and produce a tougher bake.
Tip: Stop as soon as you don’t see dry streaks. - 7
Fill pans and bake
Divide batter evenly, level the surface, and slide into the oven. Use the timer and, if possible, a thermometer to check doneness.
Tip: Rotate pans halfway if your oven heats unevenly. - 8
Cool and store
Remove from oven, rest on a rack, and allow cooling before slicing or storing. Proper cooling prevents condensation and sogginess.
Tip: Store baked goods in airtight containers to maximize freshness.
Frequently Asked Questions
What is a bake kitchen and why is it important?
A bake kitchen is a dedicated space optimized for oven-based cooking, with proper temperature control, essential tools, and a streamlined workflow. It helps you achieve consistent results and reduces the guesswork involved in baking projects.
A bake kitchen is a dedicated space optimized for oven-based baking, helping you get consistent results every time.
What essential tools do I need to start baking at home?
Essential tools include mixing bowls, measuring tools, an oven thermometer, parchment or silicone liners, baking pans, a cooling rack, and a basic mixer. These items enable most standard recipes to be prepared reliably.
You’ll need bowls, measuring tools, an oven thermometer, parchment or silicone liners, pans, a cooling rack, and a mixer to start baking.
How should I choose oven temperature for different baked goods?
Different baked goods require different temperatures to achieve proper texture. Cakes typically bake at lower, steady temperatures; cookies may require higher heat for crisp edges; bread often benefits from higher initial heat followed by a reduction. Always preheat and use an oven thermometer for accuracy.
Choose temperatures based on the product—cakes lower, cookies a bit higher, bread with hotter start; preheat and trust a thermometer.
What are common bake problems and how can I fix them?
Common problems include sinking centers, domed tops, and uneven browning. Solutions involve accurate measuring, proper mixing, correct oven temperature, and rotating pans for even heat. Take notes to adjust future batches.
If a bake sinks or browns unevenly, check your measurements and oven temp, and rotate pans next time.
Is parchment paper necessary for baking?
Parchment paper or silicone liners prevent sticking and facilitate cleanup. They’re especially helpful for cookies, cakes, and delicate pastries. Use parchment to maintain clean edges and even cooking.
Parchment helps prevent sticking and makes cleanup easier.
How long should baked goods cool before storing?
Most baked goods should cool on a rack until they reach room temperature before storage. Cooling prevents condensation and sogginess, preserving texture and flavor.
Let baked goods cool completely before storing to keep their texture.
Watch Video
Key Takeaways
- Set up a dedicated bake kitchen early for consistency
- Preheat accurately and measure precisely for reliable textures
- Use appropriate pans and liners to ensure even browning
- Keep a baking journal to track temps, times, and outcomes
- Bake safely, cleanly, and with organized workflow every time