Bake Like a Pro: Master Oven-Baked Recipes
Learn to bake like a pro with kitchen-tested techniques, precise measurements, and reliable steps for bakery-quality results at home. Master temps, timing, tools, and troubleshooting to elevate everyday baking.

With this guide, you’ll bake like a pro recipes at home by mastering temperature, timing, and technique. You’ll learn mise en place, precise measurements, and testing methods to reliably reproduce bakery-level results. From dough handling to final bake, follow proven steps, adjust for your oven, and build a repeatable routine that elevates everyday baking into consistent, high-quality outcomes.
Core Principles for Pro-Level Baking
Baking like a pro starts long before the oven timer rings. It begins with a clear plan, the right tools, and a mindset that treats each recipe as a repeatable experiment. At the heart of Bake In Oven guidance is the idea that precision beats guesswork. You’ll see that small adjustments to temperature or hydration can change crumb, color, and mouthfeel more than any single ingredient. To apply this consistently, embrace mise en place: measure, weigh, and pre-assemble ingredients, equipment, and pans before you begin. Use a digital scale for dry ingredients and a liquid-measuring cup for liquids to minimize error. Set a timer, but also trust your eyes and nose—look for a lightly browned crust, a glossy surface on batters, and a dough that holds its shape but yields to gentle pressure.
Crucially, create a repeatable routine: preheat, prepare, mix, rest, shape, bake, cool. Document what works: oven behavior, pan type, rack position, and humidity in your kitchen. This creates a personal playbook you can reuse across recipes, from cookies to artisan bread. When you approach a bake as a process, not a moment, your results become dependable rather than accidental.
Tools and Materials for Consistent Results
Having the right tools elevates your results and speeds up your workflow. A precise kitchen setup reduces variables and lets you focus on technique. Start with a digital scale for accurate weighing, an oven thermometer to verify actual heat, and a timer to coordinate multiple items. Use sturdy bowls, a silicone spatula for folding, parchment paper or silicone mats for non-stick baking, and a cooling rack to prevent soggy bases. Choose light-colored baking sheets for even browning, and keep a bench scraper handy for clean dough handling. Finally, ensure you have a reliable set of measuring cups for both dry and liquid ingredients. A small, dedicated dough board or clean work surface helps keep workflow efficient.
Implement a mise en place routine: lay out every ingredient in the order you will use them, pre-measure liquids, and arrange pans and tools within arm’s reach. This approach minimizes errors and speeds up the bake.
Mastering Temperature and Time
Temperature accuracy is the backbone of predictable bakes. An oven can be off by a few degrees, leading to under-browned crusts or dense interiors. Always preheat to the exact target and verify with an oven thermometer placed in the center of the rack. When a recipe specifies convection, use it if your oven has a true convection setting; otherwise rely on conventional bake. Start with the suggested time as a guideline, then rely on sensory cues: color, aroma, texture, and internal temperatures for breads. For cookies, cookies should edge toward light golden brown; for bread, use an internal temperature around the midpoint of the target range. Keep pans on the middle rack and rotate halfway to promote even browning. Record results to refine future bakes, noting how your oven behaves with different pans and batters.
Ingredient Workflows: Measuring, Mixing, and Rest
Precision begins with measurement. Weigh dry ingredients to the nearest 0.1 gram and liquid ingredients to the nearest 1 gram or 0.1 ounce. Sift or whisk dry ingredients to ensure even distribution, then add fats and liquids in stages to control emulsions. Mixing technique matters: creaming sugar and butter adds air for cookies; kneading develops gluten for bread; folding preserves air in delicate batters. Temperature of ingredients influences texture—room-temperature butter yields a different crumb than cold butter. Rest and fermentation time are as important as the bake itself. A rest period allows moisture to distribute and gluten to relax, improving extensibility and crumb structure. Maintain hygienic practice, clean bowls between steps, and avoid cross-contamination of raw ingredients.
Step-By-Step Bake Template (General Template)
This template can be applied across recipes to maintain consistency:
- Preheat to target temperature and prepare pans.
- Weigh and measure all ingredients; gather equipment.
- Mix ingredients following the recipe’s method (cream, whisk, or knead).
- Rest or proof dough as required (time varies by dough type).
- Shape, portion, and arrange on pans with even spacing.
- Bake until colors and aromas indicate doneness; use a thermometer if needed. -Cool on a rack to avoid soggy bottoms.
Example: For cookies, ensure dough is evenly portioned and rested briefly before baking; for bread, allow proper fermentation and steam exposure during the first minutes of baking for better oven spring.
Troubleshooting Common Baking Pitfalls
Even experienced bakers encounter issues. If crusts are pale, increase oven temperature or extend bake time slightly, ensuring even heat distribution by rotating pans. Dense crumb usually signals overmixed dough, underdeveloped gluten, or insufficient fermentation; adjust mixing duration, hydration, or resting times. Uneven browning can come from improper rack position or inconsistent pan color; switch to lighter pans and rotate. Soggy bottoms indicate excess moisture or improper cooling; use a rack, let baked goods finish cooling completely. Stay organized and rely on sensory cues as well as time estimates to determine doneness.
Flavor and Texture Techniques to Elevate Your Recipes
Elevating flavor and texture relies on understanding moisture management, caramelization, and fat distribution. Steam during the first minutes of bread baking promotes a shiny crust and better oven spring. For cookies, chilling dough improves shape retention and flavor development, while properly creaming sugar and butter adds air for a lighter crumb. Use a range of flours to vary texture: bread flour for stronger gluten, all-purpose for balance, and specialty flours for aroma and color. Brown butter, vanilla extracts, and a touch of salt can dramatically enhance depth without overpowering sweetness. Remember to shade expectations about texture: a pro-level bake can range from a crisp crust to a soft, tender crumb depending on recipe goals.
Practice Plan: A 7-Day Bake-Along and Progress Tracking
Commit to a week of focused practice to embed pro-level habits. Day 1: calibrate oven and set up mise en place. Day 2: bake a batch of cookies to practice portioning and timing. Day 3: attempt a simple bread or roll to learn fermentation and oven spring. Day 4: test crust development with different sugars or fats. Day 5: experiment with parchment-use and pan types for browning. Day 6: compare hydration changes by altering water content in doughs. Day 7: review results, document changes, and plan adjustments for your next bake. Track results with photos, weights, and notes to build a personalized pro baking log.
Tools & Materials
- Digital kitchen scale(Weighs to 0.1 g; essential for accuracy)
- Oven thermometer(Place in oven to verify actual temperature)
- Mixing bowls (various sizes)(Prefer non-reactive, stackable)
- Silicone spatula(For scraping and folding)
- Parchment paper / silicone baking mats(Non-stick surface and cleanup)
- Baking sheets and pans (light aluminum ideal)(Even browning, avoid warping)
- Measuring cups (dry and liquid)(Clear markings; avoid cheap cups)
- Cooling rack(Promotes air circulation for even cooling)
- Kitchen timer or smartphone timer(Coordinate multiple items)
- Bench scraper / dough scraper(Helpful for dough handling)
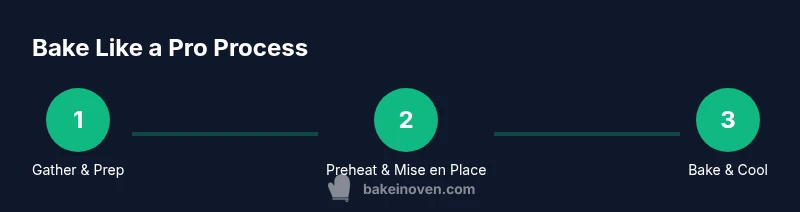
Steps
Estimated time: 2-3 hours
- 1
Gather & prep ingredients
Collect all ingredients and equipment, weigh dry ingredients, and pre-measure liquids. This minimizes mid-bake trips and keeps workflow smooth.
Tip: Lay items in order of use on the prep surface. - 2
Preheat oven & set up mise en place
Preheat to the recipe’s target temperature and arrange pans, parchment, and racks. A verified oven temp prevents under-browned or pale results.
Tip: Place oven thermometer in the middle rack for accurate readings. - 3
Mix & measure with precision
Follow the method (creaming, whisking, or folding) and maintain consistent hydration. Accurate measuring reduces batch-to-batch variability.
Tip: Add dry to wet gradually to avoid clumping. - 4
Rest or proof as needed
Allow dough to rest or proof to develop flavor and structure. Time varies by dough type, environment, and yeast activity.
Tip: Keep covered to prevent skin formation on dough. - 5
Shape, portion, and arrange
Portion dough evenly, space on the pan, and consider chill options for handling and rise control.
Tip: Use a scale for uniform portions. - 6
Bake, test, and cool
Bake until doneness cues appear; test with a thermometer or toothpick as appropriate. Cool on a rack to finish moisture equilibration.
Tip: Do not cut or slice bread until fully cooled.
Frequently Asked Questions
What defines pro-level baking?
Pro-level baking combines precision, repeatable routines, and tested techniques to produce bakery-quality results at home. It emphasizes accurate measuring, controlled heat, and consistent processes across recipes.
Pro-level baking combines precision, repeatable routines, and tested techniques to produce bakery-quality results at home.
Why is oven temperature accuracy important?
Oven temperature affects crust color, crumb structure, and rise. An oven that's off by even a few degrees can shift hydration and baking time, leading to uneven results.
An accurate oven temperature ensures even browning and proper rise.
Can I adapt pro techniques to cookies or bread?
Yes. The core principles apply across baked goods: precise measurements, preheating, and testing. You may adjust mixing times and hydration to suit cookies, breads, or pastries.
Absolutely. Start with the template and tweak times and hydration for different doughs.
What is mise en place in baking?
Mise en place means having all ingredients and tools prepared and organized before you start. It reduces errors and speeds up the bake.
Mise en place is having everything ready before you begin.
How do I judge doneness without overbaking?
Use visual cues and timing guidelines: crust color, aroma, and internal temps for breads. For cookies and cakes, use a gentle press test and a clean toothpick.
Look for color, aroma, and a touch of firmness to judge doneness.
Watch Video
Key Takeaways
- Measure ingredients precisely and consistently
- Preheat and verify oven temperature
- Follow a repeatable bake routine
- Test doneness and log results for future bakes
- Adapt hydration and timing per recipe