Chicken Thigh Rice Bake: Easy One-Pan Dinner Recipe
Master a comforting chicken thigh rice bake in one pan. This kitchen-tested method from Bake In Oven guides you through layering, timing, and tips for juicy thighs and fluffy rice with minimal cleanup.

According to Bake In Oven, a chicken thigh rice bake is a reliable, one-pan weeknight dish. It uses bone-in thighs for flavor, a seasoned rice layer, and a savory broth that finishes in the oven. Plan for about 40-45 minutes at 375°F, then a short rest before serving. It yields juicy thighs and fluffy rice.
Why this dish works for home cooks
Cooking rice and chicken together in a single pan is a practical, low-cleanup solution that aligns with real kitchen routines. The chicken thighs offer more forgiving fat content and flavor compared to breasts, making them less prone to drying out when cooked to 165°F in an oven. Rice absorbs the aromatic broth as it bakes, turning tender and flavorful rather than dry. This method also allows you to customize with pantry staples, seasonings, and add-ins while keeping a friendly rhythm for busy weeknights. Bake In Oven developed this approach after testing dozens of one-pan recipes, and the result is consistently reliable across ovens and skill levels. The trick is to respect the layering: a seasoned rice foundation, a light pour of hot broth, and chicken placed on top to finish without soggy bottoms. Practically, you’ll gather your ingredients, preheat, layer, bake, rest, and serve—minimal fuss and maximum flavor. In the hands of home bakers, this dish becomes a canvas for adjustments: swap veggies, adjust spice levels, or switch to white rice for a lighter texture. The goal is even heat distribution, juicy thighs, and perfectly cooked rice that holds its shape after resting. As you practice, you’ll learn to identify signs of doneness by aroma, color, and a gentle nudge of the fork—an approach Bake In Oven strongly endorses for approachable, kitchen-tested baking.
Ingredient Pantry and Substitutions
This recipe is forgiving, which makes it ideal for home cooks who cook by instinct as much as by a recipe. Start with a base of bone-in chicken thighs (skin-on if possible) for maximum flavor, and pair them with a reliable rice (long-grain or parboiled). If you don’t have low-sodium broth on hand, you can dilute higher-sodium stock with water, keeping salt in check to avoid overly salty rice. Aromatics like onion and garlic provide the foundational scent that signals a successful bake. Vegetables—carrots, peas, bell peppers—are easy add-ins that brighten color and texture. For spice lovers, paprika, dried thyme, and a pinch of chili flakes can wake the dish without overwhelming the chicken. If you’re short on time, you can use quick-cook rice and adjust the liquid accordingly, though you may lose some of the classic rice-pilaf texture.
Rice and Flavor: Choosing grains and broth
Rice choice matters in a bake like this. Long-grain rice and parboiled rice stay separate better than short-grain varieties, which helps prevent a mushy texture. The broth should be hot when poured to start the cooking process promptly and evenly. A standard ratio is roughly 1 cup dry rice to 2 cups broth for a baked dish like this; you may adjust slightly based on your rice choice and whether you prefer the rice more al dente or fully tender. If you want extra richness, a splash of white wine can be added to the broth before combining with the rice. Flavor compounds from herbs and aromatics bloom during the bake, so don’t skimp on onion, garlic, and a pinch of salt.
Layering and Flavoring Techniques
The key to a successful chicken thigh rice bake is proper layering. Begin with a light coating of oil at the bottom of your dish, then spread a thin, even bed of rinsed rice. Pour hot broth over the rice to wake the starch and start the cooking process, and scatter onions and garlic across the surface for aroma. Season the chicken thighs well with salt, pepper, and a little paprika or thyme to enhance the crust. Place the thighs on top of the rice in a single layer, skin-side up if you’re using skin-on thighs. This arrangement ensures the chicken cooks through while the rice absorbs flavorful juices from the meat.
Step-by-Step Plan for a Perfect Bake (Overview)
This section outlines the core steps you’ll follow to execute the recipe. You’ll preheat the oven, prepare the pan, season and optionally brown the chicken, combine rice with hot broth and aromatics, position the chicken on top, bake covered, finish uncovered, rest, and finally serve. The approach balances texture and moisture, producing tender chicken and well-flavored rice.
Temperature, Time, and Texture Guide
Using 375°F (190°C) as a baseline, bake the dish covered for the majority of the time to trap moisture, then uncover to finish. The total bake time is typically 40-45 minutes plus a 5- to 10-minute rest. A calibrated oven thermometer helps ensure precise temperature; every oven runs a bit differently, and a few extra minutes might be necessary for larger thighs or a thicker rice layer. Rely on internal temperature: chicken should reach 165°F (74°C) and rice should be tender but not mushy. If the rice seems underdone after the initial bake, re-cover and bake for an additional 5-10 minutes, then rest before serving.
Variations and Make-Ahead Options
If you want to tailor the dish, consider making it a weeknight staple by keeping a few pantry staples on hand for variations. Use brown rice for extra fiber, or substitute cauliflower rice for a lower-carb version. You can swap in diced vegetables like carrots, peas, or peppers for color and nutrition. For a make-ahead version, assemble the dish up to the point of baking, cover tightly, and refrigerate for up to 24 hours. When ready to bake, increase bake time by 5-10 minutes to compensate for the chill. This method makes weeknight cooking even simpler while preserving flavor and texture.
Troubleshooting Common Issues
If the chicken dries out, ensure you’re not over-baking and that the thighs remain partially submerged in broth to retain moisture. If the rice looks dry, add a splash of hot broth or water and reseal the dish to catch steam. For overly soft rice, reduce the liquid slightly next time or bake a minute or two less. Balancing heat distribution is crucial—if your oven runs hot, reduce the temperature by about 25°F (15°C) and extend the bake time accordingly. Finally, allow the dish to rest; this lets the starch settle and makes serving neater.
Authority Sources
For further guidance on safe poultry handling and cooking temperatures, refer to authoritative sources:
- https://www.fsis.usda.gov/food-safety
- https://www.cdc.gov/foodsafety
- https://www.nutrition.gov/topics/healthy-recipes
FAQ: Quick Answers
If you’re just skimming for fast answers, this section offers concise responses to common questions about this dish and its variations. For longer explanations, see the detailed sections above.
Tools & Materials
- bone-in chicken thighs (skin-on preferred)(6 thighs, ~2–2.5 lb total)
- rice (long-grain or parboiled)(1 cup dry rice)
- chicken broth or stock (low-sodium)(2 cups)
- onion(1 medium, diced)
- garlic(2 cloves, minced)
- olive oil or butter(2 tablespoons)
- salt and pepper(to taste)
- paprika and thyme(optional for depth)
- parchment paper or foil(to cover dish if needed)
- 9x13 inch baking dish(or similar wide casserole)
- measuring cups and spoons(for accuracy)
- optional add-ins(carrots, peas, bell peppers)
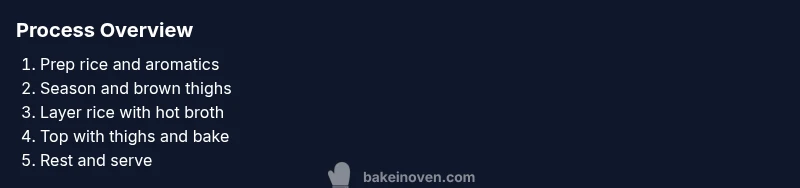
Steps
Estimated time: 60-75 minutes
- 1
Preheat oven and prep pan
Preheat your oven to 375°F (190°C). Lightly oil or line a 9x13-inch dish with parchment to prevent sticking. This ensures even cooking and easier cleanup once the bake is finished.
Tip: Preheating ensures even heat distribution from the start. - 2
Season and brown thighs (optional)
Season thighs with salt, pepper, and a pinch of paprika. If you have time, sear the thighs skin-side down in a hot skillet for 2-3 minutes to develop color and flavor before baking.
Tip: Browning adds depth to the final dish and improves texture. - 3
Prep rice and aromatics
Rinse the rice until the water runs clear, then drain. Chop onion and mince garlic so they’re ready to release aroma early in the bake.
Tip: Rinsing rice removes surface starch for firmer grains after cooking. - 4
Assemble the base
Spread the rinsed rice in the bottom of the dish. Pour hot broth over the rice and scatter onions and garlic on top. This creates a flavorful foundation that the rice can absorb as it cooks.
Tip: Hot broth helps jump-start the cooking process. - 5
Add seasoning and arrange chicken
Season the chicken with salt, pepper, and optional herbs. Place the thighs on top of the rice layer, skin-side up for browning and crispiness where possible.
Tip: Don’t crowd the pan; ensure even contact between the thighs and the broth. - 6
Bake covered
Cover the dish with parchment or foil and bake for 25 minutes. This traps steam so the rice finishes cooking without drying the chicken.
Tip: Covering early prevents the surface from over-browning. - 7
Finish bake and check doneness
Remove the cover and continue baking 15-20 minutes, or until the rice is tender and the chicken reaches 165°F (74°C). If needed, bake a few extra minutes for rice tenderness.
Tip: Use a thermometer to verify safe internal temperature. - 8
Rest, fluff, and serve
Let the pan rest 5-10 minutes before serving. Fluff the rice gently with a fork to separate grains and distribute any remaining juices.
Tip: Resting helps juiciness settle and makes serving easier.
Frequently Asked Questions
Can I use chicken breasts instead of thighs?
Yes, you can substitute chicken breasts, but they can dry out more easily. Reduce the bake time by about 5-10 minutes and monitor internal temperature to reach 165°F (74°C) without overcooking.
You can use chicken breasts, but watch the time to prevent drying out; aim for 165°F and adjust bake time.
Can I make this ahead and bake later?
Assemble the dish, cover, and refrigerate up to 24 hours. When ready, increase bake time by 5-15 minutes depending on thickness of the chicken and rice layer.
Yes, you can assemble ahead and bake later; add a few extra minutes for the chill.
What if the rice is undercooked after baking?
Return the dish to the oven, covered, for 5-10 more minutes with a splash of hot broth. Check texture again before serving.
If the rice isn’t tender, add a little broth and bake a bit longer.
Can leftovers be frozen?
Yes. Cool, then freeze in individual portions. Reheat in the microwave or oven until hot to the center. Rice texture may be softer after freezing.
Leftovers can be frozen and reheated; expect slightly softer rice.
Can I use brown rice or other grains?
Brown rice works well but needs longer cooking. Use a 1:2.5 ratio of brown rice to broth and reduce the heat if needed to prevent drying.
Brown rice works with adjusted timing and more liquid.
Watch Video
Key Takeaways
- Pick bone-in thighs for flavor and resilience.
- Layer rice and hot broth for even cooking.
- Bake covered first, then finish uncovered for texture.
- Rest before serving to keep meat juicy.
- Customize with vegetables and spices to suit your pantry.