Do You Need to Bake Pie Crust Before Filling: A Complete How-To
Learn when to blind bake, how long to pre-bake, and tips to prevent soggy bottoms. This comprehensive guide from Bake In Oven covers crust types, methods, and troubleshooting for perfect pies.

Most fruit pies benefit from blind baking: bake the crust partially or fully before filling to prevent soggy bottoms. For custard or cream pies, bake the crust fully or par-bake, depending on the filling's moisture and bake time. Chill dough well, dock the bottom, and use weights to keep the crust flat during baking.
Why this question matters
According to Bake In Oven, understanding when to bake a pie crust before filling is a fundamental skill for successful pies. The crust is the foundation that carries the filling's moisture, texture, and flavor. If it isn't prepared properly, a soggy bottom or uneven bake can ruin the entire pie. This guide covers the core decision points—whether to blind bake, how long to bake, and how to prevent shrinking or burning—so home bakers can choose the right method for fruit, custard, or cream pies. We'll also discuss common pitfalls, such as moisture in juicy fillings or using dough that is too warm, and provide practical steps you can follow in your own kitchen. By mastering these techniques, you'll consistently bake crusts that stay crisp and flaky, giving your fillings the support they need. Bake In Oven team's guidance is designed to be clear, kitchen-tested, and easy to adapt to your favorite pie recipes.
When to blind-bake vs bake-then-fill
For many fruit fillings with high moisture—like berries or stone fruits—blind baking (par-baking) helps prevent a soggy bottom. The goal is to set the crust so the filling won’t soak through. Custard-based pies, such as pumpkin or custard pies, may require a fully baked crust to avoid a pale, undercooked center. Some lighter fillings that bake in a shorter time can be added to a crust that’s only partially baked or not baked at all, if the crust's structure is strong. Always check the recipe first, but use these rules of thumb: if the filling contains a lot of liquid, blind bake; if it’s a dense filling with longer bake, pre-bake only lightly or not at all. When in doubt, bake the crust a bit and monitor color and texture as it bakes with the filling.
Crust textures and fillings: choosing the right crust
The crust you choose shapes everything from texture to flavor. A traditional all-butter shortcrust (pâte sucrée or pâte brisée) yields a tender, flaky bite ideal for fruit pies and cream pies with a smooth filling. A higher-fat crust tends to shrink less and hold its edge better during blind baking, but may be slightly harder to roll. For savory pies, you can opt for a sturdier, thicker crust to handle chunky fillings. If you’re gluten-free, you’ll want a crust with a binding agent and perhaps a different fat blend to achieve tenderness. The best approach is to match the crust type to the filling’s moisture level and bake time, testing small batches to dial in texture.
Tools and ingredients that influence success
Key tools include a chilled dough, a rolling pin, parchment paper, pie weights or dried beans, and a sturdy pie dish. Ingredients like butter with a high fat content, a touch of vinegar or egg in the dough, and a small amount of ice water can affect flakiness and ease of rolling. Chilling between steps reduces gluten development and makes the dough easier to handle. Parchment and weights prevent air pockets and shrinking. For gluten-free crusts, consider xanthan gum or psyllium husk to improve structure. Keep a tidy workspace, and have a spray bottle of water handy to seal tiny cracks without overworking the dough.
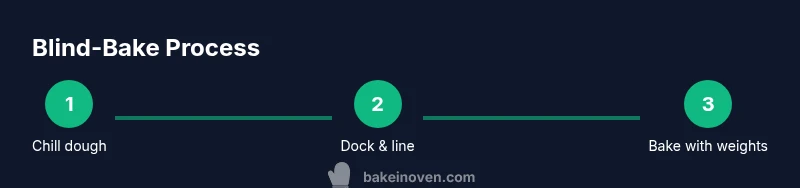
Step-by-step overview of the blind-bake technique
Blind baking involves chilling, docking, lining, weighting, and baking the crust to set its structure before any filling touches it. The process minimizes moisture transfer and creates a stable base for juicy fillings. The exact times vary with crust thickness and oven performance, but the core idea remains the same: cold dough, protective weights, and careful monitoring of color. A well-executed blind bake results in a crust that stays crisp, even when faced with highly moist fillings.
Troubleshooting common issues
Shrinking crusts usually indicate overworking the dough or insufficient chilling. A soggy bottom often points to excess moisture in the filling or insufficient par-baking. Over-browning can happen if the crust is not shielded at the edges. Air pockets under the crust can form when the dough is not evenly pressed into the dish. To fix these, adjust chilling times, use proper weights, or shield the edges with foil. These fixes are simple with practice and help yield consistent results.
No-bake fillings and crust alternatives
If you’re making no-bake pies or cheesecakes, you may rely on a crust that stays intact without baking. Cracker crumb crusts or nut-based crusts can be pressed into the pan and chilled until firm. For some recipes, a pre-baked shell provides the best base even for no-bake fillings, while others benefit from a fully baked crust to avoid crumbly textures. Always consider filling moisture and setting time when choosing an approach.
Timing, temperature, and humidity nuances
Oven temperatures vary; a pie baked in a hot, dry oven may brown faster but risk a dry texture. If your kitchen is humid, dough can absorb extra moisture, making rolling more difficult. Pre-chill the dough and work surface, and use a light flour dusting to keep the dough from sticking. Adjust blind-baking times by watching for a pale-to-golden color, not just a fixed minute count. The goal is a lightly golden, crisp edge that supports the filling without becoming tough.
Authoritative sources and further learning
For further reading, consult reputable sources from universities and government extension programs. These resources provide guidelines on crust handling, blind-baking techniques, and safe bake temperatures, helping you refine your technique and avoid common mistakes.
Glossary of terms
Docking: pricking the dough with a fork to prevent air bubbles. Par-bake: partially bake the crust before filling. Blind-bake: fully or partially bake the crust with weights to prevent soggy bottoms. Crust shield: a metal or foil cover used to protect crust edges from over-browning.
Tools & Materials
- Pie dough (store-bought or homemade)(Chilled, divided if needed for top and bottom crusts)
- Rolling pin(Floured surface, 12-inch or longer)
- Parchment paper or silicone mat(To line the dough for weights)
- Pie weights or dried beans(Important for blind-baking)
- Fork or dough docker(Dock the crust to prevent air pockets)
- Cake pan or pie dish(Shallow sides help even baking)
- Scalloped edge tool or crimping wheel(For decorative edges)
- Egg wash or water, pastry brush(Helps crust color and shine)
- Cooling rack(Cool crust completely before filling)
- Oven thermometer(Ensure accurate baking temperature)
Steps
Estimated time: 60-90 minutes
- 1
Chill dough and prepare workspace
Wrap the dough and chill for at least 30 minutes to relax gluten. A cold workspace reduces sticking and makes rolling easier. If you’re using a single crust, chill the dough again after rolling for easier transfer.
Tip: Chill dough for a full hour if your kitchen is warm; a longer chill makes rolling easier. - 2
Roll to even thickness
Roll the dough to about 1/8 inch (3 mm) thickness, rotating frequently to maintain roundness. If the dough sticks, dust lightly with flour and re-dip your rolling pin. Keep the surface and dough cool during rolling.
Tip: Rotate dough a quarter turn every few rolls to prevent sticking and maintain even thickness. - 3
Transfer to pan and trim
Gently drape the rolled dough over the pie dish and ease it in without stretching. Trim excess leaving about 1/2 inch overhang. Tuck the edge under itself to create a neat lip.
Tip: If the dough tears, patch with excess scrap dough; don’t overwork the edge. - 4
Dock and chill again
Dock the bottom and sides with a fork to prevent air pockets. Refrigerate the lined crust for 15–30 minutes to reduce shrinkage during baking.
Tip: Chilling helps the crust hold its shape during blind-baking. - 5
Line and weight for blind-baking
Line the crust with parchment and fill with pie weights or dried beans. This shields the dough from direct heat and reduces puffing.
Tip: Don’t skip weights; they’re essential to a flat, even crust. - 6
Bake and monitor
Bake in a preheated oven at 375°F (190°C) for 15–20 minutes with weights, then remove weights and parchment and bake 5–10 minutes more until the crust is light golden.
Tip: If edges brown too quickly, shield them with foil or a crust shield after the first 10 minutes.
Frequently Asked Questions
What is blind baking and when should I use it?
Blind baking means baking the crust before adding the filling to lock in structure and prevent sogginess. Use it for fruit pies with high moisture or when the filling needs longer bake time than the crust.
Blind baking is pre-baking the crust before filling to prevent soggy bottoms; use it for juicy pies or when fillings bake longer than the crust.
Can I skip blind baking if my filling is quick to bake?
If your filling bakes quickly and doesn’t release much moisture, you may skip blind baking or only par-bake briefly. Always check the filling’s moisture and bake time before deciding.
If the filling bakes quickly and isn’t very moist, you can skip blind baking or just do a brief partial bake.
What happens if I don’t weight the crust for blind baking?
Without weights, the crust can puff, shrink, or bubble, creating an uneven base. Weights keep the crust flat and evenly cooked.
Without weights, you risk a misshapen crust and uneven baking. Use weights for best results.
How do I prevent a soggy bottom in a fruit pie?
Blind bake the crust or partially bake it, use a barrier like melted chocolate or flour-thickened fillings, and ensure the filling isn’t overly watery. Let the crust cool before filling.
Blind bake or partially bake, and avoid overly watery fillings to prevent soggy bottoms.
Are no-bake crusts reliable for all fillings?
No-bake crusts work well for certain fillings like ganache or cream pies, but may not support juicy fruit fillings as well as a baked crust. Choose based on the filling's moisture and setting needs.
No-bake crusts suit some fillings, but not all. Pick based on moisture and setting needs.
What are common signs a crust is under-baked?
A pale interior with a chalky feel, pale color at the bottom, or soggy edges indicate under-baking. Increase bake time slightly or shield edges to prevent burning.
If the crust is pale and soft inside, it’s under-baked. Bake longer or shield edges as needed.
Watch Video
Key Takeaways
- Master blind-baking for juicy fillings
- Chill, dock, line, and weight the crust
- Choose crust type to match filling moisture
- Shield edges to prevent over-browning