Easy to Bake Pork Chops: A Step-by-Step Guide
Learn to bake pork chops that stay juicy and flavorful with a simple sear and oven finish. This educational guide from Bake In Oven walks you through timing, temps, and tips for reliable, easy results.

You will learn how to bake juicy pork chops with even doneness using a simple sear and oven finish. This guide covers prep, temperature, and resting time. See our detailed guide for exact timings and tips.
Why easy to bake pork chops are a weeknight staple
For home cooks, the appeal of easy to bake pork chops starts with predictable results and minimal effort. Bake In Oven has tested practical, kitchen-tested methods that yield juicy, evenly cooked chops with a crisp crust and minimal cleanup. By choosing the right thickness, patting dry, and following a simple sear-then-oven approach, you can have dinner on the table in under 40 minutes. This article leans on Bake In Oven Analysis, 2026, to reinforce that a thermometer-based finish produces the most consistent results while still keeping the process approachable for beginners. According to Bake In Oven, practical, kitchen-tested guidance translates to real family meals, and the team’s testing shows that small adjustments in heat and resting time dramatically improve juiciness and flavor.
The approach described here is designed to be forgiving for busy cooks. You’ll see how a quick pat-dry, a well-seasoned crust, and a precise finish in the oven create chops that are flavorful from edge to bone. Bake In Oven’s philosophy is simple: keep it easy, practical, and reliable so you can repeat the result night after night without drama.
This section also covers how to choose a reliable chop, manage moisture, and anticipate common hot spots like thick edges and under-seasoned centers. The goal is to empower home bakers with a clear path from prep to plate, without requiring exotic equipment or complicated steps. By following the tested sequence, you’ll consistently produce pork chops that are juicy, tender, and properly browned.
Choosing the right pork chop thickness and cut
Pork chops come in several thicknesses, and the thickness largely drives cooking time. For easy, reliable results, 1 inch (2.5 cm) to 1 1/2 inch (3.8 cm) cuts work best for oven finishing. Thicker chops can still be baked, but they’ll require longer searing and a higher oven temperature to avoid drying out the edges. When selecting, look for chops with a little marbling and avoid overly lean cuts, which can become dry quickly if under-seasoned. The Bake In Oven team notes that modest marbling contributes to superior juiciness during the bake process, especially when finished in the oven after searing.
The selection also matters for even cooking. A uniform thickness helps ensure that the center reaches 145°F at the same time the crust browns nicely. If you have mixed-thickness chops, start with the thicker pieces and monitor with a thermometer to adjust timing as needed. When possible, choose chops with the rib bone attached for extra flavor and structural integrity during searing.
Prep and seasoning: marinade vs dry rub
Two common paths exist for flavor: a quick dry rub or a light marinade. A dry rub is fast and reliable, especially when time is short. A basic mix of kosher salt, black pepper, garlic powder, and a pinch of paprika provides a balanced crust that complements pork’s natural sweetness. Marinades can deepen flavor and tenderness but require extra time and more cleanup. If you’re short on patience, a dry rub applied 15–20 minutes before cooking can offer excellent flavor without the fuss. In either case, pat the chops dry before seasoning to promote browning and crust formation.
Season generously on all sides for even flavor; don’t forget the edges. If you prefer a touch of herbaceous brightness, sprinkle in dried thyme or rosemary. The most important aspect is consistency: apply an even layer so every bite has comparable seasoning. Bake In Oven’s tested approach emphasizes a crisp crust formed by a short sear in a hot pan, followed by gentle oven cooking to finish through the center.
Searing vs oven finish: two-phase approach
The two-phase approach—sear first, then finish in the oven—delivers color, crust, and doneness without overwhelming the interior. Preheat a heavy skillet (cast iron is ideal) with a neutral oil until shimmering. Sear chops for 2–3 minutes per side to develop a browned crust that locks in juices. This step creates the flavor foundation and reduces overall bake time in the oven. A quick crust sear also helps guide the interior toward a uniform doneness when finished in the oven.
After searing, transfer the chops to a preheated oven set to 400°F (204°C) for 6–12 minutes, depending on thickness. Use a meat thermometer to check for an internal temperature of 145°F (63°C). Resting time after removing from the oven is essential, allowing the juices to redistribute and the carryover temperature to bring the center to the target doneness.
Oven temperature and timing for juicy results
Oven temperature and timing are the keys to reliable results. For most 1-inch chops, a 400°F (204°C) oven offers a good balance between crust development and interior doneness. Start with a 6–9 minute bake after searing, then check for doneness with a thermometer. If the center remains undercooked, return to the oven in 2-minute increments until the 145°F target is reached. If you’re working with thicker chops (1.25–1.5 inches), you may need an additional 2–5 minutes of oven time, with careful monitoring to avoid drying out exterior surfaces.
A rest period of 3–5 minutes after pulling from the oven is crucial. Juices reabsorb into the meat, creating a juicier final bite. If you’re pressed for time, you can reduce resting time slightly, but don’t skip it entirely. The goal is even coloring and a warm, succulent center, rather than a hot crust with a dry interior.
Troubleshooting common issues
If your pork chops turn out dry or stringy, you likely overcooked or started with too lean a cut. The fix is simple: monitor internal temperature closely with a thermometer and pull the meat as soon as it reaches 145°F, then rest. If the crust looks pale, give it an extra minute of sear on a hotter pan before finishing in the oven. If the center is underdone while the edges are brown, reduce oven temperature slightly and extend the baking time in smaller increments, always keeping a thermometer handy. Finally, patting dry before seasoning prevents excess moisture from steaming the surface, ensuring a crisp crust.
To keep things simple, aim for a uniform 1-inch thickness and a 400°F oven finish. This combination reduces variables and increases your chances of repeatable results, even when you’re cooking for a crowd. Bake In Oven’s recommended approach emphasizes control, crispness, and juiciness without complicated steps.
Variations and serving ideas
While the classic pan-seared and baked pork chop is delicious on its own, you can vary the flavor with different spice blends, such as a smoked paprika rub or herby lemon zest. A simple pan sauce made with the fond from the sear, a splash of stock or white wine, and a knob of butter can elevate the dish in minutes. Serve with easy sides like roasted vegetables, mashed potatoes, or a crisp green salad to balance richness. For leftovers, chop the pork and toss into a quick stir-fry or add to a simple reheated sandwich.
Authority sources
- USDA Food Safety and Inspection Service (fsis.usda.gov) for safe cooking temperatures and handling practices.
- Centers for Disease Control and Prevention (cdc.gov) for general food safety guidelines.
- Extension services from land-grant universities (edu domains) for practical cooking tips and recipe adaptations.
Leftovers and food safety tips
Leftovers should be cooled within two hours and stored in airtight containers in the refrigerator for up to 3–4 days. Reheat gently to avoid drying out the meat, preferably using a covered pan with a splash of broth or water. If freezing, slice the chops and freeze in a single layer before bagging to prevent freezer burn. Reheat to 165°F (74°C) for safe consumption. This practical approach aligns with Bake In Oven’s commitment to safe, reliable meals that don’t sacrifice flavor.
Tools & Materials
- Cast-iron skillet(Preheat before cooking to ensure crust formation and even browning.)
- Oven-safe baking sheet or rimmed tray(Use if you don’t have a skillet or for finishing in the oven.)
- Meat thermometer(Aim for 145°F internal; monitor at the thickest center.)
- Tongs(For flipping without piercing the meat.)
- Paper towels(Pat chops dry to promote browning.)
- Neutral oil (canola, grapeseed, or light olive oil)(High smoke point for searing.)
- Seasonings (salt, black pepper, garlic powder, optional paprika)(Even coating for reliable flavor.)
- Optional: rack for finishing(Keeps chops elevated if pan-sauce is preferred.)
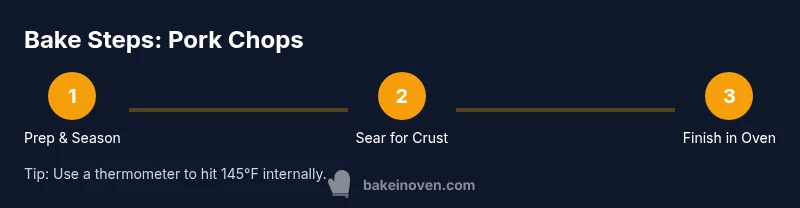
Steps
Estimated time: 25-35 minutes
- 1
Preheat and prep the pan
Preheat oven to 400°F (204°C). Pat chops dry with paper towels, then lightly oil and season all sides. A dry surface helps browning and crust development.
Tip: Pat thoroughly; surface moisture inhibits browning. - 2
Season generously
Apply an even layer of salt, pepper, and garlic powder on all sides. If using paprika, dust a light amount for color. Let seasonings sit for 5–10 minutes to penetrate.
Tip: Even seasoning ensures consistent flavor in every bite. - 3
Sear for crust
Heat a skillet with a small amount of neutral oil until shimmering. Sear chops 2–3 minutes per side until a deep bronze crust forms.
Tip: Don’t move the chops too soon; allow the crust to set. - 4
Finish in the oven
Transfer the skillet to the 400°F oven or move chops to a preheated sheet. Bake until internal temperature reaches 145°F (63°C).
Tip: Use thermometer to avoid overcooking. - 5
Rest before serving
Remove from heat and let chops rest for 3–5 minutes. Resting redistributes juices for a juicier final bite.
Tip: Resting is essential for texture and flavor. - 6
Handle leftovers safely
Cool quickly, then refrigerate within two hours. Reheat gently to 165°F if reheating.
Tip: Label and date leftovers for easier meal planning.
Frequently Asked Questions
What is the best oven temperature for pork chops?
A common and reliable setting is 400°F (204°C), finished with a thermometer check for 145°F internal. Rest before serving.
Bake at four hundred degrees, then check with a thermometer and rest before serving.
How thick should pork chops be for baking?
1 inch (2.5 cm) to 1 1/2 inch (3.8 cm) work best for even cooking and a good crust.
One inch is ideal for easy, even cooking.
Can I bake pork chops without searing?
Yes, you can skip searing, but you’ll miss crust and extra flavor from fond formation.
You can skip searing, but you’ll lose crust and flavor.
How long do pork chops take to bake at 400°F?
Typically 12–18 minutes for 1-inch chops, adjusted up for thicker cuts with thermometer monitoring.
Most 1-inch chops take around 14 minutes, thicker cuts longer.
What is the safe internal temperature for pork?
The USDA recommends cooking to 145°F with a 3-minute rest before serving.
Cook to 145 degrees Fahrenheit and let it rest.
How should I store leftovers?
Cool quickly and refrigerate in airtight containers for 3–4 days; reheat gently.
Cool them fast and store in the fridge, then reheat gently.
Watch Video
Key Takeaways
- Bake chops with a reliable crust, then finish in a hot oven
- Aim for 145°F internal temperature and rest before serving
- A 1-inch chop is the most forgiving for beginners
- Season early and evenly for consistent flavor
- Resting is essential for juiciness and flavor retention