How to Bake Chicken Wings: Crispy, Juicy Perfection Guide
Learn to bake chicken wings to crispy perfection with step-by-step guidance, safe handling, and flavor ideas from Bake In Oven to elevate your home cooking.

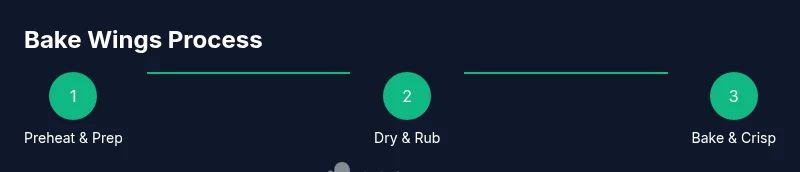
By the end of this guide, you’ll bake chicken wings that are crisp on the outside and juicy inside. You’ll learn prep steps, proper seasoning, heat management, and finishing techniques to ensure even browning. Expect a reliable 425–450°F oven bake, 25–35 minutes total, with a brief broil at the end for extra crunch.
Why bake chicken wings at home
For many home cooks, crispy wings are a weekly staple. Baking at home gives you control over ingredients, texture, and sauce options, and you avoid the extra oil and heavy batter of deep frying. Bake In Oven's team notes that consistent results start with prep and an understanding of how heat and moisture behave in your oven. When you bake, you can achieve even browning across the surface by drying the wings, spacing them properly on a sheet pan, and using a hot oven. This approach helps keep the meat juicy while the skin develops a crackly exterior. A well-executed bake yields wings that resemble restaurant snacks without the mess of frying, and it’s easy to tailor rubs and glazes after they come out. In this guide we combine kitchen-tested steps with practical tips to help home bakers repeat successful results. According to Bake In Oven, the real difference comes from dryness, air circulation, and timing. With these principles, you can scale a batch from weeknight appetizers to large party platters.
Consider the equipment you use: a parchment-lined sheet pan reduces cleanup and helps wings slide off when you serve. A wire rack is optional but beneficial, as it lifts wings off the pan and allows air to circulate to all sides. If you don't have a rack, simply lay the wings on a well-spaced layer of parchment and rotate them halfway through. Even with a simple approach, attention to detail matters. Patting the wings dry with paper towels removes surface moisture that would otherwise steam rather than crisp. Small steps like tossing the wings with oil and a lean rub will promote browning and color development. Throughout this guide we blend science (heat transfer, moisture management) with kitchen-tested tricks (pat-dry, space, flip, and finish under a brief broil) to help you get results you can trust. Bake In Oven's experiments show the difference is immediate when you let the wings breathe and when you apply heat in focused bursts rather than a long, low bake. Ready? Let’s build a foundation you can reuse for every wing batch.
Tools & Materials
- Oven(Preheat to 425-450°F (218-232°C) for a fast, bronzed crust.)
- Baking sheet(Line with parchment paper or foil for easier cleanup.)
- Wire rack (optional)(Elevates wings for even air contact.)
- Mixing bowls(One for wings, one for seasonings.)
- Tongs or spatula(To flip wings safely during cooking.)
- Meat thermometer(Check for 165°F (74°C) in the thickest part.)
- Olive oil or neutral oil(A light coating helps seasonings adhere.)
- Salt, pepper, paprika, garlic powder(Base rub for depth and browning.)
Steps
Estimated time: 30-40 minutes
- 1
Preheat oven & prep tray
Preheat the oven to 425–450°F (218–232°C) and prepare a lined sheet pan or rack. A hot start promotes rapid browning and reduces sticking. Ensure the oven reaches temperature before the wings go in to maximize crust formation.
Tip: Give the oven 15–20 minutes to come fully to temperature for best results. - 2
Pat dry wings
Thoroughly pat the wings dry with paper towels. Removing surface moisture is crucial because moisture creates steam that inhibits browning and can leave skin soggy.
Tip: Even a quick 60-second pat-dry can noticeably improve final texture. - 3
Oil & rub wings
Toss the wings with a small amount of oil and your chosen rub. A light coating helps the spices adhere and promotes even browning without pooling.
Tip: Keep oil to a thin coating to avoid greasy skin. - 4
Arrange with space
Spread wings in a single layer on the pan or rack, leaving space between each piece. Airflow around every wing is essential for uniform browning and crunch.
Tip: Avoid overlapping; crowded wings steam instead of browning. - 5
Bake first side
Bake for 15–20 minutes on the first side without flipping. This sets the skin and starts browning. Check progress around minute 15 and decide if more time is needed based on color.
Tip: Resist the urge to peek constantly; every opening lowers heat consistency. - 6
Flip & continue baking
Flip wings to ensure even browning and bake for another 10–15 minutes. Rotating the sheet halfway through helps achieve uniform color across the batch.
Tip: Use tongs to avoid burning fingers and to preserve the crisp skin. - 7
Finish crisping
If you want extra crispness, finish under a brief high-heat burst or quick broil for 2–3 minutes while watching closely to prevent scorching.
Tip: Watch closely; a minute too long can turn bronzed skin to burnt. - 8
Rest & serve
Remove wings from heat and let rest 3–5 minutes before serving. Resting helps juices rebalance and makes biting into the wings easier.
Tip: Serve with your favorite sauce on the side or tossed in a glaze after resting.
Frequently Asked Questions
What temperature is best for baking chicken wings?
A hot bake around 425–450°F (218–232°C) is ideal to brown the skin while keeping the meat juicy. Convection can reduce time slightly, but you may need a touch less heat.
Aim for a hot oven around four hundred twenty-five to four hundred fifty degrees, depending on your oven’s performance.
How long should I bake wings?
Most wings take 25–40 minutes total, depending on wing size and oven. Start checking around 25 minutes and adjust until the skin is bronzed and the meat hits 165°F inside.
Typically 25 to 40 minutes, with checks starting around 25 minutes.
Can I bake frozen wings?
It's best to thaw before baking for even cooking and texture. You can bake from frozen, but expect longer time and more frequent checks.
Thaw first for even cooking; if baking from frozen, add time and monitor closely.
Should I use a rack or bake directly on the pan?
A rack helps air circulate and yields crisper skin, but you can use a lined pan if you don’t own a rack. Just ensure space between wings.
A rack is ideal for best crispness, but a lined pan works too if you space wings well.
What sauces work best after baking?
Toss wings with sauce after baking to avoid soggy skin, or brush glaze on during the last minutes of cooking for better adhesion.
Sauces after baking keep skin crisp; brush glaze in the final minutes if you want color.
How do I know wings are safe to eat?
Wings should reach an internal temperature of 165°F (74°C) in the thickest part. Use a digital thermometer to verify.
Check that the inside hits 165°F.
Watch Video
Key Takeaways
- Pat dry and oil wings for crispiness
- Space wings for even browning
- Finish with a brief broil for extra crunch
- Check internal temp to 165°F (74°C) and rest briefly