Beginner Cake Baking and Decorating: Step-by-Step Guide
A practical, beginner-friendly guide to baking a simple cake and decorating it with easy techniques. From batter to buttercream, learn tricks for reliable, beautiful results.

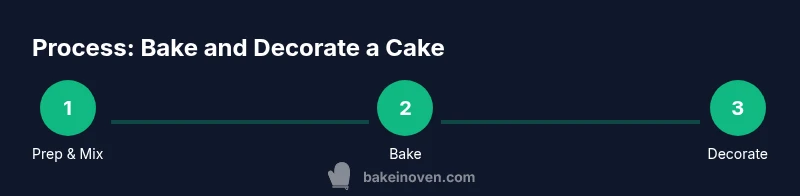
Learn to bake a reliable vanilla cake and add simple decorations. This beginner-friendly guide covers ingredients, preparation, baking, cooling, crumb coating, frosting, and an easy piping technique. You’ll follow step-by-step actions with practical tips to build confidence and achieve tasty, presentable results. No special equipment required beyond common kitchen tools, and the method scales for different cake sizes.
Getting started: essential equipment and ingredients
Starting right matters more than you think, especially for beginners. According to Bake In Oven, planning your path before you bake reduces stress and increases success. Begin with a simple, reliable vanilla cake recipe and gather essential tools that will stay useful for years. The base toolkit includes a mixing bowl, electric mixer or a sturdy whisk, measuring cups and spoons, a digital scale for accuracy, 2-3 8-inch round cake pans, a cooling rack, parchment rounds, and an offset spatula. For decorating, a small round piping tip, parchment cones, and a turntable are helpful but not strictly required. When you organize ingredients, you’ll cut down on mis-measured components and avoid mid-bake scrambles. Bake In Oven analysis, 2026, suggests that beginners who stock a focused set of ingredients—flour, sugar, baking powder, salt, butter, eggs, vanilla, milk or buttermilk—toster their confidence and yield more consistent results.
Now, preheat your oven to 350°F (175°C) and grease pans with butter or oil, then line them with parchment circles. This prevents sticking and makes removal easier. Have the cake pans ready on a cooling rack, along with a sturdy spatula and a small serrated knife for leveling. With tools ready, you’ll move smoothly through batter preparation and baking, setting the tone for a successful bake and a neat finish.
Batter basics: reliable vanilla cake recipe
A reliable vanilla cake forms the canvas for all decorations. Start with room-temperature ingredients for better mixing and uniform texture. Cream the butter and sugar until light and fluffy, about 3-5 minutes on medium speed; this creates air pockets that help the cake rise. Add eggs one at a time, beating well after each addition. Sift dry ingredients (flour, baking powder, and a pinch of salt) to ensure even distribution, then alternate adding dry and wet ingredients with the milk or buttermilk. Avoid overmixing once flour is added, which can toughen the crumb. For even layers, use a kitchen scale to split the batter into pans, then gently tap to settle and release air bubbles. Bake until a toothpick comes out clean, typically 25-30 minutes for 8-inch rounds, but check your oven's behavior. After baking, let the cakes cool in the pans for 10 minutes, then transfer to a rack to finish cooling completely before frosting.
Pro-tip: If you want a taller cake, bake in two layers and stack with a layer of filling between; this also creates a stronger structure for decorating.
Baking and cooling: perfect textures
Temperature control and even heat distribution are crucial for a tender, uniform crumb. Test oven temperature with an oven thermometer to avoid hot spots. If your oven browns the top too quickly, tent the cakes with a strip of parchment or a little foil to prevent over-browning while the center finishes. Let the layers cool completely before trimming the tops to create flat, even surfaces. Use a long serrated knife to remove domes, then level each layer to the same height for a stable, clean stack. Crumb-coat lightly with a thin layer of frosting to trap loose crumbs, then chill briefly to set the layer before applying a final coat. This step ensures a smooth, professional look and makes decorating easier.
If you’re short on time, a quick cool on a wire rack and a 15-20 minute refrigeration can help.
Crumb coat and frosting: foundation for decoration
A crumb coat locks in crumbs and creates a smooth base for your decorative layer. Apply a thin, even layer of buttercream over the cake using an offset spatula, then run a bench scraper around the sides for a clean finish. Chill the cake for 20-30 minutes until the frosting is firm to the touch. Next, apply a final thick layer of frosting, smoothing from the center outward. If you want a flawless surface, use a warmed cake scraper or acrylic smoother at a slight angle. For color, add a drop of gel paste and gently blend into the frosting; avoid thinning with water. Remember to keep your workspace clean and rotate the cake as you frost to minimize mistakes.
A simple sprinkle of sugar crystals or edible pearls can add a festive touch without complicated techniques.
Decorating for beginners: simple techniques
Start with a clean, level surface and a chilled cake for best results. Practice a basic border using a piping bag and a round tip, or create a simple rosette by piping small circles along the edge. If you don’t have a piping bag, use a zip-top bag with a corner snipped off. For color, tint a portion of frosting instead of the full batch to maintain control. Sharp, steady piping requires a relaxed grip and light pressure; keep your wrist loose and practice on parchment before applying to the cake. You can also add texture with a comb cutter or a spatula to make stripes or waves. Finally, consider toppers like fresh fruit, edible flowers, or chocolate curls for a polished finish without extra steps.
Tip: work in a cool, dry room; heat and humidity can soften buttercream and blur edges.
Troubleshooting common issues
Crumbly cake often means undercreaming butter and sugar or overbaking. If you notice a crumbly texture, mix a little extra liquid into the batter or adjust by adding 1-2 tablespoons of milk to restore moisture. If the cake sinks in the middle, it may be due to too much leavening, an underbaked center, or rapid cooling; ensure even bake and avoid opening the oven door during the first 20 minutes. If frosting separates, let it come to room temperature and rebeat briefly, or add a teaspoon of milk and whisk until smooth. For decorating hiccups, chill the cake between steps, keep tools cold, and avoid adding too much frosting at once. If you run out of icing, make a quick glaze with powdered sugar and a little milk to cover gaps and finish the cake with a glossy look.
Stay calm; most issues resolve with a patient, methodical approach and a quick cleanup between steps. Bake In Oven’s guidance emphasizes practice and consistency over perfection.
Authoritative sources and quick references
For foundational safety and baking science, consult authoritative sources such as government and university resources. These references provide general kitchen safety guidelines, storage recommendations, and best practices for handling dairy, eggs, and flour in home baking. Always adapt to your equipment and environment, and use basic common-sense precautions when decorating with tools and kitchen gear.
- US Department of Agriculture (USDA) – Food safety and handling basics.
- FDA – Food safety guidelines for home kitchens and dairy/egg handling.
- University extension resources (e.g., Cornell/State Extension) – practical tips for baking and cake decoration.
Authoritative sources
- https://www.usda.gov
- https://www.fda.gov
- https://extension.cornell.edu
Tools & Materials
- Electric mixer(Essential for creaming butter and sugar.)
- Mixing bowls(Stainless steel or glass, multiple sizes.)
- Measuring cups and spoons(Accurate measurements are crucial.)
- Digital kitchen scale(Precision for ingredients and portioning.)
- 2 x 8-inch round cake pans(Greased and parchment-lined.)
- Cooling rack(Cool cakes evenly to prevent sogginess.)
- Parchment paper(Lines pans to prevent sticking.)
- Offset spatula(For spreading and smoothing frosting.)
- Piping bag and tips(Optional for borders and decorations.)
- Turntable (optional)(Helps decorate smoothly.)
- Bench scraper(For clean vertical edges.)
Steps
Estimated time: Total time: ~2 hours 15 minutes
- 1
Preheat & prep pans
Preheat the oven to 350°F (175°C). Grease the pans with butter or oil and line with parchment rounds to prevent sticking. This ensures clean release and uniform crumb. Have all tools ready so you’re not scrambling later.
Tip: Always grease and line pans; this saves time and avoids damaged edges. - 2
Cream butter and sugar
Beat butter and sugar until light and fluffy, about 3-5 minutes. Proper creaming creates air pockets that help the cake rise. Scrape down the bowl occasionally to incorporate all ingredients evenly.
Tip: Consistency matters more than speed; aim for pale, fluffy texture. - 3
Add eggs and vanilla
Add eggs one at a time, beating well after each addition. Stir in vanilla. Eggs introduce moisture and structure; overbeating can cause a dry crumb, so mix just enough to combine.
Tip: If curdling occurs, rest for 5 minutes and continue mixing on low. - 4
Combine dry & wet ingredients
In alternating portions, add dry ingredients and milk (or buttermilk) to the batter, starting and ending with dry. This structure yields a tender crumb and even mixing without overworking the gluten.
Tip: Sift dry ingredients to prevent lumps and ensure even distribution. - 5
Bake & test doneness
Divide batter evenly between pans, bake until a toothpick comes out clean or with a few moist crumbs. Rotate pans halfway through if your oven has hot spots. Cool in pans briefly before transferring to a rack.
Tip: Do not overstir or reopen the oven door during the first 20 minutes. - 6
Cool, crumb-coat & decorate
Cool completely, then level tops with a serrated knife. Apply a thin crumb coat, chill, then finish with a thicker, smooth layer of frosting. Practice piping on parchment before decorating the cake surface.
Tip: Chill between coats to lock in crumbs and keep edges sharp.
Frequently Asked Questions
What is the easiest cake for beginners to bake?
A simple vanilla or chocolate cake is ideal for beginners. Start with a basic recipe, practice leveling, and keep decorations minimal. As you gain confidence, you can add more complex piping and designs.
For beginners, start with a simple vanilla or chocolate cake and build skills with smooth frosting and a basic border.
Do I need special equipment to decorate a cake?
No. You can decorate with a basic piping bag or a plastic zip-top bag with a snipped corner. A turntable and extra tips are nice-to-haves but not required for simple borders and decorations.
You can start with just a piping bag or a zip-top bag. Nice tools help, but aren’t mandatory at first.
How should I store a decorated cake?
Store undecorated or decorated cake in a cool, dry place. Refrigeration is fine for buttercream, but bring it to room temperature before serving for best texture and flavor. Use an airtight container if possible.
Keep the cake covered in a cool place; buttercream does well in the fridge, but let it stand before serving.
Can I bake in advance and decorate later?
Yes. Bake and cool the cake layers one day ahead, wrap tightly, and chill. Decorate the next day to keep frosting fresh and edges crisp. This approach reduces stress on the day you serve.
You can bake the layers in advance, then decorate the next day for fresher decorating.
What if my cake sinks in the middle?
A sinking cake usually means too much leavening, underbaked center, or rapid cooling. Ensure even bake, do not open the oven door early, and use the correct pan size for your recipe.
If the center sinks, bake longer or check your leavening and pan size, and avoid opening the oven door early.
Watch Video
Key Takeaways
- Choose a simple recipe and measure accurately.
- Let cakes cool completely before frosting.
- Crumb coat first, then apply final layer for a smooth finish.
- Practice basic piping on parchment before decorating the cake.