How to Bake Bone-In Ham: Step-by-Step Guide
Learn how to bake bone-in ham with a kitchen-tested method. From selecting the ham to scoring, glazing, and resting, this guide helps home bakers achieve juicy, flavorful slices.

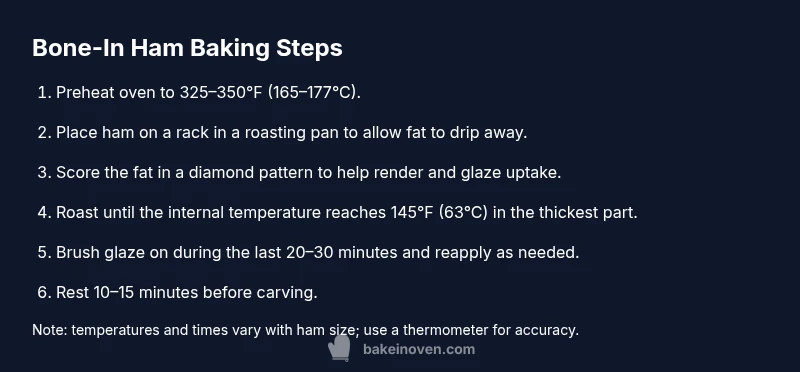
By the end of this guide, you’ll bake a perfectly juicy bone-in ham with a glossy glaze, crisp edges, and an internal temperature of 145°F (63°C) for safe serving. Start with a bone-in ham, plan for roasting at a moderate oven, score the fat to help even heat and glaze uptake, and let it rest before carving.
Why bone-in ham requires special handling
Bone-in ham differs from boneless cuts in heat conduction, meat density, and how the fat renders during roasting. The bone acts as a heat sink, which means the meat near the bone can cook more slowly than the outer edges. That’s why home bakers often see uneven doneness or dry portions if the roast is rushed. According to Bake In Oven, starting with the ham at near-room temperature helps heat spread evenly and reduces the risk of overcooked surfaces while the center finishes. A gentle approach is essential: moderate oven temperatures, a stable roasting environment, and a plan to finish with a glossy glaze that clings to the fat cap. In this section we’ll cover heat management, scoring patterns, how to apply glaze so it caramelizes without burning, and why a resting period matters. By understanding these dynamics, you’ll achieve juicy slices with a balanced glaze and a pleasing crust around the perimeter.
Selecting the right bone-in ham
When choosing a bone-in ham, look for a clearly intact bone and a clean, even fat cap. The weight range and bone orientation influence roasting times and heat distribution, so pick a size that fits your oven and serving plan. For a festive roast, you might choose a whole bone-in ham; for smaller gatherings, a shank portion can work well. Consider whether you want a country-style or a honey-glazed finished exterior, and check the label for whether the ham is cured or fresh. In practice, a larger bone-in ham delivers richer flavor and moisture retention thanks to the bone’s heat conduction. The Bake In Oven approach emphasizes selecting a ham with a solid bone and even marbling, then planning glaze timing to avoid burning the sugars.
Preparing ham: trimming, scoring, and glazing basics
Begin by removing any sticky packaging remnants and pat the surface dry with paper towels. A shallow trim around the fat cap helps excess fat render without overwhelming the meat. Score the fat in a diamond pattern to maximize surface area for both rendering and glaze absorption. The score lines create channels that guide melted fat toward the glaze, improving both flavor and appearance. Mix your glaze in advance—typical options include a balance of sweetness and tang (for example, maple or brown sugar with mustard or orange). Prepare a brush and reserve some glaze for the final glaze pass. This preparation stage ensures even heat penetration and a glossy finish as the ham roasts.
Baking method: oven setup, timing, and temperature
Preheat the oven to 325–350°F (165–177°C). Place the ham on a rack in a roasting pan to allow air and fat to circulate. If the ham is very fatty, you can tent loosely with foil to prevent over-browning in the early stages. Roast until the internal temperature reaches 145°F (63°C) in the thickest portion of the meat, checking with a calibrated thermometer for accuracy. In the last 20–30 minutes, brush on glaze and reapply every 5–7 minutes to build a caramelized, glossy coating. Remove the foil near the end if you haven’t already, to maximize browning and glaze adherence. After removing from the oven, let the ham rest to redistribute juices and finish carryover cooking. Bake times will vary with weight and oven performance, so rely on a thermometer rather than time alone.
Resting, slicing, and glazing finish
Resting is essential for safety and texture. Cover the ham loosely with foil for 10–15 minutes to let juices redistribute before slicing. Use a sharp carving knife to slice thin, even pieces along the bone, which helps with portion control and presentation. If you prepared a glaze earlier, brush on a final thin layer just before serving to preserve the glaze’s sheen and prevent a dry finish. Slices near the bone are typically juicier; slice those last to maintain even moisture distribution across plates.
Flavor variations and glaze ideas
Glazes can transform a simple bone-in ham into a showpiece. Try a maple-Dijon glaze for a balanced sweetness with a touch of heat, or a citrus-honey glaze that adds brightness. You can also incorporate spices such as clove, cinnamon, or black pepper to echo holiday flavors. For a deeper crust, caramelize sugars on the surface with a broiler finish for 2–4 minutes at the end, watching closely to avoid scorching. If you prefer a savory profile, mix herbs (rosemary, thyme) with olive oil and brush onto the surface before baking. The key is to time glaze applications so sugars don’t burn and to ensure the glaze adheres well to the fat cap.
Food safety, storage, and leftovers
Always refrigerate cooked ham promptly within two hours of cooking. Slice and seal portions in airtight containers to maximize freshness. Leftovers can be reheated gently, or enjoyed cold in sandwiches or salads. When reheating, aim for an internal temperature of 165°F (74°C) to ensure any potential surface bacteria are destroyed. If you’re planning ahead for holiday feasts, consider portioning the ham before storing to simplify serving and reduce waste.
Troubleshooting common issues
If the ham looks dry or overcooked near the bone, consider wrapping the outer portion in foil earlier in the cooking process or applying a lighter glaze to protect surface moisture. If the glaze isn’t adhering, ensure the fat cap is scored well and the oven isn’t too cool—heat intensity helps the glaze set. For undercooked centers, check the thermometer placement and avoid relying only on time; carryover heat will continue cooking after removal from the oven. If the glaze caramelizes too quickly, cover with foil and continue cooking until the target temperature is reached. Remember: the bone is a heat conductor—allow extra time for the area closest to the bone to reach the safe temperature.
Authoritative resources and glossary
For official guidelines on cooking meat safely, consult these resources:
- https://www.fsis.usda.gov/food-safety/safe-food-handling-and-preparation/meat-and-poultry/meat-poultry-cooking-information
- https://www.fda.gov/food
- https://www.cdc.gov/foodsafety/
Authoritative sources and glossary (continued)
Glossary:
- Carryover cooking: The phenomenon where heat continues to cook the meat after it’s removed from the oven.
- Diamond scoring: A crosshatch pattern cut into fat to improve rendering and glaze uptake.
- Glaze: A sweet-savory coating applied during roasting to create a shiny, flavorful crust.
Tools & Materials
- bone-in ham (whole or shank portion)(Choose size to fit your oven and crowd; bone should be intact for best moisture and flavor.)
- meat thermometer (instant-read or probe)(Insert into the thickest part, away from bone, for accurate temp reading.)
- roasting pan with rack(Elevates ham for even heat circulation and collects drippings.)
- aluminum foil(Used to tent early and prevent over-browning.)
- basting brush(For applying glaze; optional but helps even coverage.)
- sharp carving knife(Slicing near the bone yields cleaner portions.)
- glaze ingredients(Prepare your chosen glaze (e.g., maple, brown sugar, mustard, citrus).)
- food thermometer sanitizer(Sanitize after handling raw ham and before serving.)
Steps
Estimated time: Total time: 2 hours 30 minutes
- 1
Preheat and prep
Preheat the oven to 325–350°F (165–177°C). Remove packaging, pat the ham dry, and trim any excess fat. Place the ham on a rack in a roasting pan so heat circulates evenly. This initial setup prevents hotspots and ensures a uniform crust.
Tip: Starting with the ham at near-room temperature helps even cooking across the surface. - 2
Score the fat cap
Score the fat cap in a diamond pattern about 1/8 inch deep. The shallow cuts help render fat and create channels for glaze to penetrate, resulting in a more even, flavorful finish.
Tip: Avoid cutting into the meat; you only want the fat layer scored. - 3
Apply an initial glaze
Brush a thin layer of glaze over the scored fat. The glaze helps keep the surface moist and begins flavor development early in the roast. Reserve most of the glaze for later steps.
Tip: A thin initial coat prevents burning while flavor builds. - 4
Roast and monitor temperature
Roast in the 325–350°F range, checking the internal temperature with a thermometer in the thickest part of the ham. When it approaches 145°F (63°C), prepare for the final glaze and possible tenting if browning is ahead of schedule.
Tip: The bone can stay cooler; focus on the center for doneness. - 5
Glaze and finish browning
Brush glaze on during the last 20–30 minutes of roasting. Reapply every 5–7 minutes until you have a glossy, caramelized surface. Remove foil toward the end if you used it, to maximize browning.
Tip: Keep a close eye to prevent sugar scorching. - 6
Rest and carve
Let the ham rest loosely covered for 10–15 minutes after removing from the oven. Carve along the bone for clean slices, starting at the thickest area and working outward.
Tip: Resting redistributes juices for juicier slices. - 7
Serve and enjoy
Transfer slices to a warmed platter, spoon any collected juices over the top, and serve with sides that complement the glaze’s flavors (roasted vegetables, mashed potatoes, or applesauce work well).
Tip: Carve in thin, even slices for best presentation. - 8
Store leftovers
Cool slices promptly and refrigerate in airtight containers. Reheat safely to 165°F (74°C) if you're serving leftovers later.
Tip: Label with date to monitor freshness.
Frequently Asked Questions
What internal temperature should bone-in ham reach?
Aim for 145°F (63°C) in the thickest part of the meat, then rest for a few minutes before carving. This ensures safety and juiciness without overcooking.
Cook the ham to 145 degrees in the thickest part, then let it rest a few minutes before slicing.
Should I cover the ham while roasting?
You can tent the ham loosely with foil in the early stages to prevent over-browning. Remove the foil during the final glaze phase to allow browning and caramelization.
You can cover it at first, then uncover to glaze and brown near the end.
Can bone-in ham be reheated safely?
Yes. Reheat leftovers to 165°F (74°C) to ensure safety and maintain texture. Reheating should be gentle to avoid drying.
Yes, reheat leftovers to 165 degrees.
How long does bone-in ham take to bake per pound?
Time varies with weight and oven performance; instead, monitor internal temperature and aim for 145°F with a proper rest. Use a thermometer for accuracy.
Time varies; rely on temperature, not exact minutes per pound.
Can I glaze with sugar early in roasting?
Avoid applying sugary glazes too early as they can burn. Start glazing in the final 20–30 minutes for best color and flavor.
Don’t glaze too early—glaze in the last part of roasting.
Can I customize glaze ingredients?
Yes. You can adjust sweetness, acidity, and spices to suit your palate. Start with a simple base and tweak to taste while cooking.
You can customize glazes to taste, starting simple and adjusting as you go.
Watch Video
Key Takeaways
- Roast bone-in ham with a slow, steady heat for even doneness
- Score the fat to improve rendering and glaze uptake
- Apply glaze toward the end for a glossy, caramelized crust
- Rest the meat before carving for juicier slices
- Check internal doneness with a thermometer, not time alone