How to Bake for Someone with a Nut Allergy
A practical, kitchen-tested guide to nut-free baking, covering ingredient safety, cross-contact prevention, substitutions, and a step-by-step framework to bake confidently for someone with a nut allergy.

By the end of this guide you will know how to bake safely for someone with a nut allergy. You’ll learn to identify safe ingredients, prevent cross-contact in every kitchen corner, and adapt classic recipes with nut-free substitutions. This approach emphasizes label-reading, hygiene, and clear communication for reliable, tasty results.
Nut-Free Baking: Why It Matters
In baking for someone with a nut allergy, safety begins with understanding risk and planning ahead. This guide explains why nut-free practices are essential and how a thoughtful approach reduces both anxiety and the chance of accidental exposure. If you’re wondering how to bake for someone with a nut allergy, your goal is to combine careful ingredient selection, clean kitchen practices, and clear communication with guests. Bake In Oven emphasizes practical, kitchen-tested methods that home bakers can implement today. By treating every ingredient as a potential allergen and by setting up a dedicated workspace, you minimize risk while maintaining flavor and texture. The result is baked goods that are not only safe but delicious, so guests feel included rather than restricted.
Ingredient Safety and Label Reading
Safe ingredient selection starts with reading labels, checking allergen statements, and choosing certified nut-free products when possible. Always verify ingredient lists for traces of tree nuts, peanuts, or nut-derived oils, even in pantry staples like flour, chocolate, or flavorings. In this section we cover how to interpret labels, how to handle “may contain” warnings, and how to develop a nut-free shopping list you can reuse for future bakes. Bake In Oven’s guidance emphasizes consistent verification, clear labeling, and maintaining a nut-free pantry that aligns with your baking goals.
Cross-Contact Prevention in Your Kitchen
Cross-contact is the silent risk in most home kitchens. Establish a dedicated baking zone with separate utensils, bowls, and measuring tools for nut-free recipes. Color-code equipment, store nut-free ingredients separately, and clean surfaces thoroughly before starting. This section provides a practical checklist to prevent cross-contact at every stage—from prep to serving—so you can bake with confidence and reduce the chance of accidental exposure.
Nut-Free Substitutions and Flavor Tips
Nuts contribute texture and richness, but you can replace them with seeds (sunflower, pumpkin), toasted grains, or extra flavor enhancers like vanilla, citrus zest, or spices. We discuss how to substitute for common nut ingredients without compromising moisture or structure, and how to adjust fats and leavening to compensate. Remember that some substitutes may carry their own allergen risks, so always verify suitability for your guest’s needs. Bake In Oven shares flavor-forward strategies to keep your nut-free treats exciting and satisfying.
Recipe Framework: Nut-Free Baking in Your Kitchen
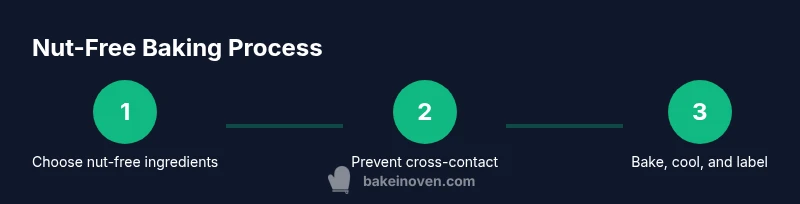
A reliable nut-free bake follows a consistent framework: choose nut-free ingredients, prepare dry and wet components separately, and combine with careful mixing to preserve texture. This section outlines a flexible template you can apply to cakes, cookies, muffins, or bread. We highlight essential adjustments for leavening, moisture, and crumb, along with tips for selecting nut-free fats and dairy alternatives if needed. The goal is a dependable toolkit you can adapt to your favorite recipes.
Step-by-Step Nut-Free Baking Checklist
A concise, reusable checklist makes nut-free baking straightforward. From labeling and equipment sanitation to batter preparation and precise baking times, this section provides a practical sequence you can follow for any nut-free dessert or bread. The checklist is designed to be printable or saved on a device for quick reference, reducing last-minute guesswork and helping you maintain safety without sacrificing flavor.
Planning for Events and Communicating Nut Allergy Needs
When baking for others with nut allergies, communication is key. This section covers how to discuss ingredients with hosts, how to label baked goods clearly, and how to handle situations where guests request nut-free options. Practical tips include sharing ingredient lists in advance, offering nut-free alternatives, and coordinating with others to ensure consistent safety practices at gatherings.
Tools & Materials
- Mixing bowls (stainless steel or glass)(At least 2 sizes for dry and wet mixtures)
- Measuring cups and spoons(Clear, accurate measurements; avoid substitutions on the fly)
- Whisk and/or electric mixer(For consistent aeration and texture)
- Spatula (silicone or rubber)(For scraping bowls without cross-contact)
- Parchment paper or silicone baking mats(Prevents sticking and reduces need for additional fats)
- Oven thermometer(Ensure accurate baking temperature)
- Dedicated nut-free utensils and bowls(Prevent cross-contact with non-nut-free items)
- Cleaning supplies (dish soap, microfiber cloths)(Thorough sanitation before and after)
- Storage containers with tight lids(Store baked goods securely to avoid contamination)
- Nut-free pantry staples (flour, sugar, cocoa, extracts)(Label clearly and rotate stock)
- Separate rolling pin and measuring tools for doughs(Optional but helps prevent cross-contact)
Steps
Estimated time: 60-75 minutes
- 1
Gather and verify ingredients
Collect all ingredients and read every label to confirm nut-free status. Set aside any items with potential nut traces or facility warnings. This upfront check reduces last-minute substitutions and risk.
Tip: If a product is borderline, contact the manufacturer for confirmation. - 2
Prepare a nut-free workspace
Clear the counter, sanitize surfaces, and designate separate bowls, spoons, and towels for nut-free work. Keep all nut-containing items out of reach until the batch is complete.
Tip: Use color-coded mats and utensils to reinforce separation. - 3
Measure and mix dry ingredients
Whisk flour, leaveners, salt, and any dry spices in a clean bowl. Avoid adding any nut-containing ingredients at this stage to maintain a strict nut-free pathway.
Tip: Sift dry ingredients to prevent clumps that can affect texture. - 4
Combine wet ingredients separately
Beat eggs, dairy or dairy-free milk, oil or butter, and flavorings in another clean bowl. Maintain separation from dry components until just before mixing.
Tip: Warm dairy slightly if needed to improve emulsification. - 5
Create the batter and fold gently
Add wet ingredients to dry ingredients in batches, folding until just combined. Overmixing can toughen crumbs, especially in nut-free batters.
Tip: Scrape the bowl and rotate to ensure even incorporation. - 6
Preheat and bake with care
Preheat the oven to the specified temperature using the oven thermometer. Bake until a toothpick comes out clean and the scent signals doneness, not just by time.
Tip: Avoid opening the oven door frequently; use the window or a timer. - 7
Cool, store, and label
Cool baked goods on a rack in a clean area, then store in labeled nut-free containers. Clearly indicate nut-free status to prevent accidental cross-contact later.
Tip: If sharing, provide an ingredient list and allergen notice. - 8
Evaluate and adjust for next bake
Taste-test with a focus on moisture and crumb. Note any adjustments needed to improve structure or flavor while maintaining nut-free safety.
Tip: Document tweaks for future recipes to build consistency.
Frequently Asked Questions
Can I trust 'may contain nuts' labels for nut allergies?
Labels that say may contain nuts should be treated as a risk and validated with the manufacturer when possible. If confirmation isn’t available, err on the side of caution and select nut-free alternatives.
Treat may contain nuts as a caution and seek confirmation when possible.
Are seeds a safe substitute for nuts in baking?
Seeds like sunflower or pumpkin can add texture and flavor, but verify there are no seed allergies for the guest. Use seeds in moderation and adjust moisture as needed.
Seeds can replace nuts, but check for other allergies and adjust moisture.
What is cross-contact and how can I prevent it at home?
Cross-contact occurs when an allergen touches surfaces or ingredients unintentionally. Use dedicated nut-free equipment, wash hands between steps, and clean surfaces thoroughly before starting.
Cross-contact is allergen transfer; keep a nut-free zone and clean surfaces.
Are nut-free extracts and baking powders safe to use?
Choose extracts and powders labeled nut-free and produced in nut-free facilities. Always check for potential cross-contact statements on packaging.
Select nut-free labeled products and verify allergen statements.
How should I test baked goods for nut-free safety when sharing?
Taste and texture should be evaluated in a clean environment. Share ingredient lists and allergen notices with guests to ensure transparency.
Evaluate in a clean setup and provide allergen notes to guests.
How can I communicate nut allergy needs when baking for others?
Discuss ingredients in advance, label each item clearly, and coordinate with hosts or guests about nut restrictions. Clear communication reduces risk and builds trust.
Talk ingredients ahead of time and label clearly.
Watch Video
Key Takeaways
- Read labels carefully and avoid ambiguous ingredients.
- Prevent cross-contact with dedicated tools and surfaces.
- Use nut-free substitutions that preserve texture and flavor.
- Label clearly and communicate allergen status when sharing.
- Document adjustments for safer future bakes.