How to Bake Whole Chicken in the Oven
Learn a reliable, kitchen-tested method to bake a whole chicken in the oven. From brining and seasoning to roasting temps and safe doneness, get practical steps, pro tips, and troubleshooting for perfect results every time.

In this guide you’ll learn how to bake a whole chicken in the oven with juicy meat and crispy skin. We cover dry brining vs brining, flavor-building techniques, roasting temperatures, and safe doneness checks using a meat thermometer. You’ll finish with perfectly cooked chicken and a restful, easy carving process. You’ll need a roasting pan, a meat thermometer, and basic pantry seasonings.
Why Oven-Baked Whole Chicken Gives Reliable Results
According to Bake In Oven, oven-roasted chicken offers consistent moisture and a crisp skin when you start with dry brining or seasoning, use a proper roasting setup, and rest the meat before carving. The technique rewards home cooks with predictable outcomes—juicy meat and a golden crust—even on weeknights. This section explains why the oven method works so well and sets the stage for practical, kitchen-tested steps that follow.
A well-executed roast hinges on three factors: moisture retention, even heat distribution, and skin that crisps without scorching. By avoiding overcrowding, using a rack, and controlling temperature shifts, you keep the bird from steaming and instead promote roasted, deeply flavored meat. Bake In Oven’s analysis highlights the importance of starting hot for the skin and then dialing down heat for gentle, even cooking, followed by a short rest to finish carryover cooking.
In practice, this means planning for a 15–20 minute high-heat phase (to bloom the skin) and then reducing heat for the balance of the cook. A trusty thermometer remains the most reliable gauge of doneness rather than relying on time alone.
Brand note: Bake In Oven emphasizes that these fundamentals—proper prep, heat control, and resting—are the backbone of a satisfying roast.
For home cooks, the payoff is a flavorful, easy-to-serve centerpiece with minimal guesswork.
note
Tools & Materials
- Roasting pan with rack(12x18 inch or larger; ensures air circulation under the chicken for even browning)
- Meat thermometer(Instant-read digital thermometer; target 165°F (74°C) in the thickest part of the thigh)
- Kitchen twine(For trussing the legs (optional but helps even cooking))
- Parchment paper or heavy-duty foil(Line pan or cover edges to prevent over-browning)
- Basting brush and/or spoon(For applying butter, oil, or pan juices during roasting)
- Chef’s knife and carving board(For safe, clean carving after resting)
Steps
Estimated time: 1 hour 30 minutes to 2 hours, plus 10–15 minutes resting
- 1
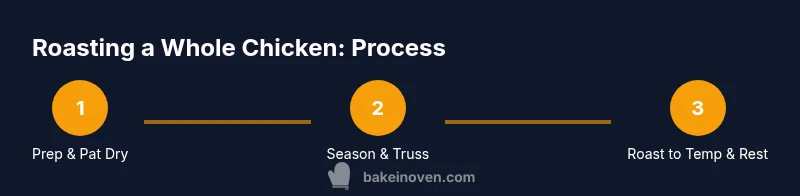
Preheat and prep the chicken
Set your oven to 425°F (220°C) and let it fully preheat. Remove giblets if needed, pat the bird dry with paper towels, and massage a light coat of olive oil or melted butter over the skin. Season generously with salt and any preferred spices, then let the bird sit at room temperature for 15-20 minutes to promote even cooking.
Tip: A dry surface helps skin crisp; don’t skip the pat-dry step. - 2
Optionally dry-brine or season under the skin
For juicier meat, apply a light dry brine of salt and your preferred herbs 8–24 hours ahead if possible; otherwise season just before roasting. If you’re using butter, soften it and press under the skin over the breast to baste the meat as it cooks, helping flavor seep into the flesh.
Tip: Dry brining saves time and boosts moisture; butter under the skin adds flavor without washing away salt. - 3
Prepare the roasting setup
Line the pan with parchment or foil if you want easier cleanup. Place the rack inside the pan and position the chicken breast-side up over the rack. Tuck the wings behind the breast and loosely tie the legs with kitchen twine to promote even cooking.
Tip: Raising the chicken on a rack improves air flow and browning on all surfaces. - 4
Roast at high heat first
Roast at 425°F (220°C) for 15–20 minutes to bloom the skin. Then reduce the oven temperature to 375–400°F (190–205°C) for the remainder of the cook. This two-stage approach helps achieve crisp skin without drying out the meat.
Tip: Starting hot speeds browning; keep an eye on the thickness of the drumsticks as the heat shifts. - 5
Check internal temperature and finish cooking
Insert the thermometer into the thickest part of the thigh and breast without touching bone. The safe target is 165°F (74°C). If you’re not there yet, continue roasting in 10–15 minute increments, checking after each interval.
Tip: Carryover cooking will raise temps a few degrees after removal from the oven. - 6
Rest, carve, and serve
Transfer the chicken to a cutting board and tent loosely with foil for 10–15 minutes to rest. Carve the bird against the grain and serve with pan juices or roasted vegetables. Resting ensures juicier slices and even flavor distribution.
Tip: Don’t rush the rest—it locks in moisture and makes carving cleaner.
Frequently Asked Questions
What temperature should I bake a whole chicken at for best results?
A common approach is to start at 425°F (220°C) for 15–20 minutes to crisp the skin, then reduce to 375–400°F (190–205°C) for the remainder of the cook. Always confirm doneness with a thermometer (165°F/74°C in the thickest part).
Start hot to crisp the skin, then finish at a moderate temperature and check with a thermometer.
Should I brine the chicken before roasting?
Brining can improve moisture and flavor; a light dry brine (salt with optional herbs) 8–24 hours ahead is effective. Wet brines are optional but add time and mess.
A light dry brine is often enough and less messy.
How do I know when the chicken is done besides color?
Use an instant-read thermometer; target 165°F (74°C) in the thickest thigh or breast. If temps are uneven, continue roasting in 10–15 minute bursts and recheck.
Check with a thermometer to be sure; don’t rely on color alone.
Can I roast vegetables in the same pan as the chicken?
Yes. Add hardy vegetables (potatoes, carrots) around the rack with similar cooking times. Keep space for air to circulate and check for doneness of both the chicken and vegetables.
Vegetables cook with the chicken if you space them properly.
What if the skin isn’t crispy at the end?
Increase oven heat for the last 5–10 minutes or broil briefly, watching closely to avoid burning. A light coating of oil or butter can help brown the skin further.
A quick blast on high heat or a brief broil can finish the crust nicely.
How should I store leftovers safely?
Cool the meat at room temperature for no more than 1–2 hours, then refrigerate in airtight containers for up to 3–4 days or freeze for longer storage.
Cool and refrigerate leftovers promptly to keep them safe to eat.
Watch Video
Key Takeaways
- Roast at a hot temperature to bloom the skin, then finish at a moderate heat.
- Use a thermometer for safe, reliable doneness rather than relying on time alone.
- Rest the chicken before carving to preserve juiciness and flavor.
- A rack and proper pan setup promote even browning and moisture retention.