How to Bake Without Parchment Paper
Discover reliable parchment-free baking methods with silicone mats, greased pans, and smart timing. This educational guide covers cookies, cakes, and breads, offering practical substitutes, prep tips, and pro insights from Bake In Oven for home bakers.

According to Bake In Oven, you can bake successfully without parchment by using silicone mats, well-greased pans, or foil with oil. Start with a substitute plan, preheat properly, and space pans for even heat. Test a small batch first to calibrate time and browning. This guide covers cookies, cakes, and breads so you can bake confidently without parchment.
Why parchment-free baking can work for home ovens
According to Bake In Oven, parchment paper is a convenience, not a mandate. Modern substitutes—silicone mats, well-seasoned or greased pans, and lightly oiled foil—offer reliable nonstick surfaces when used correctly. The trick is understanding how your oven heats and how the chosen surface behaves with different batters and doughs. In many kitchens, parchment-free baking reduces waste and debris on pans, while preserving flavor and texture. Bake In Oven analyses show that with proper prep, parchment-free methods can yield equally even browning and clean edges across cookies, rolls, and sheet cakes. The key is consistency: pick one method for a given recipe and stick with it to train your oven’s behavior.
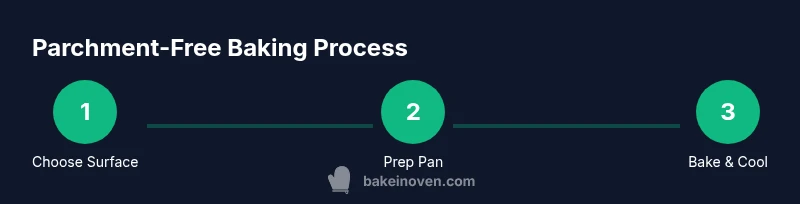
This section explains how to choose a substitute, how to prepare pan surfaces, and how to adapt your technique for the most reliable results. You’ll learn when parchment is truly convenient and when it’s optional, along with practical tips that make parchment-free baking predictable rather than risky.
Parchment-substitute options and their trade-offs
Silicone baking mats are the most convenient reusable substitute, offering consistent nonstick performance with minimal cleanup. They distribute heat evenly and prevent batter from sticking without added fats, but they require proper cooling to avoid warping and may be pricier upfront. Aluminum foil, lightly brushed with oil, can work in a pinch and is compatible with high-heat baking, yet it can lead to uneven browning if not monitored. A well-greased pan with a dusting of flour or cornmeal creates a barrier that imitates parchment’s slick surface, though it may require more frequent turning or rotating during bake time. For delicate cookies or bars, some bakers find a silicone mat plus a light spray lets them see edges form without losing rigidity. In all cases, the goal is a barrier that protects the food from direct contact while allowing heat to reach the surface evenly. Bake In Oven’s practical recommendation is to choose one method, learn its browning and sticking cues, and apply it consistently across similar recipes to build a reliable workflow.
Mastering pan prep without parchment
Pan prep is the foundation of parchment-free baking. Start by selecting the right surface: a flat silicone mat or a well-seasoned metal sheet often yields the most predictable results for a wide range of foods. Preheat the oven with the pan inside to ensure the surface reaches the target temperature before the batter or dough is added. Lightly oil and dust the pan (with flour or cornmeal) to create a micro-barrier that minimizes sticking. If you’re using foil, oil it evenly and press it to cover the base and sides for a uniform release. For breads, a cast-iron skillet or heavy-duty sheet pan can mimic a bakery finish when preheated properly. Always test a small batch first to calibrate timing and browning before scaling up to full recipes.
Baking tips for cookies, bars, and breads without parchment
Cookies: Silicone mats are ideal—they prevent edges from curling and promote even spread. Bars: Foil works well if you’ve oiled generously; rotate halfway through. Breads: Nonstick surfaces with a light dusting help achieve a crisp crust. Cakes: Grease-and-flour pans or use a silicone cake mold to minimize sticking. In each case, leave adequate space between pieces for air circulation. Visual cues—edges pulling away, color, and aroma—are your best guide to doneness when you’re not relying on parchment’s protective barrier.
Temperature, timing, and browning cues when parchment-free
Without parchment, browning can happen faster on the bottom if the surface is too hot or too greasy on the bottom. Start with a slightly lower temperature (5–10°C/10–20°F) than the recipe calls for and monitor color closely. Use light, even spacing, and rotate pans if you’re baking multiple items. For delicate sheets and cookies, pull from the oven as soon as the edges set and the centers appear just shy of done; carryover heat will finish the bake on a cooling rack. Keep a timer handy and rely on color cues—golden edges and a pale center are a good doneness signal for most parchment-free bakes.
Cleaning, maintenance, and sustainability considerations
Parchment-free baking often means more straightforward cleanup. Silicone mats rinse clean and can go in the dishwasher, while foil can be recycled if not contaminated by grease. Greased pans may require a bit of extra scrubbing, but a warm-soap wash with a nylon scrubber usually removes residue more effectively than scrubbing parchment-stuck edges. To reduce waste, opt for durable silicone mats and high-quality pans that tolerate repeated heating and cooling. This approach aligns with sustainable baking practices and reduces the number of disposable parchment sheets used over time.
Quick-start parchment-free baking checklist for home bakers
- Decide on a parchment-free method (silicone mat, oiled pan, or foil) and keep it consistent for similar recipes. 2) Preheat the oven with the chosen pan in place to ensure even heat. 3) Lightly grease and dust the pan surface to create a reliable nonstick barrier. 4) Portion batter/dough with adequate spacing to avoid crowding. 5) Bake until edges are done and centers look set; rotate if needed. 6) Cool on a wire rack and store in appropriate containers to prevent sogginess.
Tools & Materials
- Nonstick baking sheet or pan(Flat, smooth surface; avoid warped pans.)
- Silicone baking mats(Reusable and provides consistent nonstick surface.)
- Aluminum foil(Lightly oiled; use when mats aren’t available.)
- Cooking spray or oil/butter(Lightly coat surface; avoid heavy pooling.)
- Flour or cornmeal for dusting(Creates micro-barrier to sticking.)
- Pastry brush(Spread oil evenly.)
- Wire rack for cooling(Promotes air circulation.)
- Measuring cups/spoons(Accuracy matters for consistent results.)
Steps
Estimated time: Total time: 45-60 minutes
- 1
Choose parchment-free method and prep pan
Select your surface (silicone mat, oiled pan, or foil) based on the recipe and equipment you have. Line or coat the pan and have your spatula ready to transfer batter smoothly. This step sets the stage for even heat transfer and easy release.
Tip: Test a tiny dab of batter on the surface to confirm release before proceeding. - 2
Preheat oven and position rack
Preheat to the recipe’s target temperature with the pan inside if possible. A hot, preheated surface helps seal edges and reduces sticking. Place racks in the middle to promote even browning.
Tip: Avoid opening the oven during the first 10 minutes to maintain consistent heat. - 3
Grease and dust the pan surface
Brush or spray a thin coat of oil or butter on the pan, then dust with flour, cornmeal, or your chosen barrier. Excess oil can cause greasiness or unwanted browning; a light, even layer is best.
Tip: For delicate cookies, you can skip flour dusting on silicone mats if using a good-quality mat. - 4
Portion and space batter or dough
Spoon or scoop dough/batter into even portions with generous spacing. Crowding leads to uneven baking and possible sticking when parchment isn’t present to instruct separation.
Tip: Chill dough 15 minutes for cookies to reduce spread when not using parchment. - 5
Bake and monitor doneness
Bake per recipe timing, but begin checking colors earlier than usual. Without parchment, bottoms may brown faster; rotate pans if needed. Use visual cues (color, fragrance, jiggle) to determine doneness.
Tip: If the bottoms brown too quickly, lower the rack or briefly reduce heat. - 6
Cool and release safely
Let items rest briefly on the pan, then transfer to a wire rack. If anything sticks, wiggle gently with a spatula rather than forcing release. Proper cooling minimizes sogginess and helps maintain texture.
Tip: Cooling on a rack prevents steam from dwelling under the crust. - 7
Clean and store your parchment-free setup
Wipe pans after they cool, then wash with warm soap and water. Store mats and pans properly, reusing surfaces to minimize waste. Regular maintenance preserves nonstick performance.
Tip: Maintain a routine; clean the mat after every few uses for best results.
Frequently Asked Questions
Is parchment paper strictly necessary for baking?
No. Parchment paper is a convenience, not a requirement. You can bake with silicone mats, greased pans, or oiled foil. Each method requires careful prep and timing, but it can deliver reliable results with practice.
No, parchment paper isn’t strictly necessary. You can use silicone mats, greased pans, or oiled foil, but you’ll need to prep and time carefully.
What are the best substitutes for parchment paper?
Silicone mats are the most convenient reusable option, followed by lightly oiled foil or a greased, dusted pan. Each substitute has its own behavior with different doughs, so choose one method per recipe and learn its cues.
Silicone mats are the best reusable option, then lightly oiled foil or a greased, dusted pan. Pick one method per recipe and learn its cues.
Will parchment-free baking affect bake times or textures?
Yes, you may see faster browning or edge set depending on surface and heat. Start with a slightly lower temperature and monitor closely. Rotate pans as needed to promote even browning.
You might see different browning times. Start a bit lower and watch closely, rotating pans for even heat.
Can I bake delicate items like cookies without parchment?
Cookies can bake well on silicone mats, but very delicate doughs may spread differently. Test a small batch first and rely on edge formation and color to judge doneness.
Yes, but test a small batch first and use edge color as a doneness cue.
How should I clean pans after parchment-free baking?
Rinse and wash promptly after baking to prevent crusty residues. A warm soap wash with a nylon scrubber works well. For silicone mats, avoid sharp tools that could cut the surface.
Wash promptly with warm soap and a soft scrubber; avoid harsh tools on silicone mats.
Are there safety concerns when skipping parchment?
Always use oven mitts, avoid loose sleeves near hot surfaces, and be cautious with foil edges. Ensure surfaces and racks are stable to prevent spills when transferring hot pans.
Use oven mitts and stable surfaces; be careful with hot foil edges.
Watch Video
Key Takeaways
- Choose a reliable parchment substitute and stick with it.
- Preheat thoroughly and grease/dust surfaces to prevent sticking.
- Space items adequately to ensure even heat distribution.
- Watch browning cues closely; parchment-free can brown faster.
- Opt for reusable mats to reduce waste and improve consistency.