How to Get Started Roasting Coffee Beans
Learn the fundamentals of home coffee roasting, from equipment to cooling and storage. This beginner-friendly Bake In Oven guide helps home bakers master a simple, flavor-first approach to roasts.

By the end of this guide you'll know how to get started roasting coffee beans at home using a simple method and safe equipment. You will choose your roasting method, prepare green beans, monitor color and aroma, and cool and store your roast properly. This beginner-friendly approach covers essential gear, timing, and flavor development.
What roasting does to coffee flavor
Roasting transforms the chemical structure of green coffee beans, unlocking aroma compounds and flavor notes. At a basic level, lighter roasts emphasize acidity, fruitiness, and origin character, while darker roasts bring body and chocolatey, smoky tones. The roast level you choose shapes grind size, extraction time, and ultimately whether a cup tastes brighter or bolder. For beginners, understanding how heat interacts with beans helps you plan your first attempts and avoid under- or over-roasting. In practice, expect progression from yellowing beans to first crack, and then to your target color. According to Bake In Oven, the most reliable roasts begin with a simple plan, careful monitoring, and a willingness to adjust based on aroma and visual cues. This foundation will help you set expectations for flavor development and consistency.
How to get started roasting coffee beans
If you're curious about how to begin, this section breaks down the core steps and choices. You can choose between inexpensive methods like a popcorn popper or a small dedicated home roaster, or you can experiment with a home oven adapted for roasting. Start with a small batch of high-quality green beans, in a well-ventilated area. Keep notes on times, color, and aroma so you can compare roasts later. The key is consistency: measure your batch size, use the same equipment for each roast, and gradually adjust roast level as you become familiar with the cues. By following these steps, you’ll build confidence and taste incremental improvements as you refine your technique.
Essential gear and workspace setup
Your setup matters almost as much as the beans themselves. Begin with a reliable heat source, a roasting method that fits your budget and space, and a dedicated area with good ventilation. A kitchen scale helps you track batch sizes precisely, while a timer keeps you aligned with your chosen roast profile. A cooling rack or tray is essential to quickly cool beans after roasting, preventing continued roasting from residual heat. Wear heat-resistant gloves when handling hot equipment, and keep a fire extinguisher or baking soda on hand as a precaution. Finally, designate a clean storage container for your roasted beans to lock in aroma and freshness.
Sourcing and preparing green coffee beans
Choose green beans from reputable suppliers and check for freshness by looking at packaging dates and origin notes. For beginners, origin clarity (e.g., single-origin vs. blends) and bean size consistency matter more than exotic origins. Decide between washed and natural processed beans; washed beans tend to produce cleaner flavors, while natural processed beans can offer fruity, fuller-bodied cups. Store any unused green beans in a cool, dry place in an airtight bag. Rinse beans briefly before roasting if they feel dusty, but avoid washing them as water can start fermentation.
The roast process: timing, color, and cues
Roasting is a dance of heat and time. Start with a gentle heat and allow the beans to travel from green to yellow to the first crack stage. Listen for the audible cracking sounds and watch for color changes; light roasts show pale brown, while medium roasts exhibit caramel tones, and dark roasts become almost black. Depending on your equipment, use a roast timeline and color cues as your guide rather than chasing a fixed minute count. The key moments are when you hear first crack and when you decide to end the roast based on aroma and visual cues. Always stop slightly before your target color to maintain clarity and balance in the cup.
Cooling, degassing, and storing roasted beans
Cool the beans rapidly using a perforated tray or colander to halt the roast and start the degassing process. After cooling, let the beans rest for 12–24 hours to off-gas CO2 and settle flavor. Store roasted beans in an airtight container away from light and heat, grinding just before brewing to preserve aroma.
Basic flavor guidance: starting profiles and tweaking
As a beginner, keep your first roasts in the light-to-medium range to highlight origin flavors and maintain brightness. Aim for flavor balance with a touch of sweetness and low bitterness. Taste and adjust by slightly longer or shorter roast times, altered agitation, or different airflow settings if available. Journaling each roast helps you map adjustments to flavor outcomes over time.
Troubleshooting common issues
If coffee tastes flat or sour, you likely under-roasted, or there may be uneven heat. If it smells burnt or tastes overly bitter, you may have roasted too dark or introduced scorching. Uneven roasts are often caused by bean agitation or inconsistent heat; adjust agitation and ensure even airflow around beans.
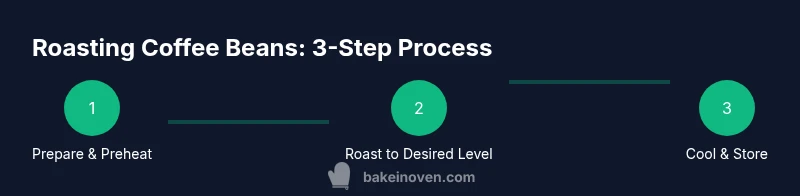
Your first roast plan: a simple 2-step workflow
Step 1: Prepare a small batch (100–150 g) of green beans, set up your roaster, and preheat for 2–3 minutes. Step 2: Roast until you reach a light/medium color, cool, and evaluate. Taste and adjust on your next roast.
Tools & Materials
- Green coffee beans (unroasted)(1–2 cups per batch (about 150–300 g))
- Home roasting device (popcorn popper, air roaster, or dedicated roaster)(Choose based on budget and space)
- Ventilation setup (window fan or range hood)(Keep air flowing to carry smoke)
- Kitchen thermometer (optional but helpful)(Can help track internal bean temp)
- Heat-resistant gloves(Protect hands during transfer)
- Cooling tray or rack(Cool beans rapidly after roasting)
- Digital kitchen scale(Accurate batch sizing and reproducibility)
- Airtight storage jar(Store roasted beans away from light)
Steps
Estimated time: 60-90 minutes
- 1
Prepare workspace and equipment
Set up your roasting area with good ventilation, a heat source, and a cooling area. Gather beans and devices so you can move smoothly through the roast.
Tip: Ensure you have adequate ventilation to manage smoke and fumes. - 2
Weigh beans and pre-measure batch size
Weigh a consistent batch size (about 100–150 g for your first roasts) to help compare results across trials.
Tip: Use a precise kitchen scale and zero it before adding beans. - 3
Preheat roasting device and set up ventilation
Preheat your chosen roaster and ensure airflow is set to avoid smoke buildup. Prepare a fan or vent near your workspace.
Tip: Preheating reduces roast time variability and helps achieve even color. - 4
Roast to first crack and monitor cues
Roast at steady heat, listening for first crack and watching color changes. Decide on your target color before the roast ends.
Tip: Use aroma and visual cues in addition to time to guide you. - 5
Finish roast and begin cooling
Once you reach your target color, stop the roast and start cooling beans immediately on a perforated tray.
Tip: Spread beans to maximize cooling surface and prevent overheating. - 6
Rest, evaluate, and store
Let beans rest for 12–24 hours to degas, then store in an airtight container away from light.
Tip: Label roast date and notes for future refinement.
Frequently Asked Questions
What is the best way to start roasting coffee beans at home?
Begin with a simple method such as a popcorn popper or a small air roaster. Roast in small batches, take notes, and adjust based on aroma and color. This builds confidence without overwhelming you.
Start with a simple method and a small batch, then adjust based on aroma and color.
Is home roasting safe?
Yes, with proper ventilation, a stable heat source, and careful handling of hot equipment. Keep a fire extinguisher nearby and never leave the roaster unattended.
Yes, with ventilation and safe handling of hot equipment.
How do I know when the roast is done?
Rely on a combination of time, color, and aroma. First crack indicates light to medium; darker roasts show deeper color and oils. Stop before you overdevelop the flavor.
Use color and aroma cues along with time to decide when to stop.
What roast level should a beginner start with?
Aim for light to medium to preserve origin flavors and avoid excessive bitterness. You can move darker in later roasts once you’re comfortable with cues.
Start light to medium to learn flavor cues.
Do I need expensive equipment to begin?
No. You can start with affordable options like a popcorn popper or small air roaster, and upgrade as you learn your preferred workflow.
You can begin with affordable tools and upgrade later.
How should I store roasted beans for freshness?
Store in an airtight container away from light and heat. For best flavor, grind just before brewing and consume within a couple of weeks.
Keep beans in a sealed, cool place and brew soon after grinding.
Watch Video
Key Takeaways
- Start with a small test batch to learn your roaster.
- Ventilation and patience are key to consistent roasts.
- Label and store roasted beans properly for freshness.