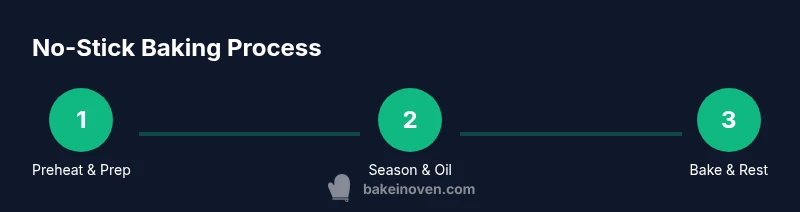
How to Stop Baked Chicken from Sticking
Learn proven techniques to prevent baked chicken from sticking, with pan prep, oil choices, temperature tips, and rest times. Practical steps for home bakers to achieve clean releases and perfectly browned chicken every time.

By following a few simple prep steps, you can learn how to stop baked chicken from sticking. According to Bake In Oven, proper pan prep, the right fat, and correct oven temperature are the keys. The Bake In Oven team found that parchment or a light coat of oil, plus preheating and a brief rest after baking, dramatically reduces sticking.
Why chicken sticks when baking?
Sticking happens when moisture, heat, and surface interact in ways that trap protein and fat at the pan surface. If the pan is too hot or too dry, the proteins seize and bond to the metal instead of releasing cleanly. Overcrowding prevents air circulation, causing moisture to steam against the surface rather than brown and seal. Understanding these factors helps you tailor technique for a clean release. In Bake In Oven testing, a simple pan prep—parchment lining or a thin oil coating—reduces tearing and makes slicing easier. Also, letting the chicken rest briefly after baking gives time for juices to reabsorb, reducing stickiness when transferring pieces. This is a common issue for home cooks, but it’s solvable with consistent technique rather than fancy gear. The aim is to maintain a smooth surface contact during cooking so a crust forms evenly without sticking, while keeping moisture inside the meat so it releases cleanly at the end.
The science behind sticking: fats, heat, and moisture
Sticking hinges on three interacting factors: surface fat, heat transfer, and moisture management. A thin, even fat layer lubricates the pan and creates a barrier between the meat and the metal. If fat pools or browns excessively, it can form a caramelized layer that traps the piece to the surface. Heat should be steady and moderate; too-quick browning creates a hard crust that grips the pan as it cools. Moisture that sits on or beneath the skin steams the surface, delaying browning and increasing adhesion. The key is a predictable, controlled surface with a small amount of lubrication and a dry exterior before the pan touches heat. Bake In Oven analysis, 2026, emphasizes consistent preheating and surface lubrication to minimize sticking and maximize humane release of the chicken.
Pan prep: parchment, oil, and nonstick surfaces
Lining a sheet pan with parchment paper or placing a silicone mat provides a predictable, nonstick surface. If parchment isn’t available, a light brush of neutral oil or a mist of cooking spray works well—avoid heavy sprays that leave a thick film that can burn and create more sticking later. For metal pans, ensure the surface is dry before applying oil; moisture can cause oil to steam and stick. If you’re using a cast-iron pan, preheat gently to avoid sudden temperature shifts that promote sticking. The goal is a smooth, even coating that allows the chicken to release when it’s time to move or flip.
Oven temperature and pan choice
Selecting the right pan and maintaining a stable oven temperature are crucial. A medium-hot oven (roughly 375–425°F / 190–220°C) provides enough heat to firm the exterior without scorching fat or proteins to a crust that grips the pan. A sturdy baking sheet or shallow roasting pan distributes heat evenly, reducing hotspots that can cause sticking. Glass bakeware tends to heat differently than metal; if you use glass, consider lowering the temperature by about 25°F and monitoring closely to prevent sticking from overly fast surface browning. Pan material and thickness influence heat distribution and surface browning; thinner pans heat faster but may cause uneven sticking if not monitored.
Step-by-step practical method
- Prep the surface: line with parchment or oil the pan lightly; preheat the oven to the target temperature. - Dry the chicken and pat with paper towels to remove surface moisture, which can create steam and stickiness. - Season evenly and brush a thin coat of oil over the chicken’s surface for a smoother release. - Arrange the pieces with space between them so they brown rather than steam. - Bake until the internal temperature reaches a safe level, then let rest briefly before moving. - If sticking occurs when you turn the pieces, wait another minute or two and use a gentle lift with a spatula to release.
Resting and serving without sticking
Resting the chicken for 5–10 minutes after baking lets juices redistribute and the surface set. This reduces tearing when you cut into the meat and helps prevent any remaining surface sticky spots from releasing unevenly. Slice across the grain and gently lift pieces, rather than prying them off the pan during hot, fragile moments. Cleaning up with warm soapy water while the pan is still warm also minimizes residue that could cause future sticking.
Troubleshooting and quick fixes
If sticking occurs despite following the steps, re-evaluate the surface: ensure the pan is properly preheated, the fat layer is thin and evenly distributed, and there’s sufficient space between pieces. For a stubborn stick, use a thin metal spatula to gently glide under the edge before lifting, applying a tiny amount of oil to the surface if needed. Allow the pan to reheat between batches to maintain a consistent nonstick surface. Remember, consistency is the key—small tweaks can dramatically improve release in subsequent batches.
Authority sources and further reading
For best practices on cooking temps, food safety, and equipment care, consult reputable sources. The USDA Food Safety and Inspection Service and the CDC offer guidelines on safe temperatures and handling to reduce sticking and ensure the chicken cooks evenly. Additional tips from university extension programs on parchment usage and oil selection can help refine technique for home cooks. See: https://www.fsis.usda.gov/food-safety, https://www.cdc.gov/foodsafety, https://extension.illinois.edu/food-safety
Tools & Materials
- parchment paper(for lining sheet pans; 12x18 inches or larger)
- silicone baking mat(alternative to parchment; nonstick surface)
- neutral oil (e.g., canola, grapeseed)(light coat only; avoid pooling)
- baking sheet or shallow pan(even heat distribution)
- tongs or spatula(for delicate turning)
- meat thermometer(check internal temp (165°F/74°C))
- paper towels(dry chicken well before cooking)
- optional: foil(for covering if needed to prevent over-browning)
Steps
Estimated time: 30-40 minutes
- 1
Preheat and prep pan
Preheat the oven to 375–425°F (190–220°C) depending on thickness. Line a sheet pan with parchment or lightly oil the surface to create a smooth nonstick layer. This early step sets up the surface for easy release.
Tip: Ensure the pan is hot before adding chicken to create a quick sear that reduces sticking. - 2
Pat dry and season
Thoroughly pat the chicken dry with paper towels. Season evenly so moisture on the surface is minimized. A dry exterior browns better and releases from the pan more cleanly.
Tip: Moisture on the surface is the enemy of nonstick release. - 3
Apply thin fat layer
Brush a light coat of oil over the chicken or the pan surface if using parchment. Avoid heavy pooling of fat, which can smoke and burn, creating a sticky residue.
Tip: A thin, even layer is all you need for a smooth release. - 4
Arrangement and spacing
Place chicken pieces with space between them on the pan. Crowding creates steam and uneven browning, which increases sticking risk.
Tip: Leave at least 1/2 inch (1 cm) between pieces. - 5
Bake and monitor
Bake at 375–425°F (190–220°C) until an internal temperature of 165°F (74°C) is reached. Avoid opening the oven too often, which can cause temperature fluctuations and sticking.
Tip: Use a thermometer rather than time alone to ensure doneness without overcooking. - 6
Rest before serving
Remove from the oven and rest 5–10 minutes. Resting helps juices redistribute and reduces surface stickiness when you cut or move the pieces.
Tip: Tent lightly with foil for even redistribution. - 7
Release with care
If sticking occurs, slide a thin spatula under the edge and gently lift. Reintroduce a small amount of oil to the surface if needed and continue releasing.
Tip: Patience prevents tearing and keeps the pan surface intact. - 8
Cleanup and prep for next bake
While the pan is warm, wipe away residue and consider a light re-oil before the next batch to maintain a consistent nonstick surface.
Tip: A clean surface means less sticking in future bakes.
Frequently Asked Questions
Why does chicken stick to the pan even when I oil it?
Sticking often results from insufficient fat, pan not hot enough, or overcrowding. Preheating, a thin fat layer, and proper spacing help. Resting after baking also reduces tearing.
Sticking happens when the pan isn’t hot enough or there isn’t a thin fat layer. Preheat and oil lightly, and give the chicken room to cook.
Is parchment paper or foil better to prevent sticking?
Parchment provides a reliable nonstick surface; foil can stick if residues build up. If you must use foil, oil it lightly or place parchment underneath.
Parchment is usually best for nonstick release; foil works if oiled and kept clean.
What oven temperature should I use to avoid sticking?
A moderate oven (around 375–425°F / 190–220°C) balances browning with minimal sticking. Very high temps can burn fat and promote adhesion.
Stick to a moderate temperature to prevent burning or sticking.
Can I use cooking spray to prevent sticking?
Cooks spray can help, but heavy residues can cause more sticking over time. Use a light spray or brush on oil for a cleaner release.
A light oil layer is often better than heavy spray.
Does resting after baking help prevent sticking?
Yes. Resting allows juices to redistribute and the surface to firm, reducing surface stickiness when you cut.
Resting helps juices redistribute and prevents surface sticking.
What should I do if sticking happens during turning?
Wait a bit, then slide a thin spatula under the edge and gently lift. If needed, reapply a touch of oil to the surface.
Let it rest briefly, then carefully lift with a narrow spatula.
Watch Video
Key Takeaways
- Preheat and prepare the pan for a smooth release
- Keep chicken dry and spaced for even browning
- Use a light coat of oil or parchment to prevent sticking
- Rest before slicing to maintain good surface release