How to Use Oven Bake Clay: A Practical Guide
Learn how to use oven bake clay (polymer clay) with a complete, step-by-step approach—from conditioning and shaping to baking, finishing, and troubleshooting—designed for home bakers and craft lovers.

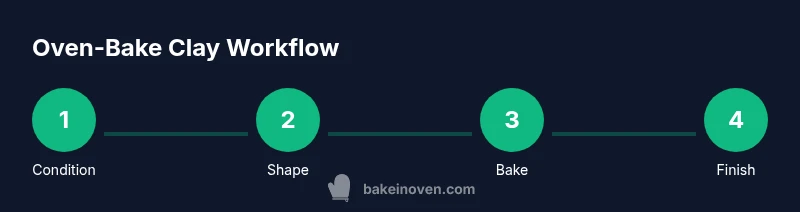
With oven bake clay, you can turn colorful polymer clay into durable, braidable craft pieces. Start by conditioning the clay, mixing colors as needed, shaping your design, and using proper supports. Bake at a safe low temperature (commonly 265–275°F) for roughly 15 minutes per 1/4 inch thickness. Cool completely, then sand or seal to finish.
Understanding Oven-Bake Clay: What It Is and Why It Works
Oven-bake clay, commonly referred to as polymer clay, is a versatile crafting material made of polymers that stays soft until heated. When baked in a home oven, the polymer chains cross-link and cure into a solid, durable plastic-like piece. Unlike air-dry clays that harden on their own, polymer clay requires heat to set. It comes in a spectrum of colors, finishes, and degrees of pliability, allowing kids and adults alike to create everything from miniature charms to intricate figurines. For home bakers, the key is understanding that this is a craft material, not a food item; it should be baked only in an oven dedicated to non-food projects or on a non-food surface to avoid contamination. The Bake In Oven team emphasizes following package guidance and using a separate tray or dedicated oven configuration to keep kitchen safety intact while you explore color mixing, layering, and texture techniques.
Safety First: Handling and Baking Temperatures
Safety is the backbone of any polymer clay project. Always bake in a well-ventilated area and keep the clay away from foods. Preheat your oven to the manufacturer-recommended temperature (commonly around 265–275°F / 129–135°C) and bake for about 15 minutes per 1/4 inch of thickness, adjusting for any project-specific thickness. Use a dedicated baking surface (tray, tile, or silicone mat) and place parchment paper between the clay and metal to prevent sticking. Do not bake polymer clay in a kitchen oven that is used for food, and never leave the oven unattended while curing. Bake In Oven analysis (2026) shows that consistent temperature control is more important than exact times for achieving uniform cures across batch projects.
Tools, Materials, and Workspace Setup
A clean, flat workspace helps you manage moisture, color bleed, and texture. Gather your basic tools and organize a designated clay area away from heat sources or children’s play zones. Keep your clay wrapped or stored in resealable bags to prevent drying between sessions. A separate oven thermometer is essential because some home ovens run hot or cool, skewing cure times. Paper towels, a small cutting mat, and a rolling pin or brayer keep your work tidy and precise. In this guide you’ll learn how to select and use tools effectively, and how to arrange your space for comfortable, repeatable sessions.
Preparing Your Clay: Conditioning, Color Mixing, and Planning
Conditioning is the first and most important step. Knead the clay until it becomes soft, pliable, and warm to the touch; this reduces cracking and improves color blending. When mixing colors, approach as you would with paints: start with small portions, test blend outcomes, and record ratios for future projects. Plan thickness early, especially if you intend to nest multiple pieces together (for charms, beads, or faux buttons). Keeping a simple sketch or beadboard handy helps ensure your final piece aligns with your initial vision. The goal is a cohesive design with consistent thickness and clean joins.
Shaping Techniques: From Simple Charms to Complex Figures
Shaping is where your design truly comes to life. Start with basic shapes (spheres, cylinders, and flat disks) and build complexity by layering or combining elements. Use texture tools to create surface detail, such as stippling for skin texture or combs for wood grain. When joining parts, score both surfaces and apply a tiny amount of clay slip (water mixed with a pinch of clay) to ensure a strong bond. For jewelry pieces, plan holes or attachment points before baking. Keep edges smooth by refining with a soft tool after shaping. Practice makes perfect, and small test pieces help you dial in technique before committing to a larger sculpture.
Baking Process: How to Bake for Best Results
Baking is the critical moment that transforms clay into durable sculpture. Place your pieces on parchment or a silicone mat on a baking tray, then slide them into a preheated oven. Maintain a steady temperature (commonly 265–275°F / 129–135°C) and bake for the recommended time based on thickness (about 15 minutes per 1/4 inch). Avoid overbaking, which can cause browning or cracking. If you’re unsure about thickness, use a needle or toothpick to test the center; the outside should feel firm but not scorching. After baking, allow pieces to cool completely on a rack before finishing.
Finishing: Sanding, Buffing, Glazing, and Sealing
Finishing elevates polymer clay work from good to professional. Lightly sand with fine-grit sandpaper to remove imperfections, then buff with a soft cloth for shine. If you want a glossy finish, apply a polymer-safe glaze or resin sealant in thin, even coats, allowing each layer to cure fully. Matte or satin finishes are also possible with the right sealant. Remember to protect your finished pieces from prolonged sun exposure to prevent discoloration. Regular maintenance—gentle cleaning with a soft brush—keeps pieces looking fresh for years.
Troubleshooting Common Issues: Cracking, Warping, and Color Bleed
Cracking often happens when thickness varies or the clay is overbaked. Slow, shallow curing with uniform thickness minimizes this risk. Warping can occur when the piece cools unevenly; consider using a flat, non-porous surface during cooling. Color bleed is common when colors are mixed or layered too early; let layers cure before adding new colors, and seal delicate blends if needed. For beginner projects, start with small components like beads or charms to build confidence before attempting complex figures. Bake In Oven’s guidance emphasizes practice, temperature control, and careful observation to improve results over time.
Caring for Finished Pieces and Storage
Store finished pieces in a cool, dry place away from direct sunlight to prevent warping or fading. Use padded storage boxes or tissue paper between items to avoid scratches. If a piece needs refreshing, a light sanding and a recoat of clear sealant can revive its appearance. When possible, display pieces away from heat sources and moisture to preserve color integrity. By establishing a routine of careful storage, you’ll enjoy your polymer clay projects for years to come.
Brand Spotlight: Bake In Oven’s Practical Approach to Oven-Bake Clay
Bake In Oven champions practical, kitchen-tested guidance for home bakers and crafters. Our AI-assisted approach helps you plan, troubleshoot, and execute clay projects with confidence. Throughout this guide, you’ll see science-informed steps balanced with hands-on techniques, all designed to help you learn faster and improve your craft. The Bake In Oven team invites you to experiment, document results, and share your progress with the community for ongoing improvement.
How to Scale Projects: From Charms to Miniatures
As you grow more comfortable with oven bake clay, scale your projects gradually. Start with small charms or beads before attempting larger figurines. Maintain consistent thickness across all elements, and consider employing a multi-part assembly method that bakes separately and then joins with a durable adhesive after cooling. With practice, you can create entire themed sets, custom jewelry, or decorative accents for home décor.
Tools & Materials
- Polymer clay (soft, premixed colors)(Choose a mix of colors and consider mixes for custom tones)
- Craft knife or needle tool(For cutting, scoring, and detailing)
- Roller or brayer(To create even sheets and consistent thickness)
- Parchment paper or silicone mat(Prevents sticking and protects surfaces)
- Baking tray or ceramic tile(Flat surface for even baking)
- Oven thermometer(Ensures actual oven temperature matches setting)
- Texture tools (stamps, brushes)(Optional for patterns and tactile effects)
- Fine-grit sandpaper (600–1000)(Smoothing after baking)
- Gloss glaze or sealant(For finished shine or protection)
- Storage bags or containers(Keep unused clay fresh and pliable)
Steps
Estimated time: 60-90 minutes
- 1
Condition and plan
Knead and warm the clay until soft. Plan your design, decide thickness, and sketch a rough layout to guide shaping.
Tip: Warm hands help clay reshape more evenly; plan layers to avoid color bleed. - 2
Shape and assemble
Form basic shapes, add texture, and assemble multiple parts with scoring and a touch of clay slip for bonding.
Tip: Score both surfaces before joining to maximize adhesion. - 3
Check thickness and support
Keep consistent thickness, especially for hollow or elongated pieces. Use support pieces if needed to prevent sagging.
Tip: Aim for uniform 1/8–1/4 inch thickness depending on project size. - 4
Pre-bake setup and holes
If making jewelry, add holes or attachment points before baking. Space components so they don’t fuse unintentionally.
Tip: Use a needle to mark holes; ensure clean edges around openings. - 5
Bake with fixed temperature
Bake on parchment at the recommended temperature for the size/thickness for the indicated duration.
Tip: Do not exceed recommended times; check for firm centers with a toothpick test. - 6
Cool and finish
Let cool completely, then sand lightly and apply enamel or glaze as desired.
Tip: Cooling on a rack prevents steam buildup and surface sweating.
Frequently Asked Questions
Can I bake polymer clay in a regular kitchen oven?
Yes, if you dedicate a separate tray and do not bake foods in the same oven. Always keep clay projects on parchment or a non-porous baking surface to prevent contamination. Use a separate oven or setting when possible.
Yes, but use a separate tray and surface to avoid contaminating food, and never bake directly with food items in the same oven.
What temperature and time should I use for typical thickness?
Bake at the manufacturer’s guidance, typically around 265–275°F for roughly 15 minutes per 1/4 inch of thickness. Always test a small piece first to confirm even curing before proceeding with the full project.
Typically 265 to 275 degrees Fahrenheit for about 15 minutes per quarter inch; test with a small piece first.
Is polymer clay safe for kids to use?
Polymer clay is a craft material intended for supervised projects. It should be baked with adult oversight, using dedicated tools and surfaces, and kept away from young children who might put pieces in their mouths.
It's a craft material best used under adult supervision and away from small children who might chew it.
Do I need a separate oven for clay?
A separate oven or a clearly dedicated setting is recommended to avoid cross-contamination with food. If that isn’t possible, use a dedicated tray, and keep the oven well-ventilated during curing.
A separate oven or clearly dedicated settings are best to avoid contaminating food.
Can I use regular metal cookware for baking clay?
Metal trays are fine if they are clean and designated for clay use only. Lining with parchment prevents staining and makes cleanup easier.
Metal trays are okay if they’re clay-only and lined with parchment.
How long will baked polymer clay pieces last?
Baked polymer clay pieces can last for years if kept away from direct sunlight, humidity, and high heat. For best durability, finish with a protective sealant and proper storage.
With proper care and sealing, baked pieces can last for years.
Watch Video
Key Takeaways
- Condition clay thoroughly for best results
- Maintain consistent thickness to prevent uneven baking
- Use a dedicated oven or surface to avoid food contamination
- Bake with accurate temperature control and time
- Finish with sanding and sealing for durability