Is It Bake a Pizza? A Home Baker's Guide
Learn how to bake a pizza at home with stone, steel, or sheet pan. This comprehensive how-to covers dough, heat, toppings, and troubleshooting for a crisp crust and bubbly cheese.

You’ll learn the best practice for baking a pizza at home, whether to bake on a stone, steel, or a simple sheet pan, and what gear and dough prep you need. This quick guide covers a reliable method to get a blistered crust, bubbly cheese, and evenly cooked toppings in a standard home oven.
Is it bake a pizza: what this guide covers
You’ll learn the best way to bake a pizza at home, including whether to bake on a stone, steel, or a simple sheet pan. This guide from Bake In Oven focuses on practical, kitchen-tested methods you can replicate with common equipment. The goal is a crust that’s blistered at the edges, with a chewy center and toppings that cook evenly without turning to soggy mush. You’ll see why heat distribution, dough readiness, and moisture management matter more than chasing a single miracle technique. We’ll cover equipment choices, dough basics, shaping, sauce and toppings, and the exact steps that lead to reliable results. You’ll also find common myths debunked—no wood-fired oven is required in most homes to produce excellent pizza. By following these steps and adjusting to your oven's quirks, you’ll gain confidence and speed. According to Bake In Oven, even modest home ovens respond well to proper preheating and strategic placement of the stone or steel. This section lays the groundwork for the rest of the guide and primes you for a successful bake.
Oven options: stone, steel, or sheet pan
The three main heat-transfer platforms for home pizza are a baking stone, a steel, or a heavy-duty sheet pan. Stones and steels act as heat reservoirs that create a crisp bottom via rapid heat transfer when the dough contacts hot surface. Stones require a longer preheat, while steels reach peak heat faster, producing a lighter, crisper crust with less moisture. Sheet pans are convenient and affordable, and they can still yield good results if preheated and given enough time to heat through. When choosing, consider your oven’s max temperature, the time you’re willing to wait for preheat, and how many pizzas you typically bake at once. If you lack a stone or steel, you can still bake on a parchment-lined sheet pan, but expect a softer crust and slightly longer bake. The key is to preheat thoroughly and to position the rack so the pizza sits close to the heat source for efficient browning.
Dough foundations: flour, hydration, and fermentation
Pizza dough is simple in concept but powerful in outcome when you understand flour and water relationships. A high-protein flour helps develop gluten for structure, while hydration—how much water you mix into the dough—directly affects the crust texture. For home-style pizza, aim for 60-65% hydration with 00 or bread flour, then allow at least one bulk fermentation at room temperature or a longer cold ferment in the fridge. The fermentation time influences flavor and crust texture, so plan ahead if you can. Salt strengthens gluten and enhances flavor, while a touch of olive oil can improve extensibility. Knead or fold until the dough is smooth and slightly tacky, then cover and rest briefly before shaping. When dough relaxes during proofing, it’s easier to stretch without tearing, resulting in a nicer crust circumference and uniform thickness.
Shaping and stretching dough: technique
Shaping dough by hand helps you control thickness and air pockets. Start by dividing the dough into equal portions and letting each rest briefly. On a well-floured surface, press outward from the center, leaving a slight rim for the crust. Avoid using a rolling pin, which can flatten bubbles and ruin texture. Instead, use gravity and your fingertips to stretch and rotate, rotating after each pass to maintain roundness. If the dough resists, give it a short rest and try again. The goal is a 12- to 14-inch circle with a thin center and a puffed edge. Dust liberally with flour to prevent sticking when you transfer to the hot surface. Proper shaping reduces sag and uneven thickness so toppings cook evenly.
Sauce and toppings: balance, moisture, and timing
Pizza toppings should complement the crust and bake within a short window. A light, fresh sauce (or a simple crushed tomato mixture with a pinch of salt and olive oil) spreads evenly without soaking into the dough. Cheese acts as both flavor and moisture moderator; choose a mix of mozzarella for melt and parmesan or pecorino for sharpness. Pre-cook very wet toppings (like mushrooms or peppers) or pat dry to avoid a soggy crust. Layer sauce first, then cheese, and finally toppings so the crust browns evenly. Keep toppings modest to maintain structural integrity; overly heavy toppings can lead to a doughy center. Season with a light hand and finish with a drizzle of olive oil after baking for shine and aroma.
Baking science: heat, time, and rack position
Heat drives crust development, aroma, and texture. Preheat your oven to the highest safe temperature and allow the stone or steel to come to temperature for a full preheat. Position the rack closest to the heat source if you’re using a conventional oven, or use the conventional position with convection if you have it. A typical bake runs around 6-12 minutes for a 12-inch pie, depending on thickness and toppings. Rotate the pizza halfway through to promote even browning. Watch for the crust edges to blister and the cheese to bubble with golden spots. If your oven runs cool, consider one of these tweaks: bake on a higher rack, use a steel instead of a stone, or extend bake time by 1-2 minutes while monitoring closely.
Common mistakes and fixes
Overhydrated dough can spread and tear; under-hydration yields a dry crust; both hamper texture. Under preheating leads to pale bottoms; ensure the stone or steel is hot before the dough touches it. A soggy bottom occurs when toppings are overly wet or when the dough is too thick near the center. To fix: pat down toppings, drain moisture, or par-bake the crust for 2 minutes then add toppings. Rolling the dough instead of hand-stretching can crush gas pockets; try manual stretching and gravity. Finally, cutting too early while the crust is still firm and resilient can cause toppings to slide; wait a couple of minutes before slicing to let the crust rest and set.
Quick-start plan for a busy weeknight
Even with a tight schedule, you can pull off a pizza night. Start by preparing the dough earlier in the day and chilling it in the fridge; when you’re ready, let it come to room temperature for 30-45 minutes. Preheat the oven to its maximum and place your stone or steel inside. While it heats, assemble toppings and sauce. Shape one dough ball into a round, top it, and slide it onto the hot surface. Bake until the crust is blistered and the cheese is bubbling, typically around 8-12 minutes depending on thickness and heat. Rest briefly, slice, and serve with a quick drizzle of olive oil or a sprinkle of oregano. Repeat if you’re cooking multiple pizzas, adjusting bake time as needed.
Variations: crust styles and flavor ideas
Pizza crusts vary by region and technique. A Neapolitan-style crust features a thin center with a puffed, blistered rim, baked at very high heat for a short time. New York–style crust is thicker and crisper, often achieved with higher oven temperatures and a longer bake. Pan pizza offers a dense, chewy crumb with a deeper edge. Explore different hydration percentages, flour blends (such as using a portion of durum or semolina for a golden crust), and different fermentation times to craft your signature style. Flavor ideas include garlic oil brushed on the crust, fresh basil after baking, and a light dusting of flaky salt for aroma.
Care and maintenance of your pizza gear
Keep your stone or steel clean and free of food residue to avoid off-flavors. Wipe a steel surface with a dry cloth after cooling; for a stone, avoid water absorption that could cause cracking. If you need to remove stuck bits, scrape gently with a nylon scraper. Store parchment paper and tools in a dry place, and check your oven’s preheat indicator periodically to ensure it remains accurate. With regular care, your pizza setup will stay consistent and reliable, enabling you to master the craft over time.
Tools & Materials
- Pizza dough (store-bought or homemade)(enough for 1-2 pizzas; allow to come to room temp before shaping)
- Pizza sauce(use a simple crushed tomato sauce or simmered tomato sauce)
- Shredded mozzarella cheese(prefer low-moisture if possible)
- Flour for dusting (all-purpose or 00)(to prevent sticking and shape dough)
- Pizza stone or steel(preheat 45-60 minutes for best heat transfer)
- Baking sheet or pizza peel(bake on sheet if you don't have a stone; or use parchment)
- Oven thermometer(to verify oven temperature)
- Parchment paper(optional for transfer and easy cleanup)
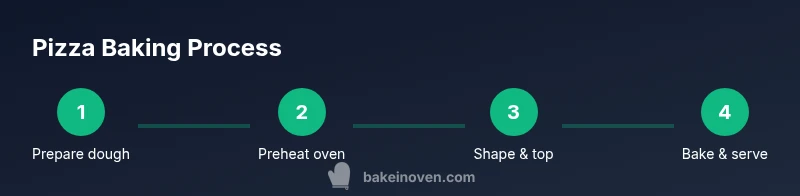
Steps
Estimated time: 60-90 minutes
- 1
Preheat and prep
Preheat your oven to the hottest safe temperature and place the stone or steel inside to heat thoroughly for 45-60 minutes. This ensures a strong base heat for a crisp crust.
Tip: Allow ample preheat time; rushing this step leads to pale bottoms. - 2
Divide and rest dough
If using divided dough, portion evenly and let each piece rest under a damp cloth for 15 minutes to relax the gluten before shaping.
Tip: Resting reduces tearing and helps you shape a uniform circle. - 3
Shape by hand
Gently press the dough outward from the center, leaving a thicker rim. Rotate as you stretch to keep the circle even and avoid tearing.
Tip: Avoid using a rolling pin; it flattens gas bubbles and yields a denser crust. - 4
Add sauce and cheese
Spread a thin, even layer of sauce, then sprinkle cheese and arrange toppings so they don’t overhang the crust.
Tip: Too much moisture in toppings can soggy the crust; pat ingredients dry if needed. - 5
Transfer to heat
Dust a pizza peel or rimmed sheet with flour or cornmeal, then slide the assembled pizza onto the hot stone/steel.
Tip: Parchment paper can help with transfer and prevents sticking. - 6
Bake and rotate
Bake until the crust edges blister and the cheese bubbles, usually 6-12 minutes depending on heat and thickness. Rotate halfway for even browning.
Tip: Watch closely toward the end to prevent over-browning. - 7
Rest and slice
Remove from oven and let the pizza rest 2-3 minutes to set the cheese. Slice with a sharp wheel for clean cuts.
Tip: Resting helps maintain structural integrity for slicing. - 8
Clean up
Allow the stone to cool naturally before scrubbing any residue; wipe steel surfaces and store tools dry.
Tip: Regular maintenance prevents flavor transfer and preserves heat performance.
Frequently Asked Questions
Is it necessary to preheat a pizza stone?
Yes. Preheating the stone or steel ensures a strong heat transfer to the dough, yielding a crisp bottom and even browning. If the surface isn’t hot, the crust may pale and bake unevenly.
Yes. Preheating the stone ensures a crisp bottom and even browning, which is key for a good crust.
Can I bake pizza on a parchment-lined sheet?
Yes, parchment helps prevent sticking and makes transfer easier. The crust may not be as crisp as a stone, but it’s a reliable alternative for sheet-pan cooking.
Yes, parchment helps prevent sticking and makes transfer easier, though the crust may be a bit softer than on a stone.
How long should I proof pizza dough?
Most dough benefit from a 1-2 hour room-temperature rise, with optional cold fermentation for deeper flavor over 12-72 hours. Longer fermentations slow yeast activity but enhance aroma and texture.
Most doughs rise well in 1-2 hours at room temperature, or you can cold-ferment for more flavor over 12-72 hours.
What toppings should I avoid to prevent soggy crust?
Avoid very wet toppings or excess cheese on top of heavy sauces. Pat dry mushrooms and peppers, and precook moisture-rich ingredients when possible to keep the crust crisp.
Avoid very wet toppings and pre-cook moisture-rich ingredients to prevent soggy crusts.
What is the best oven setting for Neapolitan-style pizza at home?
At home, aim for the highest safe temperature your oven allows and use a hot surface. Real Neapolitan pies cook in wood-fired ovens at very high heat; use a hot bake surface and short bake time to mimic that crisp, blistered crust.
Use the hottest safe oven setting you have with a very hot bake surface to mimic Neapolitan crusts.
Can I bake multiple pizzas at once?
Yes, but space matters. If you have room on the rack and surface, bake sequentially or use multiple stones/peels. Maintain heat by avoiding door openings and rotating as needed.
Yes, but bake sequentially or with multiple stones if you have space, and keep heat steady.
Watch Video
Key Takeaways
- Preheat thoroughly before baking.
- Choose the right surface (stone/steel or sheet) for texture.
- Hydrate and ferment dough for flavor and chew.
- Shape by hand for even thickness and air pockets.
- Bake with careful monitoring until blistered and bubbly.