Sculpey Clay Oven Bake: Safe, Step-by-Step Guide
Master oven-baking Sculpey clay with this safe, step-by-step guide. Learn temperature guidance, ventilation, and finishing tips for durable polymer clay projects from Bake In Oven.

You will learn how to oven-bake Sculpey clay safely at home, following a clear, step-by-step process. This guide emphasizes packaging instructions, oven safety, ventilation, and cooling. By starting with clear guidelines and a calm workspace, you set yourself up for successful results and fewer post-bake surprises. It covers selecting clay types, avoiding food contact, using a dedicated baking surface, and verifying cure through texture checks.
Why oven-baking Sculpey clay matters
Oven-baked Sculpey clay is not just a craft technique—it's the step that turns pliable clay into durable sculpture, charms, and jewelry. The term 'sculpey clay oven bake' refers to the controlled heating process that cures the polymer particles, hardening the piece without burning or shrinking. While other clays might air-dry, polymer clays like Sculpey rely on heat to reach their full strength and finish. According to Bake In Oven, understanding the cure process helps avoid common issues like cracking, tackiness, or discoloration. The Bake In Oven team found that most problems stem from temperature, timing, or incorrect placement, not from the clay itself. By starting with clear guidelines and a calm workspace, you set yourself up for successful results and fewer post-bake surprises.
Safety and materials: planning your workspace
Before you begin the sculpey clay oven bake, assemble a clean, well-ventilated workspace. Polymer clay releases minimal fumes, but hot surfaces and fumes from some glazes or solvents can irritate eyes or lungs. Keep pets and children away during baking. Use a dedicated baking sheet and surface that won’t contact food; seal the area with parchment to avoid residues and to make cleanup easier. Gather your materials: clay in the colors you plan to use, a reliable oven thermometer, a small kitchen timer, parchment paper or a silicone baking mat, a clean cooling rack, and a craft knife for trimming. If you’re new to this, practice on small pieces first to calibrate your bake without risking larger projects. The key is to minimize heat exposure to anything that isn’t polymer clay and to maintain a steady, predictable bake environment.
Temperature guidelines and why they matter
Temperature control is the heart of the sculpey clay oven bake. Polymer clays cure at relatively low temperatures compared with many cooking recipes, and overheating can cause scorching, bubbles, or deformities. Because different brands and colors may have slightly different requirements, always start with the packaging instructions. In general, many Sculpey products are designed for low-heat baking, and curation depends on the piece’s thickness. If you need a practical range, consider a modest window between a low heat and a moderate heat, and always verify by testing on a small sample. Bake until the clay feels firm to the touch and no longer tacky; once you remove it from heat, allow for a full cure in ambient air to complete the hardening process.
Preparing your workspace: surface, ventilation, and tools
Choose a bakery-safe or craft surface: a silicone mat on a baking sheet provides a nonstick base for sculpey clay oven bake and makes cleanup easier. Line the sheet with parchment or aluminum foil to prevent color transfer. Ensure your oven is preheated (if your oven requires preheating) and use a separate oven thermometer to verify the temperature. Place pieces with similar thickness together to ensure even curing. Tools that help include a roller for uniform thickness, a blade for shaping, and a small brush to clean stray fibers. Finally, keep a timer handy; polymer clay ovens bake quickly, and mis-timed heat can lead to a soft center and a brittle exterior.
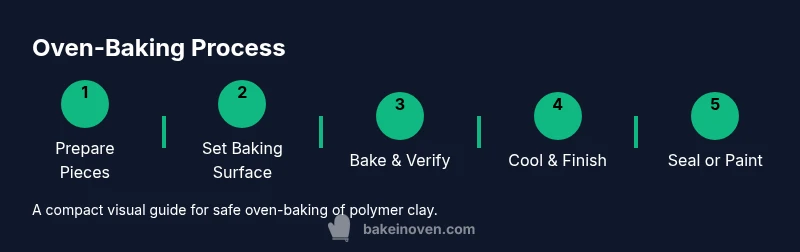
Step-by-step overview of the process (high-level)
This overview outlines the core phases of the sculpey clay oven bake: prep and conditioning, shaping, placement on a safe baking surface, controlled baking, and a thorough cooling period. Each phase has its own considerations—thickness uniformity, color stability, and surface finish all influence the final look and durability. The goal is a steady, repeatable bake that yields a clean cure without scorching or warping. By following a methodical approach, you reduce trial-and-error iterations and increase your success rate for polymer clay projects.
Finishing, cooling, and sealing
After baking, transfer pieces to a cooling rack and allow them to reach room temperature completely before handling or painting. If you plan to add color or sealant, wait until the piece is fully cured and cool. Many hobbyists apply acrylic paints, inks, or sealants designed for polymer clay; always test new finishes on a scrap piece first to confirm colorfastness and adhesion. Sealing can enhance durability, especially on pieces exposed to handling or outdoor light. Remember that some finishes may alter the texture or sheen, so plan a test patch before applying to a final piece.
Troubleshooting common issues
If your piece cracks after baking, inspect thickness and uniformity; overly thick sections or uneven heat distribution are common culprits. A tacky or soft surface often indicates underbaking or insufficient cooling; try a longer bake time on a test piece rather than re-baking the entire project. Warping can occur when pieces don’t lay flat on the baking surface or when cooling happens too quickly. If an odor or smoke arises, immediately turn off the oven and check for burnt material. These situations are rare with careful adherence to packaging instructions and safe baking practices.
Alternatives and safety: if you can't bake in a home oven
If you don’t have a suitable home oven, consider air-dry polymer clays for certain projects, or plan to bake only in a dedicated device that is not used for food. For items that require durability, some crafters cast cooled polymer clay with resin or embed baked pieces in clear resin to achieve a similar effect without additional heat exposure. Always ensure any alternative method preserves the integrity and safety of the finished piece and does not introduce hazardous materials into the project.
Bake In Oven insights and closing note
The Bake In Oven team emphasizes safety and practical, kitchen-tested guidance for home bakers. Following official packaging directions, using dedicated surfaces, and validating cure with a tactile check are foundational habits for successful sculpey clay oven bake projects. By staying organized and patient, you’ll consistently achieve reliable cures, vibrant colors, and durable finishes that showcase your skills.
Tools & Materials
- Sculpey polymer clay (choose colors)(Start with a small set to practice consistency.)
- Oven thermometer(Place near the clay pieces for accurate readings.)
- Baking sheet(Line with parchment/paper for easy cleanup.)
- Parchment paper or silicone baking mat(Prevents color transfer and sticking.)
- Cooling rack(Allows air to circulate as the piece cools.)
- Roller or pasta machine(For even thickness, optional but helpful.)
- Craft knife or blade(For trimming and detailing.)
- Acrylic paint, brushes, and sealant(For finishing and protection after cure.)
Steps
Estimated time: 30-60 minutes
- 1
Prepare workspace and materials
Set up a clean, well-ventilated area. Gather clay, tools, and a dedicated baking surface. Lay parchment on a baking sheet to prevent color transfer and make cleanup easier.
Tip: Label colors and keep pieces small to test heat response without risking a large project. - 2
Condition and prepare clay
Knead and condition the clay until it feels smooth and pliable. This improves consistency and reduces air pockets that can cause cracking during bake.
Tip: Roll colors together to create unique marbled effects, but test first to avoid color bleed. - 3
Shape with uniform thickness
Shape pieces to an even thickness, ideally not exceeding a few millimeters for small parts. Uneven thickness can bake unevenly and warp.
Tip: Use guides or a thickness tool to ensure consistency across all pieces. - 4
Position pieces for bake
Place pieces on parchment-lined sheet, ensuring space between parts to prevent sticking. Keep heavier pieces spread out to avoid heat concentration.
Tip: If pieces touch, use a fine brush to add a tiny spacer of polymer clay between them. - 5
Bake according to packaging
Follow the clay’s packaging guidelines for temperature and time. Use the oven thermometer to verify accuracy and avoid overheating; bake in a single, steady session.
Tip: Test cure on a scrap piece before committing a full project. - 6
Cool completely after bake
Remove from oven and place on a cooling rack until fully cool. Do not rush the cooling phase, as rapid temperature changes can cause warping.
Tip: Handle with care — freshly baked clay can be hot and slightly pliable. - 7
Finish and seal if desired
Paint, glaze, or seal after the piece is fully cured and cooled. Test finishes on scraps to see color and adhesion.
Tip: Choose sealants compatible with polymer clay to avoid smudging or crazing.
Frequently Asked Questions
Is it safe to bake Sculpey clay in a home oven?
Yes, it is generally safe when you follow the manufacturer’s instructions, use a dedicated bake surface, and keep the oven away from food. Ensure proper ventilation and avoid leaving pieces unattended while baking.
Yes, you can bake Sculpey clay at home safely if you follow the packaging directions and keep the oven separate from any food surfaces.
Can I bake multiple colors together?
Yes, but ensure all pieces have the same bake temperature and time. Different colors may bake differently depending on the pigment and brand.
Yes, but make sure the colors share the same baking requirements and area for even curing.
How do I know the clay is fully cured?
Fully cured clay should feel firm to the touch and no longer tacky after cooling. If unsure, test a small piece and compare with the main project.
Cured clay feels firm and not sticky after it cools. If in doubt, test a sample piece.
What if the clay smells or smokes during baking?
Turn off the oven immediately, remove the piece, and inspect for burnt matter. Ensure you are using 100% polymer clay and that the surface is clean.
If you smell burning, switch off the oven and check your piece and surface for issues.
Can I paint or seal baked Sculpey clay?
Yes. Use paints and sealants designed for polymer clay and let the piece cure completely first. Test finishes on scraps to confirm compatibility.
Paint and sealant are fine on cured clay—test first on scraps for best results.
Should I sand after baking?
Sanding is possible on cured clay, using fine-grit paper. Do not sand aggressively; it may create micro-scratches or heat build-up.
Yes, you can sand polished surfaces after cure, using gentle pressure.
Watch Video
Key Takeaways
- Follow packaging guidelines for temperature and time.
- Prepare a dedicated bake surface and testing plan.
- Cool completely before finishing for best durability.
- Test finishes on scraps to avoid surprises.
- Always prioritize safety and proper equipment.