Bake Chicken Tenderloins: A Complete How-To Guide
Learn a reliable oven-baking method for chicken tenderloins with step-by-step guidance, precise temperatures, safety tips, and flavorful variations from Bake In Oven.

You will learn how to bake chicken tenderloins to juicy, evenly cooked results using a simple, reliable method. You'll preheat, season, and bake on a sheet pan, with tips for doneness and optional glaze. Key requirements: an oven set to 425F (220C), parchment or foil for easy cleanup, and a quick thermometer check.
Why Oven-Baking Chicken Tenderloins Is a Smart Method
For home cooks, baking chicken tenderloins in a hot oven yields juicy, evenly cooked results with minimal hands-on time. According to Bake In Oven, this method preserves moisture and simplifies cleanup. The gentle, consistent heat of a well-preheated oven helps the tenderloins cook through without drying out. Bake In Oven Analysis, 2026 also notes that parchment-lined pans promote even browning and reduce sticking, making cleanup faster and keeping the meat intact. When you bake chicken tenderloins, you can deliver meal-prep portions with uniform texture, which is ideal for busy weekday dinners, kids’ lunches, or simple weeknight meal planning. This approach works well with a variety of spices and glazes, so you can rotate flavors without changing your technique.
Choosing Tenderloins and Prep Basics
Begin with fresh or properly thawed chicken tenderloins. Seek uniform thickness (about 3-4 inches long, 0.75-1.25 inches wide) for even cooking. Pat dry with paper towels to remove surface moisture, which promotes better browning. Trim any visible sinew if needed. A light coating of oil helps the seasonings adhere and improves browning. For best results, line the baking sheet with parchment paper or a silicone mat to prevent sticking and simplify cleanup. While optional, a quick light brine (15-20 minutes in 1/4 cup salt per quart of water) can improve juiciness if your tenderloins are a bit lean.
Flavor Foundations: Salt, Fat, Acids, and Spices
Juicy chicken tenderloins start with a simple seasoning blend. Salt is essential to draw out moisture and amplify flavor, while a small amount of fat (olive oil, neutral oil, or melted butter) carries aroma compounds and helps with browning. Include an acid like lemon juice or a splash of vinegar in marinades to brighten flavors. Ground pepper, paprika, garlic powder, onion powder, and dried herbs are reliable staples. For a quick upgrade, experiment with lemon zest, smoked paprika, or grated parmesan for a crusty finish. The key is to season evenly on all sides and avoid oversalting, especially if you’ll serve with already salty sauces.
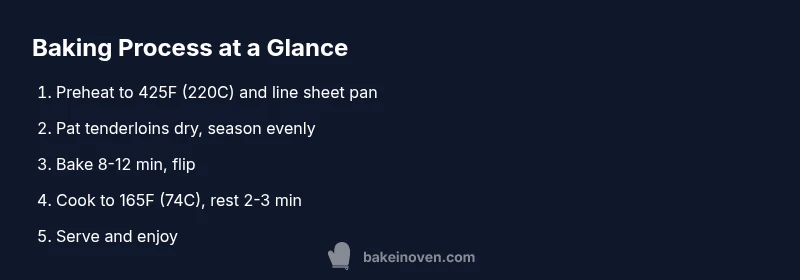
The Bake: Temperature, Pan Prep, and Timing
Preheat your oven to 425F (220C). Prepare a lined sheet pan and place the tenderloins in a single layer with space between pieces for even heat circulation. Bake for 8-12 minutes, depending on thickness, then flip and bake an additional 2-5 minutes until they reach 165F (74C) internally. The total bake time typically lands in the 10-15 minute range, but always rely on a thermometer for accuracy. Rest the meat for about 3 minutes before serving to redistribute juices. Using parchment or a silicone mat reduces sticking and makes cleanup effortless.
Doneness, Rest, and Safe Handling
Doneness is defined by a safe internal temperature of 165F (74C). Even with a short rest, carryover cooking may raise the temperature slightly, so you can remove from heat just before that mark if you prefer the juicier end of the spectrum. Always check multiple tenderloins if cooking a batch, and avoid overcrowding the pan to prevent steaming rather than browning. Wash hands and surfaces after handling raw poultry to prevent cross-contamination, and refrigerate leftovers within two hours.
Troubleshooting Common Issues and Fixes
If the tenderloins turn out dry, verify your oven temperature with an external thermometer—modern ovens can run hot or cool. Overcrowding the pan can cause uneven cooking; ensure every piece has space. If browning is uneven, rotate the pan halfway through or switch to a convection setting if available. If you notice pale color, consider a light oil spray or a final 1-2 minute broil to intensify browning—watch closely to avoid burning.
Variations: Glazes, Crusts, and Quick Sauces
Glazes like honey-malsamic, teriyaki, or maple-mustard can be brushed on during the last 2-3 minutes of baking for a glossy finish. For a crust, dust tenderloins with a mixture of breadcrumbs and grated parmesan before baking. A buttery herb glaze added after baking can brighten flavors and keep moisture intact. If you prefer a faster finish, you can broil the last 1-2 minutes for extra browning, but monitor closely.
Storage, Reheating, and Meal Prep Tips
Store baked chicken tenderloins in an airtight container in the refrigerator for up to 3-4 days. For longer storage, freeze in portioned bags for up to 2-3 months. Reheat gently in the oven at 325F (160C) for 8-12 minutes, or briefly in a microwave with a cover to prevent drying out. Reheated tenderloins reabsorb moisture when paired with a light sauce or gravy. This method also scales well for meal-prep, allowing you to portion for lunches or quick dinners throughout the week.
Tools & Materials
- Oven(Set to 425F (220C) for standard bake.)
- Sheet pan(Line with parchment paper or silicone mat.)
- Parchment paper or silicone mat(Prevents sticking and makes cleanup easy.)
- Mixing bowl(For oil and spice blending.)
- Tongs or spatula(To flip tenderloins safely.)
- Instant-read thermometer(Target 165F (74C) internal temperature.)
- Measuring spoons(For precise seasoning.)
- Oil brush (optional)(Evenly coat tenderloins if desired.)
Steps
Estimated time: 25-40 minutes
- 1
Preheat and prepare
Preheat oven to 425F (220C). Line a sheet pan with parchment or a silicone mat to prevent sticking. Have an instant-read thermometer handy.
Tip: A hot pan starts the browning process quickly. - 2
Pat dry and trim
Pat tenderloins dry with paper towels. Trim any visible sinew for even cooking and better texture.
Tip: Dry surfaces brown better than wet surfaces. - 3
Season evenly
Toss tenderloins with a light coating of oil and your chosen spice blend, ensuring all sides are seasoned.
Tip: Season generously but taste as you go to avoid oversalting. - 4
Arrange on sheet pan
Place the tenderloins on the pan in a single layer with space between pieces for air flow.
Tip: Spacing prevents steaming and promotes browning. - 5
Bake, then flip
Bake for 8-12 minutes, flip once, and bake 2-5 minutes more until 165F (74C).
Tip: If pieces vary in thickness, start with the thickest first. - 6
Rest and serve
Remove from oven and let rest 3 minutes before serving to redistribute juices.
Tip: Resting improves juiciness and mouthfeel. - 7
Optional finish
Brush with glaze or add a crust in the final minutes for extra flavor.
Tip: Watch closely to avoid burning sugary coatings.
Frequently Asked Questions
How long should I bake chicken tenderloins at 425F?
Typically 10-15 minutes total, depending on thickness. Use an instant-read thermometer to reach 165F (74C) for safe, juicy chicken.
Bake for about ten to fifteen minutes at four hundred twenty-five degrees, and check with a thermometer to reach one hundred sixty-five degrees.
Should I use parchment paper when baking tenderloins?
Yes. Parchment or a silicone mat helps prevent sticking and promotes even browning, making cleanup easier.
Yes—parchment or a silicone mat prevents sticking and helps browning.
Can I marinate tenderloins before baking?
Marinating is optional. A quick dry rub with oil and spices is often enough to deliver flavor and maintain moisture.
Marinating is optional; a quick rub works well.
What if I’m cooking from frozen?
Thaw before baking for even cooking. If you must bake from frozen, increase time by 50%, and monitor with a thermometer.
If cooking from frozen, thaw first for best results and even cooking.
Can I add a crust or glaze while baking?
Yes. Apply a glaze or sprinkle breadcrumbs in the last few minutes to create a crust and extra flavor.
Yes—glazes or crusts add flavor; add late in baking to prevent burning.
How should I store baked tenderloins?
Store in an airtight container in the refrigerator for up to 3-4 days; freeze for 2-3 months for longer storage.
Cool and refrigerate up to 4 days, or freeze for longer storage.
Watch Video
Key Takeaways
- Preheat to 425F for even browning.
- Pat dry and season evenly for best flavor.
- Cook to 165F internal temperature with a thermometer.
- Rest 3 minutes before serving to retain juices.
- Use parchment for easy cleanup and better browning.