How to Roast in the Oven: A Practical Kitchen Guide
A complete, kitchen-tested guide to oven roasting meat and vegetables with temperatures, timings, resting, and safety tips from Bake In Oven.

In this guide you’ll learn how to roast meat and vegetables in the oven with practical, kitchen-tested steps. You’ll pick the right cut, preheat correctly, establish a target internal temperature, and rest the roast for juicier results. Whether you’re roasting chicken, beef, or vegetables, this approach keeps flavor bold and the kitchen safer.
Why Oven Roasting Matters in Home Cooking
Roasting in the oven is a reliable method for developing rich flavor and a pleasing texture across proteins and vegetables. For home cooks, it combines even heat with moisture control, which helps you avoid overcooked edges and underdone centers. If you've been curious about how to roast when someone asks for a quick, impressive meal, this guide helps you plan, season, and time your roast with confidence. The technique is versatile enough for chicken, beef, pork, and hearty vegetables, and it scales from weeknight dinners to holiday feasts. By controlling heat, rest, and fat distribution, you unlock consistent results that rely less on guesswork and more on proven steps.
Core Principles of Successful Roasting
Successful roasting hinges on a few core ideas. First, dry heat promotes browning (the Maillard reaction) and creates a flavorful crust. Second, moisture management matters: a dry surface and proper fat help keep juices inside the meat rather than steaming the surface. Third, even heat and uniform sizing prevent hot spots; trimming bulky edges helps. Fourth, temperature control and timing require attention to both the internal temperature and the external color. Finally, resting is essential: allowing the roast to relax after removal from the oven lets juices redistribute, yielding a juicier slice. When you combine these principles, you can roast a wide range of cuts with predictable outcomes and minimal guesswork.
Temperature and Timing Basics
Roasting temperatures vary by the type and size of the roast. In general, poultry benefits from moderate to high heat to reach safe doneness while preserving moistness. Beef and pork can tolerate higher temperatures if you aim for desired doneness and crust development. Start with a hot oven to brown the exterior, then finish at a steadier heat to avoid overcooking the center. Use a thermometer for accuracy: indicators in the meat are more reliable than surface color alone. Plan for carryover cooking after you remove the roast from the oven, typically 5–15 minutes, during which the internal temperature rises a bit more. This balance between heat, time, and rest is what yields reliable, flavorful results.
Preparing the Roast: Seasoning, Searing, and Setup
Seasoning begins with a dry surface: pat the meat dry, then apply salt and any spices evenly. A dry rub or brine before roasting can add depth of flavor and improve texture. If you choose to sear, heat a heavy pan until it is shimmering and brown the surface quickly to develop color. Place the roast on a rack in a sturdy roasting pan to ensure air can circulate around the meat. Let the rack elevate the roast so juices collect below rather than overheating the bottom. Gather your thermometer, tongs, and carving knife before you begin so you can stay organized as the roast moves through the oven.
Tools and Materials for Consistent Roasting
You need a reliable oven, a roasting pan with a rack, a digital meat thermometer, and basic knives for prep and carving. A rack ensures air flow and crispy edges by lifting the meat above its juices. An instant-read thermometer helps you verify doneness without guessing. Oven gloves, a sturdy carving knife, and butcher’s twine (for trussing, if needed) are helpful extras. Keep parchment paper or foil handy for quick cleanups, and prep a grid or butcher paper for resting and carving to keep the juices organized. Finally, have a timer or smartphone ready to track resting and carryover cooking.
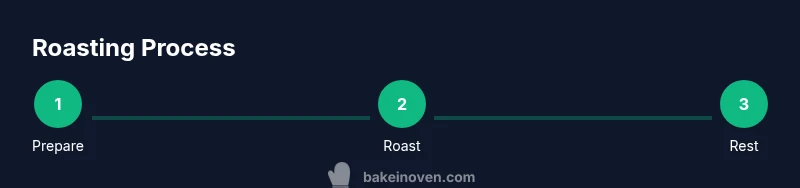
Step-by-Step Roasting Method (Kitchen Tested)
- Choose the roast and bring to room temperature. 2) Preheat the oven to the target temperature. 3) Pat dry and season evenly. 4) Optional: sear to develop color. 5) Place roast on a rack in a pan; insert thermometer. 6) Roast to the target internal temperature, checking early and frequently. 7) Remove from oven and rest under foil loosely tented. 8) Carve and serve, slicing against the grain when possible. 9) Optional: rest briefly before serving to ensure maximum juiciness. Tip: use a probe to check the thickest part of the meat, not the edge, for accuracy.
Common Mistakes and How to Fix Them
- Not drying the surface thoroughly leads to pale browning; fix by patting dry until no moisture remains.
- Overcrowding the pan causes steaming instead of roasting; fix by using a larger pan or cooking in batches.
- Forgetting carryover cooking results in underdone centers; fix by removing slightly before the target temperature.
- Skipping the resting step causes juice to escape when cut; fix by tenting and resting for 5–15 minutes.
- Relying only on color rather than a thermometer can be misleading; fix by using an accurate probe in the thickest part.
Roasting Vegetables with the Same Method
Sturdier vegetables (potatoes, carrots, squash) respond well to dry heat and require similar timing to meat when cut into even pieces. Toss with oil, salt, and herbs, then spread on a single layer for even browning. Vegetables can share the oven with meat if space allows, but avoid crowding to maintain crisp edges. The same resting principle helps flavors settle and improves texture.
Finishing Touches and Serving
Final checks ensure the roast is juicy and properly rested. Slice against the grain for tenderness and serve with pan drippings or a simple pan sauce. Resting after slicing helps juices redistribute for consistent slices. For leftovers, chill promptly in shallow containers and reheat gently to preserve moisture and flavor.
Tools & Materials
- Oven(Preheat to target temperature before roasting)
- Roasting pan with rack(Elevates meat for even browning)
- Digital meat thermometer(Insert into thickest part, not bone)
- Kitchen tongs(For turning and transferring roast)
- Chef's knife(For trimming and carving)
- Aluminum foil(Tent roast during resting if needed)
- Parchment paper(For easy cleanup and resting area)
- Timer or smartphone(Track resting and carryover time)
Steps
Estimated time: Total time: 1 hour 30 minutes
- 1
Choose the roast and bring to room temperature
Select an appropriately sized roast for your pan and guest count. Remove from refrigeration 15-30 minutes before roasting to reduce temperature shock and promote even cooking.
Tip: A dry surface helps browning and crust formation. - 2
Preheat the oven to the target temperature
Set the oven to the recommended starting heat for your cut. Allow at least 15 minutes for full preheating to ensure consistent initial browning.
Tip: Verify temperature with an oven thermometer for accuracy. - 3
Pat dry and season evenly
Pat the roast thoroughly dry, then apply salt and spices evenly across all sides. Dry surfaces improve crust and flavor development.
Tip: Seasoning ahead helps the surface render and flavor penetrate. - 4
Optional: sear to develop color
If you choose, sear the roast briefly in a hot pan to build a rich crust before transferring to the oven.
Tip: Searing is optional; it adds color but not required for tenderness. - 5
Position roast on a rack in a pan
Place the meat on a rack so air can circulate around it and juices collect below. This helps browning and even cooking.
Tip: Do not crowd the pan; air needs space to flow. - 6
Roast and monitor internal temperature
Roast until the thermometer reaches the target doneness. Check early to avoid overshooting due to carryover cooking.
Tip: Insert the probe into the thickest part, away from bone. - 7
Rest the roast after removing from the oven
Tent loosely with foil if desired and let rest for 5–15 minutes. Resting redistributes juices for juicier slices.
Tip: Carryover cooking will raise the temperature slightly during resting. - 8
Carve against the grain
Slice perpendicular to the muscle fibers to maximize tenderness and even portion sizes.
Tip: Use a sharp knife for clean cuts. - 9
Serve and store leftovers safely
Serve immediately or store leftovers in shallow containers in the fridge within two hours of cooking.
Tip: Reheat gently to preserve moisture.
Frequently Asked Questions
What is the best oven temperature for roasting?
Roasting temperatures vary by the type and size of the roast. For poultry, moderate to high heat helps reach doneness while preserving moisture. Beef and pork tolerate higher heat if you aim for a crust and desired doneness. Always verify with a thermometer rather than relying on color alone.
Roasting temps depend on the cut. Use a thermometer for accuracy rather than color alone.
Do I need to baste the roast?
Basting is optional. It can add moisture and flavor, but it can also slow roasting. If you have a well-distributed fat, you may skip it and rely on dry heat for browning.
Basting is optional; rely on fat and dry heat for best browning.
How can I tell when the roast is done without a thermometer?
Without a thermometer, use a combination of time, color, and juices. For reliable results, a thermometer is strongly recommended to ensure safety and accuracy.
Use time and juices to estimate doneness, but a thermometer is best for accuracy.
Why does resting matter after roasting?
Resting allows juices to redistribute, improving sliceability and juiciness. Skipping resting leads to juice loss when you cut into the roast.
Resting helps juices redistribute for juicier slices.
Can I roast vegetables with the meat?
Yes. Cut vegetables into uniform pieces, space them evenly, and use similar heat. They will share the oven space if you avoid overcrowding and monitor timing.
Absolutely—roast vegetables alongside meat if there’s space and you don’t crowd the pan.
Watch Video
Key Takeaways
- Preheat and monitor temperature for consistency
- Rest meat after roasting to lock in juices
- Dry surfaces and rack setup maximize browning
- Use a thermometer for accurate doneness