Oven Not Working But Stove Is: Troubleshooting Guide
When your oven won’t heat but the stove still works, this urgent guide helps you diagnose common causes, perform safe checks, and decide when to call a pro. Learn practical steps from Bake In Oven to restore baking performance quickly.

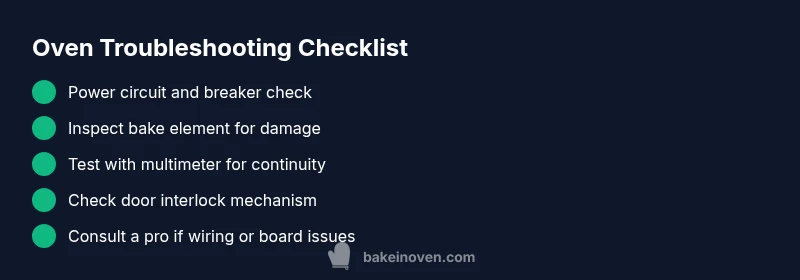
1) Reset the oven circuit and power switch. 2) Visually inspect the bake element for cracks or blistering and test continuity if you have a multimeter. 3) If power is present but no heat, replace the bake element or thermal fuse, or call a licensed pro for a safe repair.
Why the oven vs stove discrepancy matters
When your oven not working but stove is, it usually means the problem is isolated to the oven’s heating circuit rather than the entire range. This distinction helps you avoid unnecessary repairs on the stove and speeds up diagnosis. According to Bake In Oven analysis, the most common culprits are a damaged bake element, a blown thermal fuse, a faulty control board or relay, or a malfunctioning door interlock. Understanding which subsystem powers bake and broil modes can save time, money, and prevent dangerous situations around hot oven components.
Common causes when the stove works but the oven doesn’t
There are several plausible reasons your oven refuses to heat while the stove remains functional. A damaged or burnt bake element is a frequent culprit; look for visible cracks or blistering. A blown thermal fuse inside the oven can cut power to the heater while the control panel still lights up. Faulty oven sensors or a defective relay on the control board can prevent heat from being driven to the element. A stuck or damaged door interlock switch can block heat if the oven thinks the door is open. In gas ovens, ignition issues or sensor failures can mimic a non-heating condition while the stove still lights. Finally, wiring or terminal connections that have loosened over time can silently disrupt the oven circuit while not affecting the stove.
Immediate safety steps you should take
Safety first: if you smell gas, hear hissing, or notice any burning electrical smell, exit the area and call emergency services or your gas provider immediately. Do not use the oven until a professional confirms it’s safe. If there’s no immediate danger, start with the basics: confirm the oven is plugged in (for electric ovens) or connected to a working outlet, reset your home’s circuit breaker for the oven circuit, and unplug the unit before inspections. Keep children and pets away and use insulated gloves if you handle hot components later. These steps prevent harm and protect your property while you diagnose the issue.
Simple diagnostics you can do now
- Check the circuit: verify the oven’s dedicated circuit on the breaker panel is on and not tripped. If you have a dedicated outlet for the wall oven, test it with a known-good appliance.
- Inspect the visible heating element: look for discoloration, blistering, or breaks. If you have a multimeter, test continuity; a broken element shows an open circuit.
- Confirm the door interlock: press the door latch and see if the oven lights respond; a faulty interlock can prevent heat from being generated.
- Listen for relays: when you select bake, you should hear a faint relay click; if not, the control board may be at fault.
- Check fuses: many ovens include a thermal fuse or high-limit fuse; if it’s blown, heat will not be produced even though the panel operates.
Step-by-step fix for the most likely cause: bake element failure
- Safety first: unplug the oven and ensure the circuit is off at the breaker. 2) Access the bake element: remove the back panel or the lower cover as required by your model to expose the bake element. 3) Inspect and replace: if the element shows obvious damage or you cannot measure continuity, replace with a compatible element. 4) Reconnect and test: reassemble, restore power, and run a short bake cycle to verify heating. 5) Verify even heat: run a test bake on two trays to check consistency. Tip: label wires and take a photo before removing connectors so you can reconnect correctly.
When to replace components and what to expect
If the bake element tests good but heat is still absent, the problem could be the control board or thermostat sensor. Replacing a control board is more complex and expensive, but often resolves intermittent heating issues; a new thermostat can restore accurate heat regulation. Professional service is recommended if you’re not comfortable with high-voltage electronics. Replacements typically come with manufacturer-specific guidelines and required calibration after installation. Expect a service visit to take 60 to 120 minutes depending on access and model.
Maintenance tips to prevent future oven problems
- Schedule routine inspections of the oven’s heating elements and door latch, especially before holiday baking season.
- Keep the interior clean to prevent residue causing sensor faults.
- Use the oven’s temperature probe or an infrared thermometer to verify accurate oven temperatures periodically.
- Replace worn baking elements proactively and use proper voltage considerations.
- Ensure secure wiring connections in the control panel by a certified technician during service.
Final reminders and next steps
If you’ve walked through these checks and the oven still won’t heat while the stove works, it’s time to decide on DIY vs professional repair. For electric ovens, voltage safety is critical; for gas ovens, ignition safety matters. If you’re not confident, a licensed technician is the safest option. Keep your warranty in mind; some symptoms may be covered. Document symptoms, model number, and when the issue started to speed up service.
Steps
Estimated time: 45-60 minutes
- 1
Safety prep and power isolation
Unplug the oven or switch off the dedicated circuit. Confirm the area is safe, with no live wires exposed. This prevents shock during inspection.
Tip: Always start with power off before touching any oven components. - 2
Check the power supply
Confirm the oven is connected to a live outlet or its dedicated circuit. Reset the home breaker if it has tripped, and test a known-good device on the same circuit to confirm supply.
Tip: If the breaker trips again, there may be a short or overload—do not keep testing. - 3
Inspect the bake element visually
Look for visible cracks, breaks, or blistering on the bake element. A damaged element usually needs replacement and cannot be repaired safely.
Tip: Handle with insulated gloves and avoid touching hot surfaces. - 4
Test with a multimeter
If you have a multimeter, test element continuity. An open circuit indicates a failed element; a short may show other issues.
Tip: Follow model-specific instructions for meter testing to avoid false readings. - 5
Evaluate the control board and door interlock
If power and the element test fine, the issue may be the control board or interlock switch. Look for loose wires or a failed interlock.
Tip: A professional diagnosis helps avoid unintended component damage. - 6
Reassembly and verification
Reconnect any detached wires, reassemble panels, restore power, and run a brief bake cycle to verify heat and stability.
Tip: Document any changes and test at varying temperatures for even heating.
Diagnosis: Oven won’t heat while stove functions
Possible Causes
- highElectrical supply issue affecting the oven circuit
- mediumDamaged or burnt bake element
- lowBlown thermal fuse
- lowFaulty oven control board or relay
Fixes
- easyReset the oven circuit and power switch; verify dedicated oven circuit is on
- mediumTest and replace the bake element or thermal fuse if damaged
- hardInspect the control board/relay and door interlock if heat is not generated
Frequently Asked Questions
Why isn’t my oven heating when the stove works?
Commonly the bake element, thermal fuse, or control board is at fault. Start with power checks, element inspection, and then assess control components.
The oven not heating while the stove works is usually due to the bake element, fuse, or control board; begin with power checks and element inspection.
Is it safe to use the oven if the door interlock is faulty?
No. A faulty interlock can cause unsafe heating. Do not use the oven until a technician confirms safety.
Don’t use the oven if the door interlock is faulty; have it inspected first.
Can I test the bake element myself with a multimeter?
Yes, with the oven unplugged, a continuity check on the bake element can reveal a broken element.
You can test the bake element with a multimeter after turning off power.
What does a blinking oven indicator mean?
Flashing codes often signal a fault; consult the manual or a pro to interpret the code.
A blinking code usually means there’s a fault; check the manual or call a pro to interpret it.
How long does professional oven repair typically take?
Most repairs take about 60-120 minutes on-site, depending on access and parts.
Most oven repairs take about an hour or two on-site.
Is DIY repair worth it or should I hire a pro?
Electrical and gas work can be hazardous. If unsure, hire a licensed technician.
DIY can be dangerous; if you’re not sure, hire a pro.
Watch Video
Key Takeaways
- Isolate oven issues from stove issues for accurate diagnosis
- Check power, element integrity, and control components first
- Call a pro for high-risk steps or when in doubt
- Document symptoms and parts tested to speed service