What to Bake Quesadillas At: Oven Guide for Perfect Melt
Learn the optimal oven temperature and techniques to bake quesadillas at home. This comprehensive guide covers temps, fillings, browning, and troubleshooting for reliably crispy, melty results.

Goal: bake quesadillas to melty, cheesy centers with crisp edges using your oven. According to Bake In Oven, preheat to 425°F (218°C), assemble fillings on tortillas, and bake on a parchment-lined sheet for 8–12 minutes, flipping once for even browning. Use high heat and light oil to maximize crust without sogginess.
Why Home Baking Matters for Quesadillas
Cooking quesadillas at home gives you control over the ingredients, fillings, and browning. When you bake instead of pan-frying, you can achieve an evenly heated interior and a uniformly crisp exterior with less oil. Home bakers can customize fillings to dietary needs and flavor preferences, from smoky peppers to creamy cheeses. According to Bake In Oven, the hands-on approach also helps home cooks learn oven behavior—hot spots, rack positioning, and how long a bake takes in a standard home oven. This section will set the stage for reliable results, highlighting why oven baking is a practical, flavorful choice for weeknight meals and weekend feasts alike.
what to bake quesadillas at: Oven Temperature Basics
The cornerstone of a great baked quesadilla is temperature. For most home ovens, 425°F (218°C) on a standard bake setting yields a crisp crust while the cheese melts smoothly inside. If your oven runs cool, consider bumping to 435–450°F (224–232°C) for a few minutes, but monitor closely to avoid scorching. Convection can shave a few minutes off the bake and promote even browning, but you may want to reduce the temperature by about 25°F (15°C) if using convection. Always preheat fully so the tortillas begin browning the moment they enter the oven. Bake times typically range from 8–12 minutes, with a flip at the halfway point to ensure symmetry. Bake In Oven analyses suggest a hot start helps the crust set quickly while the cheese starts melting sooner. If you’re new to this method, start with 425°F on a single pan to dial in the timing before scaling up to multiple sheets.
Tortilla choices and fillings for best bake results
Tortilla selection matters as much as temperature. Flour tortillas usually yield a softer, chewier bite, while corn tortillas deliver a sharper snap and traditional flavor. For a crisp exterior, choose 6–8 inch tortillas that fit your sheet pan without hanging over the edges. Fillings should be moderately moist but not wet—excess moisture creates soggy centers. Cook meats to safe internal temperatures first, rinse off any excess moisture, and pre-cook vegetables that release water. Layer cheese directly on the bottom tortilla so it acts as a glue, then add fillings and top with more cheese to seal the deal. The key is to achieve a good cheese-to-filling balance that melts evenly without overpowering the tortilla.
Cheese and layering for melty magic
Cheese is the star player in a baked quesadilla. Use a blend of cheeses with good melt, such as mozzarella for stretch, cheddar for flavor, and a bit of Monterey Jack for creaminess. A thin cheese layer on the bottom helps the tortilla seal, while a final top layer of cheese guarantees bubbling, browning edges. Shredded cheese distributes more evenly than chunks, and grating cheese fresh from the block yields better melt than pre-shredded varieties. If you want a crisper edge, brush the top tortilla lightly with oil or melted butter before baking. Always avoid overfilling—the more cheese and fillings you pack, the longer it will take to heat through and melt.
Sauces, crema, and toppings to serve with baked quesadillas
Serving ideas elevate a simple bake. Classic accompaniments like pico de gallo, guacamole, and sour cream add balance to the richness of the cheese. A quick drizzle of lime juice or a sprinkle of chopped cilantro brightens the dish. For a smoky kick, mix a spoonful of chipotle in adobo into the crema. If you’re keeping it dairy-free, use a dairy-free cheese blend and serve with avocado crema instead. These toppings don’t just adorn the plate—they complement the warm, melty interior and help cut through richness without overpowering the flavors.
Equipment and setup for even browning
A rimmed baking sheet lined with parchment or a silicone mat prevents sticking and ensures easy cleanup. For crisper results, place a second rack beneath the sheet so air can circulate around the pan. If you own a convection oven, consider using it with a slightly lower temperature and a shorter bake to avoid over-browning. A wide, flat turner or spatula helps transfer the quesadillas gently, preserving the filling integrity. Finally, a cooling rack set on a sheet pan can be used briefly to rest the slices after baking, letting steam escape and preventing sogginess.
The assembly strategy: keeping fillings moist but not soggy
Assembling quesadillas for the oven requires balancing moisture and cohesion. Start with a dry tortilla, then layer cheese to act as a glue. Add fillings that are pre-cooked and patted dry, such as sautéed vegetables or well-drained meat. Avoid watery ingredients unless you thoroughly drain them (think tomatoes with seeds removed). Close with a final tortilla and a light cheese cap. This approach helps the outer shell crisp while the interior remains juicy and flavorful. If you notice moisture pooling on the pan, wipe it away and rotate the sheet to prevent soggy patches.
Common mistakes and troubleshooting
One common mistake is overcrowding the pan, which traps steam and prevents browning. Another is skipping preheating, which yields pale tortillas and under-melted cheese. Not pre-draining moist fillings can lead to soggy centers. If the quesadillas brown too quickly on the edges but remain pale in the center, lower the oven temperature slightly and extend the bake time by a few minutes, monitoring every minute. For extra even browning, rotate the pan halfway through the bake and consider using an oven-safe rack to elevate the sheet. Finally, let the baked quesadillas rest briefly before slicing to allow the cheese to set.
Dietary variations and substitutions
Quesadillas are versatile enough to accommodate dairy-free, gluten-free, or vegan diets. Use plant-based cheeses with strong melt, gluten-free tortillas, and flavor boosters like roasted peppers or spices to mimic traditional flavors. For a protein boost, pre-cook lean chicken, shrimp, or beans with seasoning. If using corn tortillas, reduce the bake time slightly to prevent cracking and brittleness. The goal is to keep the texture crisp while ensuring fillings stay flavorful and moist without leaking moisture into the crust.
Safety, storage, and rewarming tips
Always store any leftover quesadillas in an airtight container in the refrigerator and reheat in the oven at a lower temperature to prevent drying out. Rewarm by baking at 350°F (175°C) for 4–6 minutes or until cheese is melted again. If freezing, layer parchment between slices to prevent sticking and reheat from frozen for a longer period. Practice safe handling with hot pans, oven mitts, and careful slicing to avoid burns. Following these guidelines helps maintain texture and flavor across multiple meals.
Tools & Materials
- Oven, preheated to 425°F (218°C)(Standard bake setting; convection may adjust temperature 25°F cooler.)
- Rimmed baking sheet(Line with parchment or silicone mat.)
- Parchment paper or silicone baking mat(Prevents sticking and promotes even browning.)
- Silicone spatula or wide spatula(For transferring quesadillas without breaking them.)
- Cutting board and knife(Slice into wedges after baking.)
- Oven mitts(Safe handling of hot sheets.)
- Mixing bowls(Prep fillings and cheese mixtures.)
- Grater or food processor(Shred cheese for even melt.)
- Cooling rack (optional)(Rest sliced quesadillas to prevent sogginess.)
- Tongs (optional)(Turn quesadillas gently if needed.)
- Oil or cooking spray (optional)(Lightly oil tortillas for extra crisp.)
- Measuring spoons (optional)(Seasonings to taste.)
Steps
Estimated time: 30-40 minutes
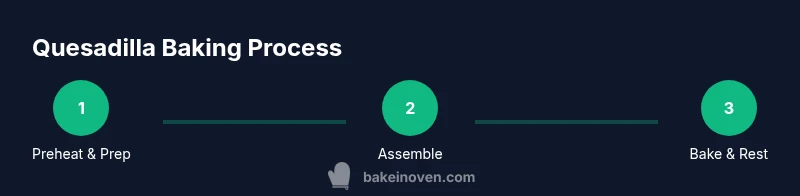
- 1
Preheat and prep sheet
Preheat your oven to 425°F (218°C) and line a rimmed sheet with parchment or a silicone mat. This ensures quick browning and easy cleanup.
Tip: Fully preheating is the key to crisp edges. - 2
Gather fillings
Prepare fillings that are fully cooked and pat dry. Excess moisture can make the crust soggy, so drain veggies and pat meat dry before assembling.
Tip: Dry fillings improve texture and prevent steam. - 3
Assemble quesadillas
Layer tortilla, cheese, and fillings on a flat surface. Place cheese on the bottom and top to seal, then press lightly to compact.
Tip: Keep fillings centered to avoid overflow. - 4
Transfer to sheet
Move assembled quesadillas to the parchment-lined sheet without overfilling. Leave space between pieces for even heat circulation.
Tip: Use a flat spatula for stability. - 5
Bake and flip
Bake 8–12 minutes, then flip the quesadillas to ensure even browning on both sides.
Tip: If edges brown too quickly, lower heat slightly. - 6
Check for melt and color
Check that cheese is melted and the crust is golden brown. If needed, bake 1–2 minutes more, watching closely.
Tip: Reserve a moment to avoid overcooking. - 7
Rest and slice
Let the quesadillas rest 1–2 minutes before slicing into wedges to set the cheese.
Tip: Resting prevents oozy cheese from oozing out. - 8
Serve with toppings
Serve with salsa, crema, or guacamole for contrast and brightness.
Tip: Small toppings add flavor without sogginess.
Frequently Asked Questions
What temperature should I bake quesadillas at in a conventional oven?
Bake at 425°F (218°C) for 8–12 minutes, flipping halfway. Convection may require slightly lower temperature and time. Monitor closely to avoid burning.
Bake at 425 degrees for eight to twelve minutes, flipping once. Watch for even browning.
Can I bake quesadillas from frozen?
Yes, but bake longer—about 14–18 minutes—and check that cheese is melted and the crust is golden. Let stand a minute after baking.
Yes, bake frozen quesadillas for about fourteen to eighteen minutes and ensure they’re hot and melted.
Is it better to bake or pan-fry quesadillas?
Baking provides even heat and less mess, with less oil. Pan-frying creates a crisper crust but can unevenly melt fillings if not watched.
Baking is easier and cleaner, while pan-frying gives extra crispness if you monitor it closely.
Should I brush tortillas with oil?
A light oil or spray on the top tortilla helps browning and crisp, especially on a dry bake. Avoid heavy oil that can pool and soggy the crust.
Lightly oil the top for crisp browns; too much oil makes it soggy.
Can I use corn tortillas instead of flour?
Corn tortillas work well for traditional quesadillas and tend to crisp nicely in the oven. They may crack if overfilled, so handle fillings gently.
Yes, corn works great and crisps nicely in the oven.
How do I reheat leftover quesadillas?
Reheat in a 350°F (175°C) oven for 4–6 minutes or until cheese is melty again. Avoid microwaving if you want crisp shells.
Reheat in a hot oven to restore crispness.
Watch Video
Key Takeaways
- Preheat thoroughly for crisp edges.
- Drain moist fillings to prevent sogginess.
- Layer cheese as glue and seal with a top tortilla.
- Rest briefly before slicing for a tidy, melty result.