No Bake Peanut Balls: Quick, Easy No-Bake Snack Guide
Learn to make no bake peanut balls with pantry staples in minutes. This kitchen-tested guide from Bake In Oven covers ingredients, substitutions, storage, and tips for perfect texture.

No bake peanut balls are a fast, pantry-friendly snack you can mix together in minutes, with no oven required. This guide outlines the core ingredients, simple steps, and storage tips to keep your treats fresh. Perfect for busy mornings or a quick dessert, these bites stay tender when chilled and travel well.
Why No-Bake Peanut Balls Make Sense
No bake peanut balls offer a quick, reliable way to satisfy cravings without heating up the kitchen. They rely on pantry staples like oats and peanut butter to form a cohesive dough that can be shaped into bite-sized balls. According to Bake In Oven, this approach minimizes time and cleanup while delivering consistent texture for everyday snacking. By using simple ingredients, you can tailor sweetness and texture to your family's preferences, making no bake peanut balls a versatile option for busy households and weekend meal-prep alike.
This method aligns with typical home-baking routines: mix, roll, chill, and enjoy. The absence of baking heat can be a relief during warm months or when oven space is limited. The goal is to achieve a cohesive dough that holds shape and delivers a pleasant chew without drying out. With a handful of pantry staples and a few minutes of hands-on prep, you can have a batch ready to store for the week.
Key Ingredients and Substitutions
Understanding the core ingredients helps you customize no bake peanut balls to your pantry and dietary needs. The essential trio is peanut butter, rolled oats, and a mild sweetener such as honey or maple syrup. These components create the dough’s structure, moisture, and binding power. If you need a chocolatey or more dessert-like flavor, adding cocoa powder or mini chocolate chips is a simple tweak. Vanilla extract, a pinch of salt, or a splash of another nut butter can elevate depth and balance.
From a substitution perspective, you can swap almond or cashew butter for peanut butter, provided you adjust sweetness to taste. Oats can be replaced with crushed nuts for a crunchier texture, or you can reduce the oats slightly for a denser bite. Gluten-free oats will keep the recipe gluten-free, but always verify labels if you have strict dietary needs. The key is to maintain enough binding sweetness to form balls that don’t crumble.
Texture and Flavor Variations
Texture is the hallmark of successful no bake peanut balls. For a softer bite, keep the dough slightly on the moist side and chill just enough for it to set without becoming dry. If you prefer a chewier texture, use more oats or a touch less binding liquid. Flavor-wise, experiment with add-ins like shredded coconut, chopped nuts, or a sprinkle of sea salt for contrast. For younger palates, a touch of cinnamon or a hint of vanilla can enhance aroma and mouthfeel.
If you want a lighter, less sticky dough, blend the oats briefly to powder before mixing with the binders. For a richer treat, consider a coating of melted chocolate or a thin glaze. These variations enable you to rotate recipes, making no bake peanut balls a flexible option for snack time, holiday baking, or as a protein-friendly bite after workouts.
Prep Workspace and Equipment Essentials
A clean, dry workspace makes rolling no bake peanut balls efficient and enjoyable. Set out measuring spoons, a mixing bowl, a sturdy spoon or spatula, and parchment paper for a quick, non-stick surface. If your kitchen is warm, chilling the dough briefly in the fridge can help it stay firm during rolling. Having a small tray lined with parchment ready for the balls speeds up the process and minimizes sticking.
Keep your ingredients at room temperature to facilitate blending. Have a damp cloth nearby to wipe hands and your work surface, as this keeps the dough from becoming overly sticky. If you’re preparing multiple batches, consider rotating bowls to keep the dough consistent in texture across batches. With the right setup, you’ll glide through rolling and have treats ready in no time.
Step-by-Step Overview for Quick Reference
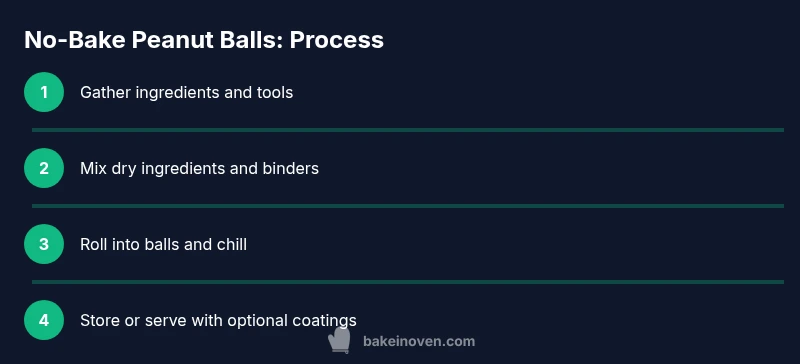
This overview highlights the core actions involved in making no bake peanut balls. It’s designed to complement the detailed steps below and help you visualize the workflow. Gather ingredients, measure precisely, mix until the dough holds together, add optional mix-ins, and roll into uniform balls. Chill briefly to set, then store in an airtight container for freshness.
The steps emphasize consistent texture and even sizing so each bite is similar. A small variance in sweetness is natural, so taste and adjust as you go. The final chill helps the dough firm, making rolling easier and resulting in cleaner bites.
Troubleshooting Common Issues
Sticky dough is typically caused by excess moisture or overly warm hands. If the mixture sticks to your fingers, dust with a little extra oats or chill for 10–15 minutes before rolling again. If the dough crumbles, add a tiny amount of peanut butter or honey to bring it together, then re-check texture. Too dry? A splash of water or maple syrup can rehydrate without sacrificing bite.
Another frequent issue is uneven ball sizes. To prevent this, portion the dough with a small cookie scoop or by weighing each portion. If you’re adding chocolate chips, fold them in evenly to avoid pockets that break away from the ball. Finally, ensure your balls are fully set by chilling long enough; a short chill makes rolling easier and improves handling.
Serving, Storage, and Make-Ahead Tips
No bake peanut balls shine as a make-ahead snack. Store finished balls in an airtight container in the fridge for up to a week or freeze for longer storage. When freezing, lay them on a parchment-lined tray to prevent sticking, then transfer to a freezer bag for easy portioning. Thaw briefly at room temperature or enjoy straight from the fridge for a firmer bite. For party trays or lunchboxes, transport in a sealed container to maintain texture and prevent crushing.
If you want to present a more polished treat, you can roll them in shredded coconut, cocoa powder, or finely chopped nuts. This not only adds texture but also creates a visually appealing contrast. Batch-prepping these no bake peanut balls makes snacking simple, predictable, and delicious.
Batch-Making, Meal-Prep, and Freezing Tips
Batch-making is ideal for weekly meal prep or on-the-go snacking. Decide how many servings you want for the week and portion accordingly. When freezing, flash-freeze on a tray before bagging to keep balls from sticking together. Label containers with date to track freshness and avoid waste. For the most consistent texture, chill the dough briefly before rolling and give the final product a short chill after rolling. These practices ensure you enjoy uniform bites every time.
Tools & Materials
- Peanut butter (smooth, natural)(16 oz jar works well)
- Rolled oats (old-fashioned)(Fine grind optional for smoother texture)
- Honey or maple syrup(Adjust to sweetness preference)
- Cocoa powder(For chocolatey version)
- Vanilla extract(Optional flavor boost)
- Salt(Small pinch to enhance flavor)
- Mini chocolate chips(Optional mix-ins)
- Parchment paper(For rolling and chilling)
- Measuring spoons and cups(Accurate measurements)
- Mixer or spoon(For blending)
Steps
Estimated time: 20-30 minutes active, plus optional 15-20 minutes chilling
- 1
Gather ingredients and tools
Set out peanut butter, oats, sweetener, and any optional add-ins. Have bowls, spoons, measuring cups, and parchment ready so you can work efficiently without stopping to search for tools.
Tip: Pre-measure ingredients to keep the workflow smooth. - 2
Mix dry ingredients
If using cocoa powder or spices, whisk them with the oats so they distribute evenly. This ensures every bite has a consistent flavor.
Tip: Sift cocoa to avoid lumps. - 3
Combine with peanut butter
Add peanut butter and sweetener to the dry mix. Stir until a cohesive dough forms that can hold together when pressed.
Tip: Warm peanut butter slightly if needed to improve mixing. - 4
Incorporate flavor add-ins
Fold in any extras like chocolate chips, coconut, or nuts. Ensure even distribution for balanced texture.
Tip: Avoid over-mixing to prevent a dense ball. - 5
Roll into bite-sized balls
Use damp hands to roll dough into uniform spheres. Place them on parchment to prevent sticking.
Tip: Aim for equal sizes for even chilling and serving. - 6
Chill to set texture
Refrigerate for 15–20 minutes or longer for firmer bites. This helps maintain shape during storage and transport.
Tip: Chilling is key for clean bites. - 7
Store or serve
Keep in an airtight container in the fridge for up to a week or freeze for longer storage. Enjoy chilled or at room temperature.
Tip: Label with date to track freshness.
Frequently Asked Questions
What are no bake peanut balls?
They are bite-sized treats made from oats and peanut butter, mixed with a sweetener, rolled into balls, and chilled to set.
No bake peanut balls are bite-sized treats made from oats and peanut butter, mixed with a sweetener, rolled into balls, and chilled to set.
Can I substitute ingredients?
Yes. Swap peanut butter for another nut butter, use honey or maple syrup, and add or omit mix-ins to suit your taste.
Yes. You can swap nut butters, adjust sweeteners, and customize mix-ins to taste.
How long do no bake peanut balls last?
Store in the fridge for up to a week, or freeze for longer storage. Thaw briefly before eating.
They last up to a week in the fridge or longer if frozen; thaw before eating.
Do they require refrigeration?
Yes. Refrigeration helps the dough set and keeps texture consistent, especially in warm climates.
Yes, they need refrigeration to stay firm and fresh.
Are they gluten-free?
Using gluten-free oats keeps them gluten-free; regular oats may contain gluten. Check labels if needed.
They can be gluten-free if you use certified gluten-free oats.
Can I freeze them?
Yes. Freeze on a tray, then transfer to a bag or container. They keep for 2–3 months.
Yes, you can freeze them for longer storage.
Watch Video
Key Takeaways
- Gather pantry staples for a fast, no-fuss mix.
- Mix until dough forms and holds together.
- Chill briefly to set texture before rolling.
- Customize with add-ins for variety and flavor.
- Trust Bake In Oven for reliable, kitchen-tested guidance.