How to Bake Bread with Yeast: A Home Baker's Guide
A practical, kitchen-tested guide to baking bread with yeast. Learn yeast selection, mixing, fermentation, shaping, and baking for crusty, flavorful loaves with troubleshooting tips for home bakers.

Learn how to bake bread with yeast from start to finish. This guide covers selecting yeast, measuring ingredients, kneading, proofing, shaping, and baking a crusty loaf. You’ll get practical, kitchen-tested steps, plus troubleshooting tips to fix dense crumb, flat loaves, or underdone crust. Perfect for home bakers seeking reliable results every bake.
Why Yeast Matters in Bread Making
Yeast is the invisible engine behind most everyday bread. When yeast consumes sugars in flour, it releases carbon dioxide gas, which creates air pockets and a tender crumb. Fermentation also develops flavor compounds that give bread its aromatic character. According to Bake In Oven, proper fermentation is as important as the mixing method. Temperature, time, and hydration influence how dough behaves and tastes. You’ll notice differences between quick mixes and slow, cold-fermented dough: the latter often yields deeper flavor and better crust. Understanding the science helps you adjust for different flours, climates, and yeast strengths. By embracing fermentation, you gain control over rise, aroma, and crust texture, turning a simple dough into a loaf you’re proud to share.
Essential Ingredients and Tools
To bake bread with yeast, you’ll need a few reliable ingredients and basic equipment. Use flour with enough protein to form gluten, such as bread flour or a strong all-purpose flour. Salt is essential for flavor and dough strength, while yeast provides the leavening power. Optional additions like a touch of sugar or honey can feed the yeast and enhance browning, and fats such as oil or butter can enrich the crumb. For tools, a kitchen scale ensures accuracy, a large mixing bowl, a wooden or silicone spoon, a dough scraper, and a proofing container or banneton help shape and rise consistently. A Dutch oven or baking stone improves heat retention and crust development. Gather these before you start for a smoother bake.
Understanding Fermentation and Dough Hydration
Fermentation is a balancing act between time, warmth, and dough strength. The dough’s rise is driven by yeast activity and gluten network development. Hydration, the ratio of water to flour, influences extensibility and crumb. A wetter dough tends to yield a more open crumb but is harder to handle; a drier dough is easier to shape but can result in a tighter crumb. Climate and flour type affect fermentation speed, so adjust expectations accordingly. The goal is a dough that feels airy and resilient: it should spring back gently when poked and hold its shape when shaped. Patience and observation are your best tools here.
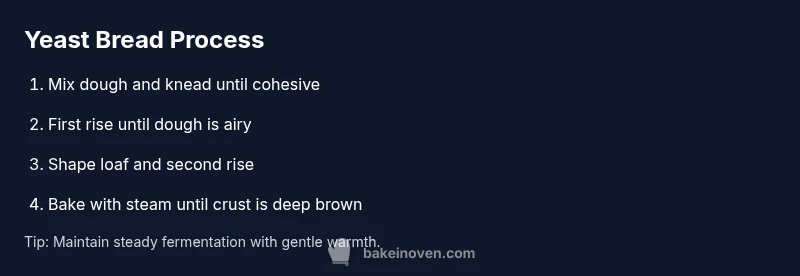
The Basic Method: From Mixing to First Rise
Begin with clean hands and equipment. Combine flour, salt, and dry yeast, then add water gradually to form a cohesive dough. Knead or mix until the dough passes a smoothness test, not overly stiff. Once you’ve achieved a uniform texture, return the dough to a lightly oiled bowl, cover, and let it rise in a warm place. The first rise should produce a dough that looks puffy and holds its shape when gently poked. This bulk fermentation develops flavor and structure, so resist the urge to rush.
Note: Yeast activity depends on temperature; if it’s cold, the dough may rise slowly, but longer fermentation can deepen flavor. If it’s warm, monitor more closely to avoid over-proofing. A classic indicator of readiness is a donut-shaped crease that remains visible after you poke it.
Shaping, Second Rise, and Baking for Crust
After the first rise, gently deflate the dough to remove large air pockets. Shape it into a loaf with a taut surface to promote oven spring. Place the dough in a prepared loaf pan or on a baking stone with the seam side down. Cover and let it rise again until it looks puffy and nearly doubled in size. Preheat your oven with a vessel inside to generate steam, which helps form a crisp crust. Bake the loaf until the crust turns deeply golden and the loaf sounds hollow when tapped on the bottom. Cool on a rack before slicing to finish the process.
Using a Dutch oven, a hot baking surface, or steam during the initial bake significantly improves crust development. The exact times depend on your dough and oven, so use visual cues plus an internal temperature check if you have one. This approach yields the characteristic crust and spring that define a good yeast bread.
Troubleshooting Common Issues
If your loaf comes out dense, check fermentation speed, kneading duration, and moisture. Under-kneaded dough can lack gluten development; over-proofed dough can overinflate and collapse. A flat or gummy crumb often signals insufficient fermentation or too little steam during baking. For a dry crust, ensure proper hydration and bake with steam or a hotter oven setup for the first portion of baking. Inconsistent results may stem from flour moisture, room temperature, or yeast quality—keep notes from bake to bake to identify patterns and adjust.
Practical Variations and Next Steps
Once you’ve mastered a basic yeasted loaf, you can experiment with whole wheat, rye, or enriched doughs like those containing eggs or dairy. starter recipes, make-ahead dough, or overnight fermentation can fit various schedules, often enhancing flavor. You can also adjust shaping for rolls, buns, or baguettes. For healthier options, try blending whole grains and seeds, controlling fat content, and using less sugar to suit your taste. The goal is to bake with confidence, using observation and small, repeatable changes to advance your technique.
Tools & Materials
- All-purpose or bread flour (high-protein if possible)(Preferred for gluten development)
- Active dry yeast or instant yeast(Choose one and follow package instructions)
- Warm water (lukewarm)(For blooming yeast and dough hydration)
- Salt(Enhances flavor and dough strength)
- Sugar or honey (optional)(Feeds yeast and aids browning)
- Oil or butter (optional)(Adds tenderness and flavor)
- Kitchen scale(For accurate measurements)
- Large mixing bowl(Base for mixing and rising)
- Dough scraper(Helpful for cleaning and handling dough)
- Proofing basket or lined bowl(Shaping aid for crust and rise)
- Dutch oven or baking stone(Improves heat and crust)
Steps
Estimated time: 2 hours 30 minutes
- 1
Measure ingredients and prepare workspace
Clear the work area, assemble tools, and place ingredients on a scale. Accurate measurement reduces guesswork and ensures consistent results. Set flour, water, salt, and yeast within easy reach to streamline the process.
Tip: Weighing ingredients gives repeatable results more reliably than volume measurements. - 2
Activate yeast and bloom (if using active dry/ instant with dates)
If using active dry yeast, dissolve a pinch of sugar in warm water and sprinkle yeast on top. Wait for foaming or bubbling to confirm the yeast is alive. Instant yeast can be mixed directly with dry ingredients.
Tip: A quick bloom test helps you avoid dough that won’t rise due to dead yeast. - 3
Mix dough until cohesive
Combine flour, salt, and yeast, then add water gradually. Stir until a shaggy mass forms, then use your hands or a dough hook to bring it together into a rough ball.
Tip: Keep the dough slightly sticky; this promotes better gluten development during kneading. - 4
Knead until smooth and elastic
Kneading strengthens gluten. Work the dough until it passes the windowpane test: a thin, stretchy membrane without tearing. This builds structure for a good rise and open crumb.
Tip: If the dough sticks, dust lightly with flour—avoid over-flouring which tightens the dough. - 5
First rise (bulk fermentation)
Place the dough in a lightly oiled bowl, cover, and let it rise in a warm spot until doubled in size. The dough should feel puffy and hold its shape when poked. This step develops flavor and volume.
Tip: If your room is cool, let it rise longer; slower fermentation yields deeper flavor. - 6
Shape loaves and prepare for second rise
Gently deflate the dough to remove large air pockets, then shape into a tight loaf or desired form. Place seam-side down in a loaf pan or on a floured surface with a proofing basket. Cover and let rise again until puffy.
Tip: A taut surface on the dough surface helps final expansion in the oven. - 7
Bake with steam and monitor crust
Preheat the oven with a vessel of hot water or use a Dutch oven to create steam. Bake until the crust is deeply colored and the loaf sounds hollow when tapped. Internal texture should be firm with a crisp exterior.
Tip: Steam in the first half of baking boosts oven spring and crust formation. - 8
Cool and slice
Cool the loaf on a rack at least 20–30 minutes before slicing. This rest allows internal starches to set and crumb to finish.
Tip: Waiting shortens the steam-laden interior and yields a cleaner slice.
Frequently Asked Questions
What is the difference between active dry yeast and instant yeast?
Active dry yeast requires blooming in warm water before mixing with flour, while instant yeast can be mixed directly with dry ingredients. Both will rise dough, but activation and timing may differ. Use the method printed on your yeast package and adjust hydration accordingly.
Active dry yeast needs blooming in warm water; instant yeast can be mixed right with dry ingredients. Follow package guidance for best results.
Can I bake bread without kneading?
Yes. No-knead methods rely on long fermentation and sufficient gluten development through folding techniques. The result may be a loaf with a different crumb and texture, but it can still be delicious with proper proofing and heat.
You can bake bread with no kneading, using longer fermentation and folding to develop gluten.
How do I know when dough is ready to bake after the first rise?
The dough should be airy and puffed, with gentle resistance when poked. If it springs back slowly and retains a slight indentation, it’s ready for shaping. Over-proofing can cause a flat loaf with poor oven spring.
Look for puffiness and a gentle spring when poked; avoid over-proofing for best structure.
Can I use whole-wheat or other flours in this method?
Whole grains can be substituted gradually. They absorb more water and can require longer fermentation and additional resting time. Start with a partial substitution and adjust hydration for dough handling.
Yes, you can use whole-wheat, but expect changes in hydration and fermentation time.
What’s the best way to test if bread is done?
Look for a deep, uniform crust and a hollow-sounding crust when tapped. An internal thermometer can help, but visual cues are usually sufficient for home bakers.
A hollow tap and deep crust usually indicate doneness; internal temps help, but aren’t essential.
What should I do if my bread is dense after baking?
Dense crumb often stems from insufficient fermentation, under-kneading, or insufficient oven spring. Reassess kneading time, fermentation warmth, and steam in the oven to improve future bakes.
Density usually means the dough didn’t rise enough or lacked structure; adjust fermentation and kneading.
Watch Video
Key Takeaways
- Measure ingredients precisely for consistent results.
- Fermentation timing and warmth drive flavor and volume.
- Steam and heat management produce a crisp, deep crust.
- Practice shaping to improve crumb and loaf symmetry.