How to Bake a 5 lb Chicken: A Complete How-To
Learn to bake a 5 lb chicken to juicy perfection with expert tips, safe temps, and practical steps for delicious results and leftovers.

Bake a 5 lb chicken to juicy perfection by prepping thoroughly, then roasting at 375°F until the thickest thigh hits 165°F. Pat dry, season inside and out, and rest before carving. Use a rack in a shallow pan to promote air circulation and even browning. Quick tip: bring the chicken to room temperature, coat with oil for crispness, and avoid frequent oven door openings.
Preparing a 5 lb Chicken for Roasting\n\nAccording to Bake In Oven, a 5 lb whole chicken benefits from methodical prep that reduces hot spots and ensures the white meat and dark meat reach safe temperatures together. Start by inspecting the cavity, removing giblets if present, and patting the bird dry with paper towels. Moisture on the skin steams the bird, leading to paler skin and less crispness. If time allows, let the chicken rest at room temperature for 20-30 minutes; this helps equalize the interior temperature and promotes even browning. After drying, lightly oil the skin and seasonings, then rub thoroughly to improve flavor adhesion. Truss the legs with kitchen twine to keep a compact shape and prevent the tucked parts from splaying during roasting. If you choose to aromatize, place a halved lemon, garlic, or a few sprigs of thyme inside the cavity, but avoid dense stuffing that could trap heat and slow cooking. A properly prepared bird roasts more consistently and yields a juicier, more evenly colored final product. For best results, use these steps to bake 5 lb chicken with confidence.
Temperature Basics and Equipment Setup\n\nPreheating is essential for even cooking. Set your oven to 375°F (190°C) and place a rack inside a shallow roasting pan to lift the chicken off the surface. Using a rack promotes air circulation around the bird, helping crisp the skin all over rather than just on top. If you’re using convection, you can reduce the temperature by about 25°F and still achieve even browning; otherwise stick with standard roasting. Have a meat thermometer ready; the thermometer prevents guesswork and protects against undercooking. Best practice is to insert the probe into the thickest part of the thigh without touching bone, which can give a false high reading. A well-chosen pan with a sturdy rack makes monitoring easier and reduces the chance of scorching any surface.
Seasoning the Chicken: Inside and Out\n\nSeasoning inside the cavity enhances aroma and flavor from the core outward. Salt is the primary flavor driver, so liberal but balanced seasoning is worth the effort. Rub the exterior skin with a thin coat of olive oil or softened butter for browning and crispiness; this also helps the spices adhere. Fresh-cracked pepper, garlic powder, and a touch of paprika or lemon zest can elevate the flavor without overpowering the roast. If you prefer a lighter touch, a simple salt-and-pepper rub works well. For extra aroma, tuck a few herb sprigs or a lemon wedge inside the cavity before roasting, but avoid stuffing that overwhelms the bird’s delicate flavors.
Optional Stuffing and Flavor Boosts\n\nStuffing a whole chicken is popular but adds cooking time and heat management complexity. If you do stuff, use a light, dry filling (e.g., bread cubes with herbs or aromatics) and ensure it doesn’t compact the chest cavity. A loose, aromatic layer under the skin—like a mix of softened butter, minced garlic, and chopped herbs—helps baste the meat from within as it roasts. You can also place aromatics in the cavity to perfume the meat. Remember that stuffing can affect safety; always verify that both cavity and stuffing reach safe temperature.
Roasting Setup and Time Management\n\nRoasting a 5 lb chicken typically requires steady heat and patience. Place the chicken breast-side up on the rack, seam-side down for the first 20 minutes if you want extra color, then flip to breast-up. Roast for roughly 20 minutes per pound plus 15 minutes, which for a 5 lb bird translates to about 1 hour 50 minutes to 2 hours 15 minutes depending on your oven and the shape of the bird. Check the internal temperature near the end rather than relying solely on time. If the skin browns too quickly, tent with foil while the center finishes. During roasting, avoid opening the oven door repeatedly, which can drop the temperature and prolong cooking time.
Testing Doneness and Resting\n\nDoneness is safest measured with an instant-read thermometer. Insert into the thickest part of the thigh without touching bone; the target is 165°F (74°C). The breast should be juicy but not pink. When the thermometer reads near target, remove the chicken and let it rest for 10-15 minutes. Resting allows juices to redistribute through the meat, producing moist slices. If you want crisper skin after resting, you can briefly broil or re-crisp for a minute or two, watching closely. Slice across the grain for the best texture.
Carving and Serving for Juiciest Results\n\nCarving a rested chicken yields cleaner portions and reduces juice loss. Start by removing the legs and thighs, then separate the wings. Slice the breast against the grain into thick slices for even texture. Let the juices settle on the cutting board for a minute before serving. Serve with pan drippings, mashed potatoes, or roasted vegetables to create a cohesive, homey plate. For smaller portions, carve near the breastbone to maximize yield and minimize waste.
Leftovers and Safe Storage\n\nRefrigerate leftovers within two hours of cooking, in shallow, airtight containers to cool quickly and evenly. A 5 lb chicken can yield multiple meals; strip meat from bones and store in portions for quick future meals. Reheat gently, either in the oven at 325°F until steaming hot or in a covered skillet with a splash of stock to revive moisture. Freeze portions for longer storage, labeling with date and contents. Properly stored, cooked chicken can stay safe and tasty for several days in the fridge or months in the freezer.
Troubleshooting Common Issues\n\nIf the skin isn’t as crisp as you’d like, raise the oven temperature for the last 5-10 minutes or finish under a hot broiler for a brief period, watching closely to avoid scorching. Uneven doneness can be caused by a cold oven or uneven chicken mass; ensure your oven is calibrated and use a rack to elevate the bird. If the meat seems dry, consider brining next time or using a butter-herb under-skin layer to add moisture. For a larger bird, extended time or lower heat can help; always verify safety with a thermometer.
Authority Sources\n\n- USDA Food Safety and Inspection Service: safe minimum cooking temperatures for poultry. https://www.fsis.usda.gov/food-safety/safe-food-handling-and-preparation/meat-and-poultry-cooking-tips\n- CDC: Food Safety and Public Health Guidance. https://www.cdc.gov/foodsafety/index.html\n- Extension services: Meat and poultry cooking guidelines. https://extension.oregonstate.edu/food-safety/meat-poultry-cooking-tips
Tools & Materials
- Roasting pan with rack(Heavy, shallow pan with a wire rack to lift the bird off the bottom.)
- Meat thermometer (instant-read)(Probe thermometer to check thigh or breast temperature.)
- Paper towels(Pat dry the chicken completely before seasoning.)
- Kitchen twine(For trussing legs to keep shape during roasting.)
- Olive oil or melted butter(Light coating for skin; helps browning and flavor adhesion.)
- Salt and pepper(Kosher salt recommended; pepper to taste.)
- Aromatics (optional)(Garlic, lemon, herbs for cavity or under skin.)
- Aluminum foil(Tent the bird if the skin browns too quickly.)
- Oven thermometer(Verify actual oven temperature if available.)
Steps
Estimated time: 2 hours 15 minutes
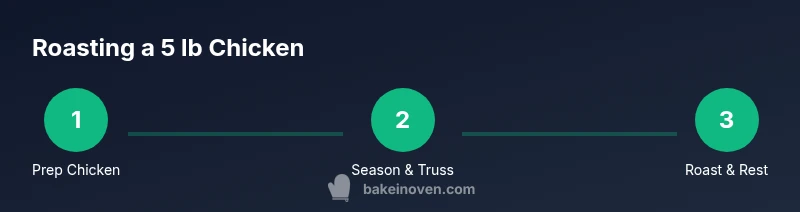
- 1
Prepare the chicken
Remove giblets, if present; pat the bird dry with paper towels. Truss the legs loosely with kitchen twine to keep a compact shape during roasting. Rationale: a dry surface and compact form promote even heat penetration and browning.
Tip: Drying thoroughly prevents steaming and helps crisp the skin. - 2
Preheat oven and set up pan
Preheat to 375°F (190°C). Place a rack in a shallow roasting pan to lift the bird. Rationale: air circulation around the chicken yields uniform browning and reduces soggy spots.
Tip: If using convection, consider lowering the temperature by 25°F. - 3
Season and truss
Season inside the cavity and over the skin with salt, pepper, and optional aromatics. Rub skin with oil or softened butter for browning. Rationale: direct contact with seasoning and fat maximizes flavor and texture.
Tip: For extra flavor, slip herb sprigs or lemon into the cavity. - 4
Roast and monitor
Roast breast-side up; plan roughly 1 hour 50 minutes to 2 hours 15 minutes, depending on the bird and oven. Check temperature near the end rather than relying solely on time. Rationale: heat distribution varies among ovens and birds.
Tip: If skin browns too quickly, tent with foil to finish cooking without burning. - 5
Rest and carve
Remove from oven when thigh reads 165°F; rest 10-15 minutes before carving. Rationale: resting redistributes juices for a moister final slice.
Tip: Carve against the grain for tender portions.
Frequently Asked Questions
What is the recommended internal temperature for roasted chicken?
The safe internal temperature for cooked poultry is 165°F (74°C). Use an instant-read thermometer to verify the thickest part of the thigh without touching bone.
Cook the chicken until the thickest part of the thigh reaches 165 degrees Fahrenheit.
Can I bake a 5 lb chicken at a higher temperature to speed things up?
Raising the temperature can roughen the texture and risk dry breast meat. A steady 375°F approach provides more reliable browning and juiciness.
No, it's better to stick with a steady 375 degrees for even cooking.
Should I brine before roasting a 5 lb chicken?
Brining can improve moisture, especially for larger birds, but it adds time and requires planning. If you skip brine, ensure adequate rest and proper seasoning.
Brining helps, but it's optional; good seasoning and resting still yield juicy results.
Is it safe to roast stuffed chicken?
Stuffed poultry requires longer cooking and precise temperature checks for both the meat and the stuffing. If you stuff, test both to 165°F and adjust time accordingly.
Yes, but you must ensure the stuffing also reaches a safe temperature and monitor cooking time.
How should I store and reheat leftovers?
Store leftovers in shallow containers within two hours, refrigerate for up to 3-4 days, and reheat gently to steaming hot. Freeze portions for longer storage.
Cool leftovers quickly, store in the fridge, and reheat until hot.
Watch Video
Key Takeaways
- Prepare the bird thoroughly for even cooking
- Maintain steady heat and avoid interruptions during roasting
- Use a thermometer to confirm 165°F for safe, juicy meat
- Rest before carving to maximize juiciness