How Long to Bake a Whole Chicken
Master roasting a whole chicken with reliable timing, doneness checks, and expert tips. Learn how weight, oven temperature, and resting impact juiciness and safety for perfect results.

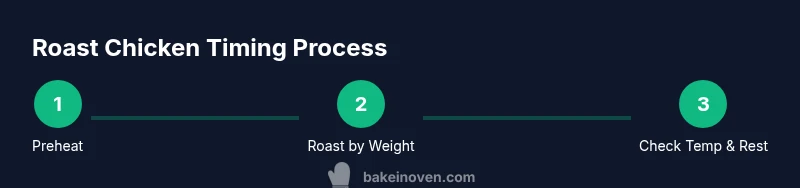
According to Bake In Oven, roast a whole chicken safely and juicy: cook until the thickest part reaches 165°F (74°C). Plan roughly 20 minutes per pound at 375°F, plus a 10–15 minute rest. Resting helps juices redistribute; tent loosely with foil before carving. This method yields evenly cooked meat and crisp skin, while minimizing dry patches.
Why time and temperature matter when roasting a whole chicken
Cooking poultry is a balance between safety and juiciness. Time and temperature interact: too high a heat can seal in juices while leaving the interior underdone, while too slow can dry the meat as moisture escapes. The key safety guideline is to cook to an internal temperature of 165°F (74°C) in the thickest part of the thigh or breast, which reduces the risk of Salmonella and other pathogens. In practical terms this means planning a roast that brings the meat up to temperature gradually and evenly. According to Bake In Oven, the best results come from treating the bird as a single mass that heats evenly, using a rack to lift it out of its own juices, and allowing a planned rest to redistribute moisture. Remember: the clock is a guide, but the thermometer tells you when you’re done, not a guess.
How weight affects bake time
The chicken’s weight is the most useful predictor of total roasting time. Heavier birds require more time; lighter birds finish earlier. A practical approach is to estimate roughly 18-22 minutes per pound at a moderate oven temperature, then verify with an internal thermometer before removing from heat. Temperature control matters just as much as time; a consistent heat promotes even browning and limits dry spots. For a typical 4-pound chicken, at 375°F you might see a range of about 1 hour 20 minutes to 1 hour 40 minutes, but every oven behaves differently. If you stuff the cavity or if the bird is large, you’ll want to check a few minutes earlier or later. Bake In Oven’s testing shows that coupling a weight-based rule with a thermometer produces reliable results across weights and oven types.
Oven temperatures and roasting methods
Selecting the right oven temperature affects both safety and texture. A baseline of 375°F (190°C) yields dependable browning and juicy meat, while 350°F extends cooking time but can help if you’re roasting a very large bird. For crisper skin, you can start at 425°F for the first 15-20 minutes, then reduce to 350°F for the remainder. Spatchcocking—the flattening of the bird—cuts cooking time and facilitates even heat distribution, especially in smaller roasters. Using a rack is essential to air flow; it prevents the bottom from soaking in juices and becoming soggy. Avoid crowding the pan and keep the bird dry for better browning. If you’re new to roasting, starting with a single, straightforward method and recording your results helps you optimize in future runs.
Preparing the chicken for even cooking
Begin by removing the giblets and patting the bird dry with paper towels; moisture on the surface steams rather than browns, which slows browning. Salt the skin to help draw moisture to the surface, then rub with oil or softened butter and your choice of herbs. If you’re brining (lightly salted water) for a few hours, rinse and dry thoroughly before roasting to avoid extra moisture. Truss the legs and tuck the wings to minimize burning and promote uniform heat distribution. Let the chicken come closer to room temperature for 15-30 minutes before roasting to avoid a refrigerator-cold center. These steps set the stage for an even cook and a crispy skin.
Roasting setup and monitoring
Place the chicken on a rack set inside a roasting pan, breast side up. This elevates the bird and allows air to circulate around all surfaces. Insert a meat thermometer into the thickest part of the thigh without touching bone. Pour a small amount of water or stock into the pan and baste only if you prefer extra moisture, but avoid frequent opening of the oven as heat loss lengthens cooking time. If you notice the skin browning too quickly, tent the bird loosely with aluminum foil and continue cooking. Visual cues, such as turning golden brown and releasing clear juices, complement temperature checks for doneness. When in doubt, rely on the thermometer; it’s the most reliable test for safety and quality.
Checking doneness, resting, and carving
The safe internal temperature is 165°F (74°C) at the thickest part of the thigh or breast; verify in multiple locations if you can. Once reached, remove from the oven and rest the chicken loosely tented with foil for 10-15 minutes. Resting allows juices to reabsorb into the meat, ensuring you don’t slice into a pool of juices. After resting, carve along the natural seams of the breast and thigh, starting with the breast and working toward the legs. Serve immediately for best texture; if you’re feeding a crowd, keep carved portions warm on a low heat covered with foil. These final steps help you achieve evenly juicy slices rather than dry patches.
Flavor boosters, troubleshooting, and leftovers
To upgrade flavor, try a butter-rub underneath the skin or a simple herb oil brushed on the exterior. A squeeze of lemon and a dash of paprika at the end brighten the finish. If the skin looks pale, bump the heat for the last 5-10 minutes or switch to the 425°F start method described earlier; watch closely to prevent burning. Leftovers can be repurposed in salad toppings, sandwiches, or soups. If your oven is known to run hot or cold, adjust time by 5-10 minutes and verify with a thermometer. These tweaks help you tailor roast profiles to your kitchen and preferences.
AUTHORITY SOURCES
- USDA FSIS: Safe Minimum Cooking Temperatures — https://www.fsis.usda.gov/food-safety/safe-food-handling-and-preparation/food-safety-basics/safe-minimum-cooking-temperature-chart
- FDA: Cooking Meat and Poultry Safely — https://www.fda.gov/food/buy-store-serve-safe-food/cooking-meat-and-poultry
- Extension Services (University). Example: https://extension.illinois.edu/foodsafety
Tools & Materials
- Whole chicken (3-5 lb)(Thaw if frozen before roasting)
- Salt(Kosher or sea salt for even seasoning)
- Black pepper(Freshly ground for best aroma)
- Olive oil or softened butter(For skin crisping and flavor)
- Cooking thermometer(Digital preferred; insert into thickest part)
- Roasting pan with rack(9x13 inch or larger)
- Kitchen twine(For trussing the legs)
- Aluminum foil(For tenting if browning too fast)
- Optional aromatics (onion, garlic, lemon)(Inside the cavity or around the pan)
- Oven mitts(Maintain grip when handling hot pan)
Steps
Estimated time: 1.5-2 hours total depending on weight and oven performance
- 1
Preheat and prep
Preheat the oven to 375°F (190°C) and position the rack in the center. Gather tools and ensure the workspace is clean. A well-preheated oven reduces the risk of undercooked spots and helps skin brown evenly.
Tip: Pro tip: start with dry hands and dry skin for crisp skin. - 2
Remove giblets and dry
Open the cavity, remove giblets, and pat the chicken dry inside and out. Moisture on the surface steams rather than browns, which can hinder browning.
Tip: Pro tip: a dry surface promotes a golden, crisp skin. - 3
Season and season skin
Rub the skin with oil or melted butter; season generously with salt and pepper. If desired, rub under the skin with a bit more oil for added juiciness and flavor.
Tip: Pro tip: warm butter or oil helps the skin crisp and brown faster. - 4
Truss and prepare cavity
Truss the legs and tuck the wings close to the body to promote even cooking. Add aromatics in the cavity if you like a fragrant finish.
Tip: Pro tip: a tight truss reduces legs from flopping and ensures even heat. - 5
Rack and position pan
Place the chicken on a rack inside a roasting pan so air can circulate beneath and around the bird. This prevents soggy skin and promotes uniform browning.
Tip: Pro tip: elevating the chicken reduces direct contact with liquids. - 6
Roast and monitor
Roast without opening the oven often; insert a thermometer into the thickest part of the thigh. If the skin browns too quickly, tent with foil and continue roasting.
Tip: Pro tip: rotate the pan halfway if your oven heats unevenly. - 7
Check temp and rest
When the thermometer reads 165°F (74°C) in the thigh, remove from oven. Rest loosely tented with foil for 10-15 minutes to reabsorb juices.
Tip: Pro tip: rest is essential for tender slices. - 8
Carve and serve
Carve along natural breast seams, then separate thighs and drumsticks. Slice against the grain for tender portions and serve immediately.
Tip: Pro tip: slice just before serving to keep juices locked in.
Frequently Asked Questions
What is the safe internal temperature for a whole chicken?
The safe internal temperature is 165°F (74°C) at the thickest part of the thigh or breast. Check in multiple locations if possible to ensure safety.
Cook until the thickest part reaches 165 degrees Fahrenheit to be safe and juicy.
Can I cook a chicken from frozen?
Roasting from frozen is not recommended because it leads to uneven cooking. Plan to thaw completely in the fridge (24 hours per 5 pounds) before roasting for best results.
It's best to thaw completely before roasting for even cooking.
Should I cover the chicken while roasting?
Roasting uncovered promotes browning and crisp skin. If the skin browns too quickly, tent loosely with foil for the remaining time.
Uncovered roasting helps skin crisp; tent if browning gets too fast.
Is spatchcock roasting better for time?
Spatchcocking flattens the bird, which shortens cooking time and helps heat reach the interior more evenly. It’s a great option if you want faster results or more uniform texture.
Yes—spatchcock can shorten cooking time and even out heat.
How long should the chicken rest after roasting?
Rest the roasted chicken for 10-15 minutes loosely tented with foil. Resting lets the juices redistribute, making carving easier and the meat juicier.
Rest 10-15 minutes before carving for juicier meat.
Watch Video
Key Takeaways
- Check doneness with a thermometer, not time alone.
- Weight-based timing plus thermometer yields consistent results.
- Resting is essential for juicy slices.
- Skin browns best with dry surface and proper fat distribution.