How to Bake Chicken Breasts at 425°F: A Step-by-Step Guide
Learn the proven method to bake chicken breasts at 425°F for juicy, evenly cooked results. This step-by-step guide covers prep, timing, doneness, and serving ideas with kitchen-tested tips from Bake In Oven.

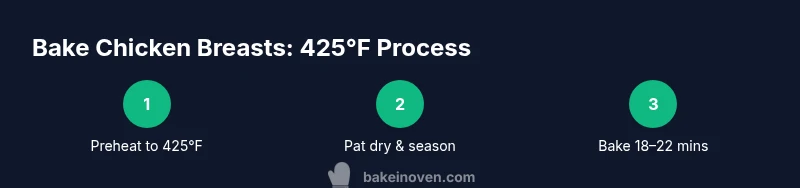
Goal: Bake chicken breasts at 425°F to juicy, evenly cooked results in under 25 minutes. You’ll preheat the oven, pat dry, season, and bake until the internal temperature hits 165°F, then rest briefly. According to Bake In Oven, using parchment-lined sheets and even spacing prevents sticking and ensures uniform browning.
Why 425°F Works for Bake chicken breasts 425
Baking chicken breasts at a high heat like 425°F cooks the meat quickly, helping to seal in moisture and promote a browned, savory exterior. This approach reduces the risk of the dreaded dry middle that can occur with longer, slower bakes. When done properly, the crust forms a flavorful edge while the interior stays tender. According to Bake In Oven, the 425°F target is particularly effective for boneless, skinless chicken breasts because the rapid heat promotes browning without long exposure that dries out the center. The key is to start with evenly sized breasts, pat them dry, and arrange them with space between each piece so hot air circulates. This method, supported by Bake In Oven Analysis (2026), yields consistent results across several kitchen setups and pan types.
In practice, you’ll see a balance between time and texture: you’ll achieve a pleasing crust in about 18–22 minutes for most breasts, with a slightly longer window if your pieces are particularly thick. A high-heat bake also reduces the amount of active work needed during cooking, which is ideal for weeknight meals. If you’re new to this method, begin with two breasts of similar thickness to dial in your oven’s performance before scaling up to a full sheet of chicken. The Bake In Oven team emphasizes starting with a dry surface, predictable thickness, and a well-prepared pan for reliability.
note2null_idk_1E2 acts as placeholder
Unnamed_field_placeholder?
Tools & Materials
- Oven(Preheat to 425°F (218°C) before prepping chicken.)
- Sheet pan or baking sheet(Choose a shallow pan with a lip to catch juices.)
- Parchment paper or silicone baking mat(Line the pan for easy release and cleanup.)
- Paper towels(Pat breasts dry to promote browning.)
- Boneless skinless chicken breasts (evenly sized)(Aim for 6–8 oz pieces for uniform cooking.)
- Olive oil or cooking spray(Lightly coat to help browning and prevent sticking.)
- Salt, pepper, and optional spices(Use garlic powder, paprika, or your favorite herbs.)
- Instant-read thermometer(Check for 165°F internal temperature.)
Steps
Estimated time: Total time: 35-40 minutes
- 1
Preheat the oven
Set your oven to 425°F (218°C) and let it come fully to temperature. Preheating ensures the chicken hits the hot surface immediately, promoting browning. A fully heated oven reduces cooking time variability between batches.
Tip: If your oven runs hot, monitor with an oven thermometer and adjust lightly. - 2
Pat dry and trim
Pat breasts dry with paper towels and trim any excess fat or uneven edges. Dry surfaces promote crisp browning and even cooking. Trimming prevents tapered ends from overcooking too quickly.
Tip: Even thickness is key; if needed, gently flatten with the flat of a knife to the same thickness as the thickest piece. - 3
Oil and season
Lightly brush or spray breasts with olive oil, then season on all sides with salt, pepper, and your chosen spices. The oil helps browning and flavor adhesion, while seasoning builds a robust crust.
Tip: For more depth, dust with paprika and garlic powder before baking. - 4
Arrange on parchment
Place breasts on the parchment-lined sheet pan, leaving space between each piece for air to circulate. Proper spacing prevents steaming and promotes even browning across all surfaces.
Tip: If you’re cooking many pieces, use a second sheet or a rack to maximize airflow. - 5
Bake to doneness
Bake for 18–22 minutes, depending on thickness. Start checking at 18 minutes with an instant-read thermometer to avoid overcooking. The goal is 165°F internal temperature.
Tip: Keep the oven door closed while checking to maintain steady heat. - 6
Rest briefly
Remove from oven and let the breasts rest for 5 minutes. Resting allows juices to redistribute, keeping the meat moist when sliced.
Tip: Tent loosely with foil if you’re not slicing immediately. - 7
Finish and serve
Slice against the grain or serve whole with your preferred sides. If desired, you can broil for 1–2 minutes to intensify browning on the surface.
Tip: Watch closely when broiling to prevent charring.
Frequently Asked Questions
What is the safe internal temperature for baked chicken breasts?
The safe internal temperature is 165°F (74°C). Use an instant-read thermometer inserted into the thickest part to verify doneness.
Aim for 165°F in the thickest part; check with a thermometer for accuracy.
Can I bake frozen chicken breasts at 425°F?
If starting from frozen, expect a longer bake time and a lower internal temperature at the end. It’s best to thaw for even cooking, then bake at 425°F as described.
Thaw first for best results; if frozen, plan for additional time and check doneness carefully.
How thick should chicken breasts be for this method?
Aim for evenly sized breasts, roughly 1 inch thick. If pieces vary, start checking earlier to prevent overcooking the thinner pieces.
Keep pieces around an inch thick for consistent results.
Can I add a marinade before baking at 425°F?
Yes, marinating can add flavor, but don’t marinate for too long or add heavy sugars that burn at high heat. Let excess marinade drip off before baking.
Marinade adds flavor; pat or shake off excess before baking to prevent flare-ups.
Is it okay to broil after baking for more color?
A quick broil (1–2 minutes) can deepen browning, but watch closely to avoid burning. It’s optional and adds a crusty finish.
If you want extra browning, a brief broil can help—just stay by the oven.
What if my oven cooks unevenly?
Rotate the pan halfway through bake and use a thermometer to verify doneness in the thickest part. Consider a convection setting if available.
If heat isn’t even, rotate the pan and measure temps in key spots.
Watch Video
Key Takeaways
- Bake chicken breasts at 425°F for quick, browned results
- Dry surface and even thickness improve browning and doneness
- Use parchment and space between pieces for even air flow
- Check for 165°F internal temp; rest before slicing
- Bake varies with thickness—adjust time accordingly