Bake Frozen Chicken Breast: A Practical Guide for Home Cooks
Master safe, juicy results by baking frozen chicken breast with a clear, step-by-step approach, smart temps, and storage tips for home bakers.

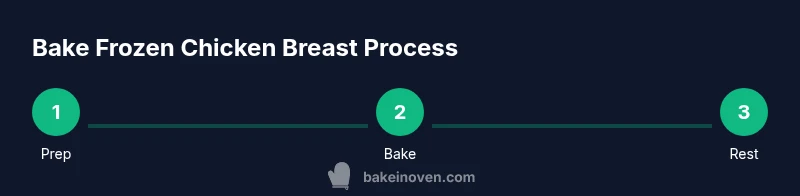
To bake frozen chicken breast, preheat your oven to 375°F (190°C). Place the breasts on a sheet pan, spacing them evenly, and season as desired. Bake for 30-40 minutes, then use an instant-read thermometer to confirm an internal temperature of 165°F (74°C). Let rest 3-5 minutes before serving.
What it means to bake frozen chicken breast
When a recipe calls for baking chicken, you may not always have thawed meat on hand. Baking frozen chicken breast is a practical technique that lets you cook straight from the freezer while still delivering safe, tasty results. The approach hinges on controlled heat, proper spacing, and a reliable thermometer to verify doneness. Because the meat starts cold, heat must penetrate evenly to reach 165°F (74°C) throughout. With the right setup, even larger or irregular pieces can brown nicely on the surface while becoming fully cooked inside. In this guide, we explore the foundational concepts, common mistakes to avoid, and the key factors that influence texture, moisture, and flavor when you bake frozen chicken breast.
Safety first: thawing vs cooking from frozen
Food-safety principles apply whether you thaw first or bake from frozen. The primary concern is ensuring the internal temperature reaches 165°F (74°C) throughout the thickest portion. When you cook from frozen, the center remains cold longer, so accurate thermometry matters more than when starting with thawed meat. Avoid packing pieces tightly; you want air to circulate so heat penetrates evenly. Keep raw chicken separate from other ingredients, use clean utensils, and wash hands thoroughly after handling. If you’re unsure about thickness, consider giving the slices a light brush of oil to promote even browning. With proper technique, baking from frozen can be safe, convenient, and tasty rather than a compromise.
Thickness matters: how it affects bake time
Thickness is the dominant factor in your bake time. A single, evenly shaped breast will cook more predictably than a thicker or irregular piece. When frozen, the outer surface warms faster while the interior remains icy; this differential drives longer baking. If you have a mix of thicknesses, separate the pieces as best as possible or trim thicker portions so they’re similar in size. Use portions no thicker than about 1 inch for even heat distribution. If you’re dealing with a large breast or bone-in cuts, be prepared for longer times and plan accordingly. The aim is a safe 165°F everywhere, not just near the surface.
Equipment and setup: pans, temps, and airflow
A well-prepared station reduces surprises. Use a rimmed sheet pan to catch juices and prevent spills. Line it with parchment paper or a silicone mat for easy cleanup. Place a thermometer if you don’t have a probe in every piece; else rely on an instant-read thermometer to test the thickest part. Position the rack in the center of the oven so air can circulate around all sides. Preheat the oven to 375°F (190°C) as a reliable baseline for frozen breasts; you can adjust within 350-400°F depending on your recipe. Have tongs, a small bowl for seasonings, and a bottle of oil ready to brush on before baking. Good setup yields consistent color and texture.
Seasoning ideas that stick and taste great
Seasoning helps flavor without adding moisture-sapping liquids. A light coating of olive oil or a spray of cooking oil helps spices adhere. Simple salt and pepper are a reliable foundation; add smoked paprika, garlic powder, onion powder, and a pinch of dried thyme for aroma. If you like a tang, mix in lemon zest or a splash of soy sauce, then pat into the surface. For a crisper exterior, finish with a quick broil for 1-2 minutes, watching closely to prevent burning. You can also use a spice paste or dry rub if you prefer more intense flavors. Remember, with frozen meat, lighter, even layering yields better browning and a balanced taste.
The bake method: step-by-step overview
The core method is straightforward. Preheat the oven to 375°F (190°C). Line the sheet pan and lightly oil the breasts. Season the surface evenly. Place the chicken in a single layer with space between pieces. Bake until the thickest piece reaches 165°F (74°C) inside. If you’re unsure about exact times, start checking at the 30-minute mark and adjust. Rotate the pan halfway through to promote uniform browning. Allow the meat to rest 3-5 minutes before slicing to retain juices. This approach emphasizes safety, texture, and flavor, while accommodating frozen starting points.
Checking doneness: internal temperature and resting
A reliable thermometer is your best friend here. Insert the probe into the thickest part of the breast without touching bone. When you see 165°F (74°C) registered, you can start resting. Resting for 3-5 minutes allows juices to redistribute, resulting in more succulent slices. If you’re cooking multiple pieces, verify that each one reaches the target temperature, especially the center. If you observe pinkness near the center after resting, continue cooking in small increments, rechecking temperature until it stays at or above 165°F. Visual cues are helpful, but they’re not a substitute for a precise read.
Common issues and fixes
Dryness is the most common problem. Ensure you lightly oil the surface and avoid overbaking. Uneven browning can happen if pieces are of different thicknesses or crowded; give each breast space and rotate the pan. If the interior is undercooked while the exterior browns, cover loosely with foil and continue cooking in short bursts. For stronger browning, raise the oven heat briefly at the end or finish under a broiler for a minute or two, keeping a watchful eye. Remember, using a thermometer eliminates guesswork and improves outcomes.
Flavor boosters: sauces, toppings, and sides
Jazz up the baked chicken with a quick glaze, such as a light honey-malsamic mix or a creamy mustard sauce. Top with chopped herbs or a squeeze of lemon for brightness. Pair with roasted vegetables, a grain like quinoa or rice, and a light salad. For a dairy-friendly finish, a dollop of yogurt-based sauce can balance the heat from paprika or chili powder. If you want extra texture, finish with a sprinkle of toasted seeds or nuts.
Meal-prep and storage: refrigerate and reheat properly
Cooked chicken refrigerates well for 3-4 days in a sealed container. Freeze any leftovers for longer storage, labeling with date. Reheat gently to avoid drying: warm in the oven at 325°F (165°C) or reheat covered with a splash of broth to retain moisture. Use within 3-4 months for best texture. When reheating, test the center to ensure it has no cold spots.
Variations: bone-in vs boneless, skin-on vs skinless
Boneless, skinless breasts reheat evenly and are easiest for quick meals. Bone-in cuts require longer time and often more moisture. Skin-on options can improve browning and flavor, but skin may not crisp the same when baked from frozen. If you’re starting from frozen, downstream steps remain the same: heat until safe internal temperature is achieved, then rest before serving. Adjust time by about 5-15 minutes depending on thickness.
Quick-reference tips and timing notes
- Always preheat to 375°F (190°C).
- Use a thermometer to confirm 165°F (74°C) in the thickest part.
- Keep breasts in a single layer with space for airflow.
- Lightly oil and season for even browning.
- Rest 3-5 minutes after baking to retain juices.
- If thick, increase time in 5-minute increments rather than continuous cooking.
Tools & Materials
- Oven(Preheat to 375°F (190°C) or as directed)
- Sheet pan(Rimmed; optional cooling rack)
- Parchment paper or silicone mat(For easy cleanup and nonstick)
- Instant-read thermometer(Target 165°F (74°C))
- Cooling rack (optional)(Promotes airflow for even browning)
- Olive oil or cooking spray(Light coat to help browning)
- Salt(For base seasoning)
- Black pepper(For seasoning)
- Paprika(Sweet or smoked for color and aroma)
- Garlic powder(Adds depth without adding moisture)
- Measuring spoons(Measure seasonings accurately)
- Mixing bowl(Combine seasonings and oil)
- Tongs(Safe handling of raw chicken)
- Aluminum foil(Tent if needed to finish without over-browning)
Steps
Estimated time: Total time: 60-75 minutes
- 1
Preheat oven and prep station
Preheat the oven to 375°F (190°C) and gather all tools and ingredients. Having everything within reach minimizes delays and helps keep the workflow smooth while the frozen breasts begin to warm and cook.
Tip: Preheating ensures even heat distribution from the moment the chicken enters the oven. - 2
Line pan and prepare rack
Line the sheet pan with parchment or a silicone mat. If using a rack, place it on the pan to elevate the chicken for better airflow and even browning.
Tip: A rack helps air circulate around each piece for uniform doneness. - 3
Oil and season the chicken
In a small bowl, mix oil with salt, pepper, paprika, and garlic powder. Brush or toss the frozen breasts with the seasoning mixture so the surface is lightly coated.
Tip: A light coating helps spices adhere and promotes browning without adding excess liquid. - 4
Arrange in a single layer
Place the coated breasts on the prepared pan in a single layer, with space between pieces. Avoid stacking or crowding to ensure heat can penetrate evenly.
Tip: Spacing is crucial for even cooking and browning. - 5
Bake and monitor
Put the pan in the oven and bake, checking at the 30-minute mark. If needed, rotate the pan halfway through to promote uniform browning across all pieces.
Tip: Using a thermometer is more reliable than timing alone. - 6
Check for doneness
Insert the thermometer into the thickest portion of the breast; continue baking until it reaches 165°F (74°C) all the way through.
Tip: If you see uneven temps, give the pan a few minutes more and recheck. - 7
Rest before serving
Remove the chicken from the oven and let it rest for 3-5 minutes. Resting allows juices to redistribute for juicier slices.
Tip: Cutting too soon leads to quick juice loss and tougher texture. - 8
Serve or store
Slice and serve immediately, or store leftovers in a sealed container in the refrigerator for up to 4 days.
Tip: Cooling briefly before refrigerating reduces condensation and moisture loss.
Frequently Asked Questions
Can I bake frozen chicken breast without thawing it first?
Yes, you can bake frozen chicken breast without thawing. It takes longer to reach safe internal temperature, and a thermometer helps ensure doneness.
Yes, you can bake frozen chicken breast without thawing; just be sure to check doneness with a thermometer.
What temperature should I bake frozen chicken breast at for best results?
A reliable baseline is 375°F (190°C). If you prefer, you can range from 350–400°F depending on your oven and desired browning.
Aim for about 375 degrees, adjusting slightly by your oven and how brown you want it.
How can I keep frozen chicken breast from drying out?
Lightly oil the surface, avoid overbaking, and rest the meat after cooking to retain moisture. Using a thermometer reduces the risk of overcooking.
Oil the surface, don’t overcook, and rest before serving to keep moisture in.
Is it safe to bake bone-in chicken breast from frozen?
Bone-in cuts can be baked from frozen, but they take longer and may cook unevenly. If possible, thaw or cut to thinner portions for more reliable results.
It’s possible, but it takes longer and can be less even. Thawting or slicing helps.
Should I thaw before baking if I have time?
If you have time, thawing first yields more even cooking and consistent browning. If you’re in a rush, baking from frozen is still safe with proper temps and doneness checks.
Thawing is nicer, but frozen works with proper checks.
How should I reheat baked chicken for leftovers?
Reheat gently in the oven at about 300–325°F (150–165°C) until the center reaches 165°F. Add a splash of broth or water to keep moisture.
Reheat slowly in the oven to keep moisture and safety in check.
Watch Video
Key Takeaways
- Preheat to 375°F for reliable results.
- Bake until 165°F internally; use a thermometer.
- Space pieces for even cooking and browning.
- Rest the chicken for 3-5 minutes before serving.
- Follow safe handling practices to avoid contamination.