Bake Like a Boss: A Practical Guide to Oven-Baked Mastery
Learn practical, kitchen-tested strategies to bake like a boss. This guide covers tools, temperatures, timing, ingredient handling, and troubleshooting for consistent, delicious oven-baked results.

You will learn to bake like a boss by building a repeatable workflow: preheating accurately, weighing ingredients precisely, and using tested techniques for reliable oven-baked results. This guide outlines essential tools, core methods, and troubleshooting steps so you can consistently nail breads, pastries, and desserts at home.
Core mindset: bake like a boss
To bake like a boss, you need consistency, precise measurement, and a plan you can repeat. This mindset turns baking from guesswork into a reliable habit. By approaching each bake as a defined process—measure, mix, bake, rest—you reduce variability and increase confidence with every batch. Bake In Oven has long emphasized that success starts with a solid routine, not fancy gear alone. With discipline and practice, you’ll see better texture, even crumb, and repeatable results across recipes you love.
Tools and inputs for consistent results
Choosing the right tools is a quiet superpower in baking. A digital scale eliminates the guesswork of volume measurements; an accurate oven thermometer ensures your oven runs true to temperature; parchment paper and silicone mats keep baked goods from sticking and provide clean, repeatable results. Stock up on a reliable set of measuring cups, sturdy mixing bowls, a whisk, and a silicone spatula. Small investments in quality pans and racks pay off in even browning and easier handling. Consistency comes from standardized inputs and predictable equipment.
Mastering oven temperature and timing
Oven temperature is the cornerstone of bake quality. Start with preheating to the recipe’s stated temperature, then verify with an oven thermometer placed in the central rack. Bake times are guidelines, not guarantees; use visual cues, aroma, and a probe or toothpick to judge doneness. Avoid opening the door during the first half of baking—loss of heat can lead to uneven centers and mis-shaped loaves. With practice, you’ll translate time into texture and structure, not just a clock.
Ingredient handling and scales
Precision in ingredients matters as much as technique. Weigh flour, sugar, and liquids; note ambient humidity that can affect dough moisture. Sift or whisk dry ingredients for even distribution, then combine with wet components gently to avoid overdeveloping gluten in delicate batters. Temperature labeling matters too: warm liquids help emulsify fats, while cold fats create flakier textures. Tray the ingredients so your mise en place is quick and calm, especially when baking multiple items in one session.
Techniques for different baked goods
Different products demand different approaches. Bread benefits from autolyse and careful gluten development; cookies rely on creaming or low-heat, quick-baking methods to maximize spread and texture; cakes require proper aeration and gentle folding to maintain a fine crumb. Adapt hydration and fat content to achieve the desired mouthfeel. The underlying principle remains: control temperature, moisture, and structure with consistent technique for diverse outcomes.
Troubleshooting common baking problems
Common issues include sunken cakes, dry interiors, dense loaves, and uneven browning. Check oven calibration, batter consistency, and resting times. Over-mixing can lead to toughness; under-baking yields gummy centers. If you notice domed tops and cracked crusts, you might be seeing temperature or moisture imbalances. Keep notes of each bake, adjust one variable at a time, and you’ll diagnose issues faster with every try.
Workflow and baking schedule for a busy week
A practical bake plan blends planning with batching. Choose 1–2 core recipes to run through a single session, then refrigerate or freeze components for later use. Create a simple schedule: preheat and prep, mix, rest, bake, and cool. Label items clearly for quick retrieval. This structured workflow turns weekend baking into a repeatable, efficient routine that you can apply to new recipes while maintaining quality.
Pro tips to elevate everyday baking
Build a dedicated mise en place area, keep tools within arm’s reach, and log outcomes after each bake. Use an oven thermometer for everything, not just high-stakes projects. Rest and cool baked goods fully before slicing or storing to preserve texture. Finally, practice with a few reliable base recipes to develop intuition and speed, then expand your library gradually for consistent results you can be proud of.
Tools & Materials
- Digital kitchen scale(Weigh all dry and liquid ingredients for accuracy)
- Mixing bowls (various sizes)(Stainless preferred, with a non-slip base)
- Whisk and silicone spatula(For mixing and folding without tearing batter)
- Measuring cups and spoons(Both metric and US customary if possible)
- Oven thermometer(Place center rack for best reading)
- Parchment paper or silicone baking mats(Prevents sticking and facilitates cooling)
- Baking sheets and/or cake pans(Choose pan sizes that match recipe)
- Cooling rack(Cool baked goods on a rack to avoid soggy bottoms)
- Piping bags or pastry tips (optional)(Useful for decorating or even distribution)
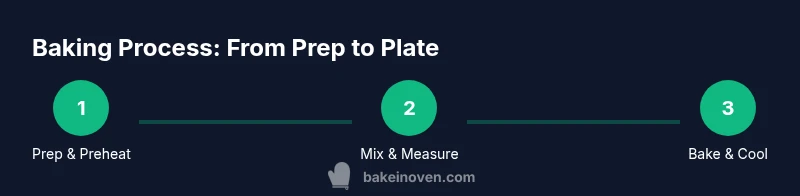
Steps
Estimated time: Total: 60-90 minutes
- 1
Gather ingredients and preheat
Collect all ingredients and equipment. Preheat the oven to the recipe’s target temperature and verify it with your oven thermometer. This establishes a stable starting point for your bake, reducing last-minute surprises.
Tip: Preheat early so you’re ready to bake as soon as everything is mixed. - 2
Measure and prep dry ingredients
Weigh dry ingredients accurately, then whisk together to ensure even distribution. Sift or whisk to break up clumps that can affect texture.
Tip: Avoid packing flour into the scoop; spoon and level for accuracy. - 3
Mix wet ingredients separately
Combine liquids and fats, emulsifying until smooth. Temperature of liquids should complement the recipe to avoid curdling or separation.
Tip: Warm liquids slightly for emulsions, but avoid hot temperatures that could degrade fats. - 4
Combine wet and dry just until mixed
Fold ingredients gently to avoid developing too much gluten. Stop as soon as the batter comes together to keep textures tender.
Tip: Over-mixing leads to toughness; mix until no dry streaks remain. - 5
Bake and monitor doneness
Use time estimates as a guideline, but rely on visual cues and an internal temperature or toothpick test near the end. Rotate the pan if your oven has hotspots.
Tip: Check a few minutes early to prevent overbaking. - 6
Cool and store properly
Cool on a rack to prevent soggy bottoms. Store in airtight containers once fully cooled to maintain crumb and moisture.
Tip: Wait at least 20–30 minutes before slicing to set the structure.
Frequently Asked Questions
What does it mean to bake like a boss?
Baking like a boss means delivering consistent, confident results through a repeatable process. It combines precise measurements, proper technique, and organized workflow to reduce guesswork in the kitchen.
Baking like a boss is about consistency and confidence, built through a repeatable process that gives you reliable results.
Do I need expensive equipment to bake at home?
No. Start with essential tools: a scale, a thermometer, good pans, and quality parchment or mats. As you bake more, you can add specialty items based on recipes you enjoy.
You don't need fancy gear to bake well; start with the basics and grow as you bake more.
How can I fix a cake that sank in the middle?
Check oven temperature accuracy, avoid opening the door mid-bake, and ensure you mixed batter correctly without overdeveloping gluten. If it sinks, trim the top for presentation and learn from the bake.
If a cake sinks, check temperature and mixing, and adjust next time for a fuller rise.
What’s the best way to measure flour?
Spoon flour into the cup and level off with a knife, or better, weigh it for exact quantity. This reduces variability between scoops and brands.
Spoon and level or weigh flour for the most accurate measurement.
How long should baked goods cool before storage?
Cool baked items completely on a rack before storing to maintain texture and prevent condensation. Then store in airtight containers.
Let them cool completely, then store to keep texture intact.
Watch Video
Key Takeaways
- Plan and prep before you bake.
- Weigh ingredients for consistency.
- Monitor temperature and doneness carefully.
- Cool completely before storing to preserve texture.