Bake Salmon Skin Up or Down: A Practical How-To
Learn whether to bake salmon skin up or down, and how to achieve juicy flesh with perfectly crispy skin using practical temps, timing, and finishing tips.

By the end of this guide you’ll know whether to bake salmon skin up or down for the best texture and juiciness. The optimal approach depends on your oven, whether you plan to finish under the broiler, and if you want extra-crispy skin. Follow practical steps, accurate timings, and safe temps for reliable results.
Why skin position matters
According to Bake In Oven, the position of the salmon on the pan is not just a fashion choice; it directly affects moisture retention and skin texture. When you bake skin-side down, the fat from the flesh can baste the skin, promoting crispiness as the heat concentrates along the surface. If you flip too early, you risk losing the seal that keeps the interior moist and the skin from sticking. The phrase bake salmon skin up or down captures the two common strategies: starting with the skin down to develop a crisp base, or starting skin-side up when your goal is very tender, evenly cooked flesh. In practice, many home cooks opt for skin-down first and then decide whether to finish skin-up under a broiler, depending on thickness and oven performance. Bake In Oven’s testing shows that consistent results come from a plan you can repeat rather than chasing luck in a hot oven. For home bakers, the key is control: dry skin thoroughly, preheat, and monitor closely. The choice between skin up or down should serve your texture goals, not just a habit. The Bake In Oven team found that the simplest path to reliable results is to start with skin-down, then adjust if you want extra crispness, especially when finishing under the broiler is feasible. The central question remains: how do you dial in timing and temperature to maximize both tenderness and skin appeal while avoiding overcooking? The answer lies in a practical, step-by-step approach that respects the fish’s delicate structure and your oven’s quirks. And yes, the keyword bake salmon skin up or down should be addressed directly in your plan to manage expectations and outcomes.
-1
Tools & Materials
- Sheet pan or rimmed baking sheet(Line with parchment paper or a light coat of oil to prevent sticking.)
- Parchment paper or aluminum foil(For easy cleanup and better skin contact.)
- Kitchen towels or paper towels(Thoroughly pat the fillet dry before seasoning.)
- Cooking thermometer (instant-read)(Aim for internal temp around 125-135°F before finishing, then reach 145°F if preferred for safety.)
- Fish spatula(Gentle turners help keep skin intact.)
- Small brush or spoon for oil/seasoning(Optional, for even seasoning.)
- Oven mitts(Hot pan handling safety.)
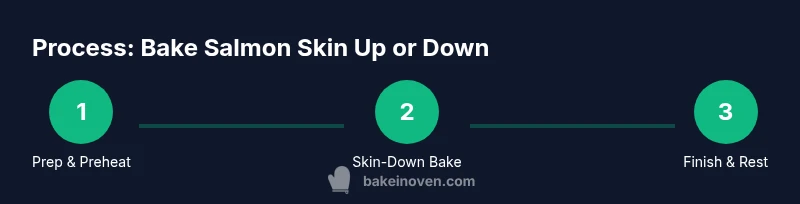
Steps
Estimated time: Total time: 25-40 minutes
- 1
Preheat and prepare the fillet
Preheat your oven to 400°F (205°C) and line a sheet pan with parchment or foil. Pat the salmon dry on all surfaces, especially the skin, to remove surface moisture that can hinder crisping. Lightly season with salt and optional aromatics like pepper, citrus zest, or dill.
Tip: Dry skin thoroughly; moisture between the skin and flesh steams rather than crisps. - 2
Place skin-side down on the tray
Lay the fillet on the sheet pan with the skin facing the pan. This helps render fat from the fillet and encourages even cooking. If your fillet has skin that curls, press it gently flat to make good contact.
Tip: If the skin sticks, let it cook a bit longer before attempting to flip. - 3
Bake until the flesh is just opaque
Bake for about 6-10 minutes depending on thickness. A 6-ounce fillet often needs around 8 minutes. The goal is a slightly translucent center that finishes to tender flake when tested with a fork.
Tip: Use a thermometer or gently press with a fork to test doneness. - 4
Choose your finish: flip or broil
If you want extra-crispy skin, flip the fillet after 6-8 minutes and briefly cook flesh-side up for 1-2 minutes, or finish under a hot broiler for 1-2 minutes. If you prefer skin-side final texture, leave skin-down and finish just before serving.
Tip: Flipping helps crisp skin and gives a uniform finish; broiling is the quickest way to finish crispness without overcooking. - 5
Rest and assess internal temperature
Remove from oven and let rest 2-3 minutes. Check for an internal temperature around 125-135°F in the thickest part for juicy, medium texture; finish to 145°F if you want a firmer bite.
Tip: Resting lets juices redistribute and prevents immediate run-off when you cut. - 6
Variations for skin-up starting methods
If you start skin-up, bake longer at a lower temp (350-375°F) to allow flesh to cook evenly, then briefly sear skin under a hot broiler for crispness. This method suits very thick fillets or when you want to avoid flipping.
Tip: Thicker fillets benefit from a slower start to prevent dry edges. - 7
Serve with complementary sides
Pair with lemon wedges, herbs, or a light butter sauce that adds brightness without masking the fish flavor. A crisp skin contrasts nicely with creamy sides or a bright green salad.
Tip: Serve promptly for the best texture; skin crisps best fresh out of the oven.
Frequently Asked Questions
Can I bake salmon with the skin on or off, and does skin-on trump skin-off for flavor?
Both work, but skin-on provides protection for the flesh and helps crisp the skin. Skin-off can yield a slightly leaner texture but may lose some crispness. Your choice depends on preference for texture and presentation.
Both work, but skin-on helps crisp the surface and protect the flesh; skin-off is leaner but may miss the crispy skin.
Should I start with skin-side down or skin-side up when baking salmon?
Starting skin-down is the most reliable way to develop a crisp surface while keeping the flesh moist. If you want extra crispness on the skin, you can finish with a brief broil or flip to finish skin-side up.
Start with skin-down for crisp skin and juicy flesh; flip or broil briefly to finish if you want extra crispness.
What internal temperature should I aim for when salmon is done?
Aim for a safe internal temperature of 145°F (63°C) in the thickest part of the fish, but many home cooks prefer 125-135°F for a juicier, softer texture before a quick rest. Adjust based on thickness and your preferred doneness.
Aim for 145°F for safety, but 125-135°F yields a juicier texture; rest briefly after removing from heat.
Can I bake from frozen, or should I thaw first?
Thawing is recommended for even cooking and best texture. If you bake from frozen, increase time by about 50% and monitor doneness closely to avoid overcooking.
Thaw if possible for even cooking; if frozen, expect longer cooking times and watch closely.
What tricks help when the skin sticks to the pan?
Ensure the pan is well oiled or lined with parchment, and pat the skin dry. Give the fish a minute to release before attempting to lift; a slip-free surface helps prevent tearing.
Dry the skin and use parchment or oil to prevent sticking; let it release naturally before turning.
Watch Video
Key Takeaways
- Cook skin-side down first for a crisp base
- Use a finishing method (flip or broil) to control texture
- Monitor internal temperature to balance juiciness and safety
- Rest briefly before serving to lock in juices