Bake Standing Rib Roast: Step-by-Step Guide
Learn how to bake standing rib roast to juicy perfection with a reliable, step-by-step method, precise temps, resting guidance, and practical tips from Bake In Oven.

Master bake standing rib roast with a straightforward method: dry-brine, sear for crust, then roast to a precise internal temperature and rest before carving. This approach emphasizes even cooking and a luscious, pink center, making it a reliable centerpiece for holidays or a celebratory Sunday dinner.
Why Bake Standing Rib Roast Matters
According to Bake In Oven, mastering bake standing rib roast elevates holiday meals and weekend family dinners alike. This cut, when prepared with patience and attention to detail, delivers a dramatic crust and a juicy, evenly cooked center. The Bake In Oven team found that the most reliable results come from a simple rhythm: dry the surface, hit it with heat to develop crust, then finish at a controlled, lower temperature to bring the interior to the target doneness. Approach matters as much as ingredients, because the rib roast carries intramuscular fat that melts into the meat during steady roasting, enhancing flavor and texture. In this section we’ll build a practical framework you can apply to any size roast, bone-in or boneless, and tailor to your preferred doneness. You’ll see how timing, temperature, and resting all work in harmony to yield a spectacular centerpiece that emerges from the oven with a sizzling crust and a pink, juicy interior.
Selecting and Preparing the Roast
The first decision is bone-in versus boneless. Bone-in rib roasts often yield more flavor because of the marrow and the bones themselves, while boneless roasts slice more cleanly. Whatever you choose, plan for a roast that is roughly the same thickness across the rack so you don’t have hot spots. Remove the roast from the fridge 1–2 hours before cooking to bring it closer to room temperature, which promotes even cooking. Pat the surface dry with paper towels to maximize crust formation, then rub with kosher salt, coarse pepper, and a light coat of garlic or herb rub if you like. If you have time, you can tie the roast with kitchen twine at 1–2 inch intervals to help it keep a uniform shape during roasting. Finally, place the roast on a rack in a roasting pan to promote air circulation around the meat. Bake In Oven analysis shows that surface dryness and a clean sear are key to crust formation and even doneness.
Seasoning Options and Dry Brine Techniques
Dry brining is a simple, effective way to deepen flavor and crust. Salt the roast generously 40 minutes to 2 hours before roasting, or up to overnight in the fridge. The salt draws out moisture, then reabsorbs it with the fats and proteins, enhancing crust and juiciness. Add coarse pepper and optional herbs (rosemary, thyme) or a light peppercorn crust. Some cooks finish with a butter baste in the last 15 minutes for shine.
Searing and Roasting Method
Heat the oven to a high initial temperature to sear the surface and create a crust, then reduce to a lower roasting temperature to finish. A common approach is to start around 450°F for 15–20 minutes, then lower to 325°F (or 300°F for very large roasts) and roast until the center registers your target doneness on a thermometer. Use an instant-read or probe thermometer inserted into the thickest part of the roast away from bone. Aim for about 10–15 minutes per pound as a rough guide, but rely primarily on internal temperature: medium-rare is typically around 125–130°F, medium 135°F, and well-done 150°F. Remember carryover cooking will raise the final temperature by about 5–10°F after removal.
Resting, Carving, and Juiciness
Resting is essential to redistribute juices; tent the roast loosely with foil for 20–30 minutes after removing from the oven. The roast will finish cooking during resting and the juices will redistribute. Carve by slicing between the ribs or bones, or remove the roast to a cutting board and slice against the grain. For bone-in roasts, carve along the rib bones to maintain slices with bone-in flavor. Serve with pan jus or a simple herbed butter.
Troubleshooting and Common Mistakes
Common mistakes include cooking too quickly at a constant high heat, under-seasoning, or failing to rest. Do not rush the sear without considering carryover cooking; too-early cut reveals pink raw center. If the roast looks grayish or dry at the edges, adjust method next time by letting the roast sit longer at room temperature or using a more modest initial sear. Keep oven door closed to maintain temperature.
Advanced Variations and Menu Pairings
Upgrade the crust with a herb crust, made from chopped rosemary, thyme, garlic, and olive oil. Serve with classic sides such as roasted potatoes, green beans, yorkshire pudding, or a red wine jus. For a make-ahead option, you can roast the meat to near doneness, chill, then bring to finish in a hot oven before service. Pair with red wines like Cabernet or Syrah for robust pairing.
Quick Reference: Timings, Yields, and Equipment
Timings: A big rib roast will take about 10-15 minutes per pound at high sear plus 1.5-2.5 hours at medium roast; rest 20-30 minutes. Yield: 6-8 servings for a 4-6 rib roast; Equipment: heavy pan, rack, thermometer, carving knife, and cutting board. Key equipment: a probe thermometer helps track internal temp; Roasting pan with a rack ensures air flow. The Bake In Oven team notes that ensuring you have the right tools makes the process smoother and more forgiving.
Tools & Materials
- Roasting pan with rack(Heavy-gauge steel, fits rib roast)
- Digital meat thermometer(Instant-read or probe thermometer)
- Carving knife and meat fork(Sharp, wide blade for clean slices)
- Kitchen twine(For optional trussing)
- Salt and coarse pepper(Kosher salt recommended)
- Garlic powder or fresh herbs (optional)(For rubs)
- Aluminum foil(For resting tent)
- Tongs(General handling)
- Butter or pan jus (optional)(For finishing sauce)
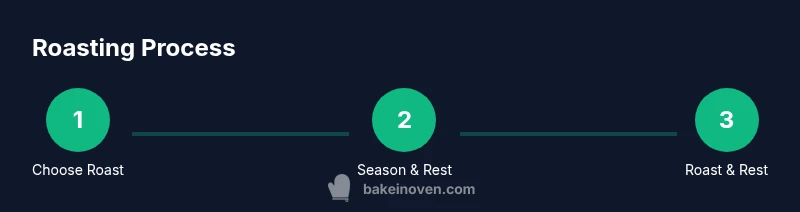
Steps
Estimated time: 2 hours 30 minutes
- 1
Prepare the roast and bring to room temperature
Remove the roast from the fridge and pat dry. Let it sit 60–120 minutes to approach room temperature for even cooking. This minimizes a cold start and supports a uniform crust.
Tip: Avoid leaving meat out too long; 2 hours is enough for standard roasts. - 2
Pat dry and season generously
Pat the surface dry to promote crust formation. Rub with kosher salt, pepper, and optional rubs. Salt at least 40 minutes before roasting or overnight for deeper flavor and crisper crust.
Tip: Patience with seasoning pays off—salt time improves texture. - 3
Tie the roast (optional)
If using a bone-in roast, tie at 1–2 inch intervals to help maintain a uniform shape during roasting.
Tip: Tying ensures even cooking and easier carving. - 4
Sear the roast to build crust
Place on a rack and roast at a high initial temperature (about 450°F) for 15–20 minutes to form a crust. This step locks in juices and gives you a dramatic surface.
Tip: Keep an eye on edges to prevent burning. - 5
Lower heat and roast to target temp
Reduce oven to about 325°F (or 300°F for very large roasts) and roast until the thickest part reaches your desired doneness using a thermometer.
Tip: Rely on internal temperature, not time alone; plan for carryover cooking. - 6
Rest the roast before carving
Remove from oven and tent with foil for 20–30 minutes. Resting allows juices to redistribute and finish cooking gently.
Tip: Do not rush the rest; slicing too soon drains juices. - 7
Carve and serve
Carve along the rib bones for bone-in roasts or slice across the grain for boneless. Serve with pan juices or a simple butter.
Tip: Cut against the grain for tenderness. - 8
Make-ahead and reheating (optional)
Roast can be prepared up to near-done and finished later; reheat gently to 120–125°F center, then rest before serving.
Tip: Reheat gently to avoid overcooking. - 9
Finish with jus or glaze
Deglaze the pan, reduce to a glossy jus, and spoon over slices for a rich finish.
Tip: Skim fat if needed to keep sauce balanced.
Frequently Asked Questions
What size standing rib roast should I buy for a crowd?
Choose a roast with roughly 2–3 pounds per rib; a 4–6 rib roast serves 6–12, depending on portions and sides.
Choose a roast with about two to three pounds per rib to feed a crowd, or plan a larger roast if you want generous leftovers.
Is a dry brine worth it for this roast?
A dry brine enhances crust and juiciness. Salt the roast 40 minutes to 2 hours before roasting or overnight for deeper flavor.
Yes. A brief dry brine helps develop a better crust and juicy interior.
Can I skip searing and still get a good crust?
Searing creates a crust and locks in flavor. You can roast at a steady temperature, but you may miss a pronounced crust.
Searing contributes to crust; you can skip it if you’re short on time, but your crust won’t be as dramatic.
What is the target internal temperature for doneness?
Medium-rare is about 125–130°F, medium around 135°F, and well-done around 150°F. Use a thermometer for accuracy, and remember carryover cooking.
Aim for 125–130°F for medium-rare, then rest; the temperature will rise slightly during rest.
How long should I rest the roast?
Rest for 20–30 minutes after cooking. Resting helps juices redistribute and finish cooking gently.
Rest the roast for 20 to 30 minutes before carving; this keeps slices juicy.
Watch Video
Key Takeaways
- Prepare the roast to near room temp for even cooking
- Sear for crust, then roast at a controlled temperature
- Trust internal temp over time for doneness
- Rest the roast to lock in juices
- Carve across the grain for tenderness