Bake Without an Oven: Practical Steps to Oven-Free Baking
Learn practical, kitchen-tested methods to bake without an oven. Explore stovetop, grill, solar, and Dutch oven techniques, plus step-by-step instructions, safety tips, and recipes you can trust.

You can bake without an oven by using a heavy pot or Dutch oven on a stovetop, grill, or solar cooker. This guide shows practical vessels, heat management, steam, and timing so you can produce bread, cookies, and baked desserts without an actual oven.
Understanding oven-free baking: why it matters to home bakers
Baking without an oven opens new possibilities for cooks who travel, camp, or simply want to experiment with kitchen heat. You’re leveraging heat sources you already own—stovetops, camp stoves, grills, or solar cookers—and pairing them with vessels that trap steam and distribute heat evenly. This approach reduces reliance on a conventional oven while still delivering crust, crumb, and aroma that bread, cookies, and desserts demand. According to Bake In Oven, oven-free baking is a practical skill for expanding your repertoire, especially when traditional oven access is limited or impractical. The key is adapting techniques to different heat sources, not pleading for a perfect replica of an oven.
The core idea is to emulate the oven environment as closely as possible: steady, moderate heat; a closed cooking vessel; and moisture to encourage crust formation and even cooking. You’ll learn to balance temperature, time, and steam to coax a good bake from alternative heat sources. This approach is especially valuable for tiny apartments, camping trips, or weekend bakeries where you want reliable results without a full oven setup.
note_visible_for_user_next_step_only_null_intermediate_access":null},
Tools & Materials
- Cast-iron skillet or heavy skillet with a lid(Heavy, flat bottom for even heat; lid helps trap steam to create oven-like conditions.)
- Dutch oven with a tight-fitting lid(Ideal for bread and dense doughs; creates a mini-oven effect.)
- Oven mitts or heat-resistant gloves(Protect hands when handling hot cookware.)
- Silicone spatula or wooden spoon(Stir dough and scrape bowls without damaging surfaces.)
- Tongs for turning and removing cookware(Safe handling when the vessel is hot.)
- Timer or clock(Track resting, rising, and bake times accurately.)
- Parchment paper or parchment sheets(Prevents sticking and makes cleanup easier.)
- Aluminum foil(Can be used to shield tops or wrap dough if needed.)
- Heat diffuser or trivet(Distributes heat more evenly on a stovetop.)
- Thermometer (probe or infrared)(Optional for monitoring vessel and internal temperatures.)
- Water spray bottle or steam source(Helps maintain moisture for crust formation.)
- Dry canvas or silicone mat (optional)(Provides nonstick surface and easy cleanup.)
Steps
Estimated time: 60-90 minutes
- 1
Prepare the dough or batter
Gather ingredients and mix until just combined. If you’re making bread, allow any kneaded dough to rest briefly so gluten relaxes before shaping. For cookies or cakes, ensure your batter is evenly textured to promote uniform baking when heated on a stove or grill.
Tip: Rest dough for 15–20 minutes to improve crumb structure, especially when using a stovetop technique. - 2
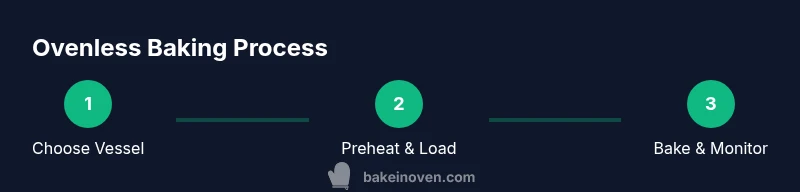
Choose the right vessel and heat source
Select a heavy pot with a tight lid (Dutch oven or cast-iron skillet with a lid). If you’re using a grill or camp stove, ensure there’s a stable surface and control over indirect heat. Preheat the vessel on low to medium heat before loading dough or batter.
Tip: Aim for a preheat that brings the vessel to a steady surface heat, not blazing hot, to avoid scorching. - 3
Shaping and loading
Shape the dough into a round loaf or place batter into a lined pan. Transfer carefully into the hot vessel. If needed, add parchment to prevent sticking and ease removal.
Tip: Keep dough compact and centered for even conduction of heat. - 4
Create steam and seal
Close the vessel with its lid or cover the pan with foil and a lid to trap steam. Steam helps develop a crust and moist crumb, similar to an oven’s humid environment.
Tip: If your lid fits loosely, add a small weight or a smidge of water in a safe manner to generate moisture. - 5
Control the heat and bake time
Maintain a steady, moderate heat. Bake times vary by recipe, but expect 25–40 minutes for bread-sized loaves on stovetop, shorter for cookies or small cakes. Rotate or reposition the vessel halfway for even browning.
Tip: Avoid sudden temperature spikes; adjust heat gradually to prevent burning. - 6
Check doneness and resting
Bread should sound hollow when tapped on the bottom; cookies should be lightly browned around edges. Remove from heat and let rest under a clean cloth for 5–10 minutes to finish internal steaming.
Tip: Resting helps set the crumb and improves slicing. - 7
Cool and serve
Transfer to a rack to cool completely before slicing. Cooling is crucial for crumb structure and texture, especially for breads and dense cakes.
Tip: Slice with a sharp knife and serve warm for best aroma. - 8
Cleanup and storage
Allow cookware to cool before washing. Dry thoroughly to prevent rust. Store baked goods in airtight containers to maintain softness and moisture.
Tip: Wipe any sticky residue with warm water and a non-abrasive sponge before washing.
Frequently Asked Questions
How long does it take to bake without an oven?
Without an oven, bake times vary by the recipe and heat source. Expect longer times than a traditional oven for bread, and cookies may bake quickly depending on vessel and heat. Start with 25–40 minutes for bread-sized loaves and monitor closely.
Bake times vary by recipe and heat source. Start with 25 to 40 minutes for a bread-sized loaf and check for doneness as you go.
Can I bake cookies on the stove or grill?
Yes. Use a heavy skillet with a lid or a Dutch oven with parchment lining. Bake with indirect heat and rotate the pan to prevent scorching. Cookies may spread less on a stove, so slightly chill dough before baking.
Yes, you can bake cookies on a stove using a heavy pan and indirect heat. Rotate for even browning.
What vessels work best for stovetop baking?
Dutch ovens and cast-iron skillets with tight-fitting lids are the best choices because they trap steam and distribute heat evenly, creating oven-like conditions on a stovetop. A thick-bottom pan prevents hot spots.
Dutch ovens and cast-iron skillets with good lids work best for stovetop baking.
Is stove-top baking safe near a grill or campfire?
Yes, but take precautions: stable setup, heat control, and protective gear. Keep flammable items away, and never leave vessels unattended when flames are nearby.
It can be safe if you stabilize the setup and monitor heat closely.
Do I need specialized equipment to bake without an oven?
Not always. A high-quality cast-iron skillet or Dutch oven is the most essential. Other tools like parchment, lids, and tongs improve results but aren’t mandatory.
No—one good heavy pot and a lid can work, with other tools improving outcomes.
How do I know when the bread is done without an oven?
Tap the bottom of the loaf; it should sound hollow. If using a lid, lift to check crust color without disrupting the bake, and adjust time as needed.
Tap the loaf; it should sound hollow when done.
Watch Video
Key Takeaways
- Bake without an oven by using a heavy pot or Dutch oven.
- Control heat and steam for crusty exterior and tender crumb.
- Use the right vessels and preheat to emulate oven conditions.
- Practice safety: protect hands, monitor heat, and avoid scorching.
- Experiment with recipes and adapt times based on vessel and heat source.