Can You Bake Bacon When Frozen? A Practical Guide
Discover how to bake bacon straight from frozen with crisp edges and even texture. Learn temps, timing, safety, and tips for perfect results without thawing.

Yes, you can bake bacon when frozen. Can you bake bacon when frozen? Yes—the oven method works well with minimal fuss, as long as you space slices, use a rack, and monitor doneness. This Bake In Oven guide shows how to bake frozen bacon safely, crisping without thawing first and with practical tips for even texture.
Understanding the Basics: Can You Bake Frozen Bacon?
Cooking bacon from frozen is a time-saving technique that works surprisingly well when done with the right setup. The core idea is to let the heat render fat slowly while the edges crisp evenly, rather than microwaving or pan-frying from thawed slices. This approach suits busy mornings or spur-of-the-moment breakfasts, and it fits a home baker’s kitchen routine. In this guide, we’ll walk through why frozen bacon behaves differently, how to manage moisture, and how to achieve a consistent, crispy finish. The Bake In Oven team emphasizes that starting from frozen isn’t a shortcut to skip steps—it’s a method that benefits from proper spacing, a reliable rack setup, and careful monitoring. If you’re wondering about texture or safety, rest assured that with a little technique you can land bacon that’s both flavorful and evenly cooked, even when the slices are still icy at the start.
Safety Considerations: Temperature, Time, and Doneness
When cooking frozen bacon, safety comes first. Do not crowd the pan; air needs to circulate so fat renders and surfaces brown rather than stew in pooled grease. Preheating your oven to a moderate-high temperature helps wake up the fat and promote crisp edges. Use a heat-safe rack over a lined sheet to elevate the bacon so fat can drip away, reducing soggy bottoms. Keep a thermometer handy to check the final doneness if you’re unsure—the goal is fully cooked bacon with a crisp bite, not leathery or grey portions. Finally, be mindful of grease splatter and allow the pan to rest briefly after removing from the oven before handling, so you don’t burn yourself while transferring slices to a plate lined with paper towels.
How Frozen Bacon Differs from Fresh or Thawed
Frozen bacon carries more surface moisture as ice crystals sublimate, which can delay browning compared with thawed slices. It also tends to release fat more gradually as the fat inside contracts and melts. Expect slightly longer cooking times and the possibility of uneven rendering if slices vary in thickness. Thin-cut frozen bacon may crisp quicker, while thicker slices need patience and a longer bake. The upside is that you can still achieve a crisp, satisfying bite without needing to thaw the meat in advance, which is especially handy for last-minute meals.
Oven Setup: Temperature, Rack, and Preparation
A reliable setup starts with a preheated oven in the 400°F (204°C) range. This temperature helps render fat efficiently while promoting browning. Place a wire rack on a lined baking sheet to elevate the bacon and create airflow around every strip. If you don’t have a rack, use parchment paper or aluminum foil to line the sheet and set slices in a single layer with space between them. You can season lightly with pepper or a touch of brown sugar or maple if you like, but avoid heavy coatings that would burn at high heat. Avoid crowding—overlapping slices will steam rather than crisp.
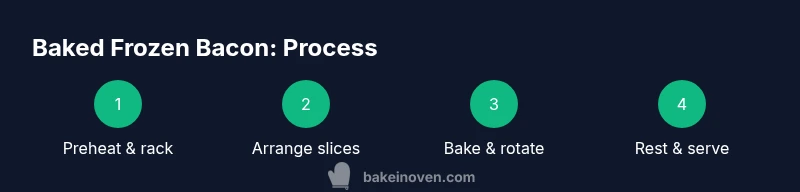
Step-by-Step Approach: Frozen Bacon in the Oven
First, preheat the oven to 400°F (204°C) and prepare your rack-lined sheet. Then arrange frozen bacon slices in a single layer, leaving space between each piece for even heat. Bake for 12–18 minutes, depending on thickness, and rotate the pan halfway to ensure uniform browning. When the edges look crisp and the color is golden, remove the tray and let the bacon rest on paper towels for a minute to wick away excess fat. Finally, transfer to a warm plate and serve immediately for the best texture. If some slices cook faster, pull those pieces early to avoid overdoing thinner bits.
Troubleshooting: Common Issues and How to Fix
If your bacon turns out soggy, it may have cooked with too much inherent moisture or you crowded the pan. Check that there’s adequate space between slices and consider using a hotter oven for a shorter time next batch. Dark, burnt edges usually mean you started with overly thin slices or left them under the broiler too long. If you notice uneven texture, flip the slices once during cooking and rotate the pan to promote even browning. Finally, if the bacon appears pale, give it a few more minutes, but keep an eye on it since frozen slices can progress quickly once they start browning.
Flavor Enhancers and Serving Tips
For a touch of extra flavor, sprinkle a pinch of black pepper or smoked paprika before baking. A light maple glaze added in the final minute can create a sweet-savory crust without burning, especially on thicker slices. Serve hot with eggs, toast, or a fresh salad for contrast. If you have leftovers, store cooled slices in an airtight container in the fridge for up to four days and reheat briefly in a hot oven or toaster oven to retain crispness.
Cleaning Up and Storing Cooked Bacon
Let the baking sheet cool completely before handling the fat that collected underneath. You can strain and reuse some of the warmed fat for other cooking tasks, or dispose of it in a sealed container once cooled. Store cooked bacon in the refrigerator for a few days in a parchment-lined container to maintain texture. Reheat in the oven or on a sheet pan at a moderate temperature, turning halfway, until the bacon is crispy again. Regular cleanup of the pan and rack helps prevent lingering grease buildup and keeps your kitchen smelling fresh.
Frozen Bacon Variations: Thick-Cut, Pre-Sliced, and Extra-Crisp Outcomes
Thick-cut frozen bacon may require a longer bake time to render fat and reach the same level of crispness as standard slices. Pre-sliced frozen bacon tends to cook more evenly, but thickness can still vary between pieces. If you’re chasing extra crispness, finish on a quick, high-heat blast for 30–60 seconds per side, watching closely to avoid scorching. Adjust your expectations based on slice thickness and fat content; with practice you’ll dial in the exact minutes that yield your preferred balance of crunch and chew.
Tools & Materials
- Baking sheet(Line with parchment or foil for easy cleanup)
- Wire rack(Elevates bacon for even fat drainage)
- Parchment paper or aluminum foil(Catches fat and prevents sticking)
- Tongs or wide spatula(Safely lift hot bacon without breaking slices)
- Oven-safe thermometer(Helpful to verify doneness if unsure)
- Paper towels(Blot excess fat after cooking)
- Oven mitts(Protect hands when handling hot pan)
Steps
Estimated time: 15-25 minutes total active time; 12-18 minutes oven time plus prep and rest
- 1
Preheat and prepare
Preheat the oven to 400°F (204°C). Line a baking sheet with parchment and set a rack on top so fat can drain away. This ensures even heat distribution and crisper results for frozen bacon.
Tip: Use the rack; it dramatically improves texture compared to laying slices directly on the sheet. - 2
Arrange slices in a single layer
Place frozen bacon slices on the rack in a single, even layer with space between each piece. Avoid overlapping to prevent steaming and soggy spots.
Tip: If thickness varies, position thicker pieces toward the center where heat is strongest. - 3
Bake and rotate
Bake for 12–18 minutes, then rotate the pan for even browning. Begin checking around the 12-minute mark, as thinner slices can crisp rapidly while thicker ones need more time.
Tip: A quick 60-second broil at the end can boost crispness if slices are not yet gold and crisp. - 4
Check doneness and rest
When edges are golden and the center looks crisp, remove the bacon. Let it rest on paper towels for 1–2 minutes to wick away excess fat before serving.
Tip: Resting helps set the crisp texture and reduces grease on the final plate. - 5
Serve and store
Serve immediately for best texture. Refrigerate leftovers in a sealed container and reheat in a hot oven or toaster oven to revive crispness.
Tip: refrigerate within two hours for safety; label with date for easy tracking. - 6
Cleanup
Cool the sheet completely, then discard used parchment and wipe the rack. Proper cleanup prevents lingering odors and makes the next batch easier.
Tip: Cool fat can be disposed of in a metal container; do not pour hot fat down the drain.
Frequently Asked Questions
Can I bake bacon from frozen without thawing?
Yes. Baking from frozen is a valid method that yields crispy bacon when done with proper spacing and timing. Expect a slightly longer cook time than thawed slices.
Yes. You can bake bacon from frozen; just give it a bit more time and space to crisp up.
Do I need to thaw frozen bacon before baking?
Thawing is optional. If you’re short on time, bake from frozen with a longer bake time and careful monitoring for doneness.
Thawing isn’t required; you can bake it from frozen, just plan for extra time.
How long does frozen bacon take to bake?
Expect roughly 12–18 minutes for standard slices, longer for thick-cut bacon. Start checking around the 12-minute mark and adjust as needed.
Usually 12 to 18 minutes, depending on thickness; check early for best results.
Can I bake thick-cut bacon from frozen as reliably as thin slices?
Thick-cut bacon will take longer to render fat and crisp. Plan for an extra 3–5 minutes and monitor the edges closely.
Yes, but it will take a bit longer than thin slices; watch carefully.
Is it safer to bake frozen bacon than to pan-sear when frozen?
Baking is generally safer and cleaner than pan-frying frozen bacon, which can splatter and cause burns. The oven also distributes heat evenly for better texture.
Baking from frozen is typically safer and cleaner than pan-frying.
Can I reuse the bacon grease after baking?
Yes, if strained and cooled, bacon fat can be saved for future cooking. Store in a sealed container in the fridge and use within a reasonable time.
You can reuse it if you strain and store it properly.
Watch Video
Key Takeaways
- Preheat to 400°F (204°C) for best browning
- Space slices; use a rack for crispness
- Rotate halfway and monitor closely
- Rest on paper towels to remove excess fat
- Reheat leftovers in a hot oven to regain crispness