Can You Bake Bacon in the Oven? A Practical Guide for Home Bakers
Learn to bake bacon in the oven for crisp, evenly cooked strips with minimal mess. This guide covers temps, timing, safety, variations, and kitchen-tested tips from Bake In Oven.

Yes. You can bake bacon in the oven to achieve evenly crisp strips with minimal splatter. Preheat the oven, line a sheet (with parchment or a rack), arrange bacon in a single layer, bake until crisp, then drain and rest briefly. This method is reliable and forgiving for beginners. It also reduces greasy cleanup.
Can You Bake Bacon in the Oven? Why this method is popular
Baking bacon in the oven is a reliable method that delivers even crispness across all slices while minimizing splatter and greasy messes. For home bakers, this approach scales up from a small breakfast fry-up to batches for brunch or meal-prep. The oven’s steady heat helps render fat evenly, and you can set it and forget it while you prep other dishes. According to Bake In Oven, oven-baked bacon also tends to be less chewy than pan-fried bacon when done properly, making it a favorite among kitchen-tested bakers. When you say you can bake bacon, you’re choosing a hands-off method that yields consistent results with minimal supervision. This guide will walk you through temps, timing, and practical variations so you can tailor the process to your oven and preferred crispness.
Bacon thickness, texture, and how they affect bake results
Bacon comes in regular and thick-cut variants, and thickness greatly influences bake time. Regular-cut bacon often crisps quickly and evenly, while thick-cut slices may need extra minutes to render fat fully. If you’re aiming for a crisper texture, use thinner slices and bake at a higher temperature for a shorter window. For a chewier bite, a slightly cooler oven and a longer bake can help preserve some fat’s softness. In all cases, ensure slices lie flat and don’t overlap, as crowded pan surfaces trap steam and lead to uneven results. Remember: the goal is fat rendering with surface browning, not soggy interiors. The key is balancing heat, time, and space on the baking surface.
Preparing your workspace: tools, surfaces, and safety
Before you start, clear your workspace and gather essentials. A rimmed baking sheet, a rack (optional but recommended), parchment paper or aluminum foil, tongs, and oven mitts should be within reach. Parchment prevents sticking and makes cleanup easier, while a rack elevates bacon so fat drains away rather than pooling beneath. Line the sheet with parchment or foil first, then nestle the bacon on the rack or direct surface. Keep a paper towel handy for blotting excess fat after cooking. Finally, ensure the oven is clean and free of residue that could smoke. A tidy setup helps you focus on timing and technique.
Tools and materials you’ll want on hand (quick overview)
- Rimmed baking sheet
- Wire rack (optional but ideal)
- Parchment paper or foil
- Tongs or spatula
- Oven mitts and a timer
- Paper towels for draining
- Sharp kitchen shears (optional for trimming) Using these items consistently helps you achieve even, predictable bacon with minimal cleanup. A rack is a simple upgrade that can make a noticeable difference in texture and ease of handling.
Step-by-step overview: what happens in the oven
Oven-baking bacon relies on steady heat to render fat and brown the meat in tandem. The fat melts away while the meat browns to a crispy edge. If slices are crowded, fat can baste slices unevenly, leading to softer spots. A rack allows the fat to drip away, resulting in crisper results. Keep the bacon in a single layer and avoid stacking slices. You’ll typically see a color change from pale pink to golden-brown as edges crisp. Finally, resting the bacon briefly after removing it from the oven helps finish the crisping and removes excess surface fat.
Common mistakes and how to fix them
Common mistakes include crowding the pan, using too high a temperature with insufficient time, or removing bacon too early. Crowding traps steam and prevents browning; use a rack or space slices apart. If you notice smoking, lower the temperature slightly and extend the bake time. For verdant greenish or grayish hues, your bacon may be too thick or not rendered enough fat; adjust by thickness choice or oven temperature. Always check the first batch to calibrate your future runs. Small adjustments can yield consistent results across multiple trays.
Flavors, seasonings, and toppings you can try
Bacon already has salt; however, you can enhance the flavor with light dustings of black pepper, brown sugar, smoked paprika, or chili powder before baking. For a savory twist, brush with a light glaze of maple syrup or honey during the last few minutes. If you’re baking bacon for a brunch plate, pairing it with roasted peppers or a dollop of sour cream can balance the flavor profile. Remember: when adding sugar-based glazes, monitor closely to avoid burning. Keep to a thin coat to maintain crunch.
Health considerations and safety reminders
Baking bacon produces crispy meat with most fat rendered away, which can be healthier than pan-frying, but it remains a high-fat item. Use a tray liner to minimize cleanup and reduce smoke from fat splatter. Always monitor the oven as fat can ignite if left unattended at high temperatures. After cooking, drain the slices on paper towels and let them rest briefly to finish crisping. Wash your hands and utensils after handling raw meat, and sanitize countertops that contact fat or raw pork.
Storing, reheating, and serving bacon baked in the oven
Cooled oven-baked bacon stores well in the refrigerator for up to 4-5 days in an airtight container. Reheat briefly in the oven or a skillet to regain crispness. For freezing, lay flat on a sheet and freeze, then transfer to a sealed bag; reheat straight from frozen. Serve bacon with eggs, toast, or atop a breakfast burrito for a quick meal. If you’re meal-prepping, portion out into individual servings and label clearly for easy retrieval.
Quick-start checklist you can print
- Preheat to 400°F (204°C) or adjust for desired crispness
- Line the sheet with parchment/foil
- Lay bacon in a single layer (rack optional)
- Bake 12-20 minutes depending on thickness
- Drain on paper towels and rest 2-3 minutes
- Store promptly if not serving immediately
Tools & Materials
- rimmed baking sheet(Non-slip surface; avoid overflow of fat)
- wire rack (optional)(Elevates slices for better fat drainage)
- parchment paper or aluminum foil(For easy cleanup and non-stick)
- tongs or spatula(To transfer hot bacon safely)
- oven mitts(Heat-resistant and dry)
- paper towels(Drain fat after cooking)
- kitchen shears (optional)(Trim irregular edges)
- timer(Track bake time precisely)
Steps
Estimated time: 20-25 minutes
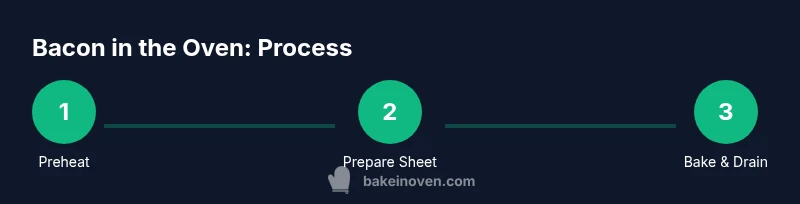
- 1
Preheat the oven
Set the oven to 400°F (204°C) and allow it to preheat fully before you start loading the bacon. A fully heated oven ensures even rendering and browning from the first minute.
Tip: Preheating prevents soft, undercooked centers. - 2
Prepare the baking surface
Line a sheet with parchment paper or foil to catch drips and simplify cleanup. If using a rack, place it on the sheet. This setup promotes even fat drainage and crispier bacon.
Tip: Parchment makes cleanup almost effortless. - 3
Arrange the bacon
Lay bacon slices in a single layer, not overlapping. Overlapping slows crisping and can lead to uneven texture. If your slices are very long, trim slightly for a neater fit.
Tip: Space between slices is key for even cooking. - 4
Bake and monitor
Place the sheet in the middle rack and bake for 12-20 minutes, depending on thickness. Start checking at 12 minutes for thin slices; thicker slices may need more time.
Tip: Thick-cut bacon often needs a few extra minutes. - 5
Flip mid-way (optional)
If you’re using a rack, flip slices once halfway through cooking for uniform browning. If on a sheet, you may not need to flip, but rotate the sheet for even exposure.
Tip: Flipping helps achieve consistent crispness. - 6
Drain and rest
Remove the bacon with tongs and lay on paper towels to drain excess fat. Let it rest 1-2 minutes to finish crisping before serving.
Tip: A short rest boosts final texture. - 7
Storage and reuse
Store leftovers in an airtight container in the fridge, or reheat briefly in the oven to refresh crispness. Avoid overwetting or microwaving long-term to preserve texture.
Tip: Reheat in the oven for best texture.
Frequently Asked Questions
Can I bake bacon directly on parchment paper without a rack?
Yes. You can bake bacon on parchment directly on a sheet, but using a rack helps fat drain away and yields crisper edges. If you don’t have a rack, spread slices in a single layer and consider rotating the sheet halfway through cooking.
You can bake on parchment without a rack, but a rack helps you get crisper bacon by letting fat drain away.
What oven temperature is best for bacon?
A temperature around 375-400°F (190-204°C) works well for most bacon types. Thinner slices crisp quickly; thicker slices may benefit from the higher end of this range or a brief extra minute.
Most bacon cooks best around 375 to 400 degrees, depending on thickness. Watch closely for doneness.
How do I tell when bacon is done?
Bacon is done when it is golden-brown and crisp at the edges. Some people prefer slightly chewy centers; in that case, remove a minute or two earlier. Always err on the side of crispness if you plan to store leftovers.
Done means golden and crisp at the edges. If you want it chewier, pull a bit earlier.
Can I reuse rendered bacon fat for cooking?
You can strain and store rendered bacon fat for future cooking, but use it within a week or two for best flavor. Keep it in the refrigerator and avoid overheating when reusing.
You can reuse the fat for other dishes, but store it properly and don’t overheat when cooking again.
Is oven-baked bacon healthier than pan-frying?
Baking bacon reduces splatter and can render fat more evenly, which some find healthier than pan-frying. The macronutrient profile remains similar, so moderation is still advised.
It can be cleaner and render fat evenly, but it’s still a bacon dish—enjoy in moderation.
How should I store cooked bacon?
Let bacon cool completely, then store in an airtight container in the fridge for 4-5 days or freeze for longer storage. Reheat in the oven for best texture.
Cool it, store in the fridge for up to five days, or freeze for longer. Reheat in the oven for best taste.
Watch Video
Key Takeaways
- Preheat to 400°F for even browning
- Line sheets and avoid overlapping slices
- Rack elevation improves texture and cleanup
- Rest briefly before serving for max crispness
- Store and reheat to maintain crunch