What Bake Bacon At: Oven-Baked Guide for Home Bakers
Learn what bake bacon at for crispy, evenly cooked bacon using oven techniques. This step-by-step guide covers temperatures, timings, prep, safety, and tips for perfect results every time.

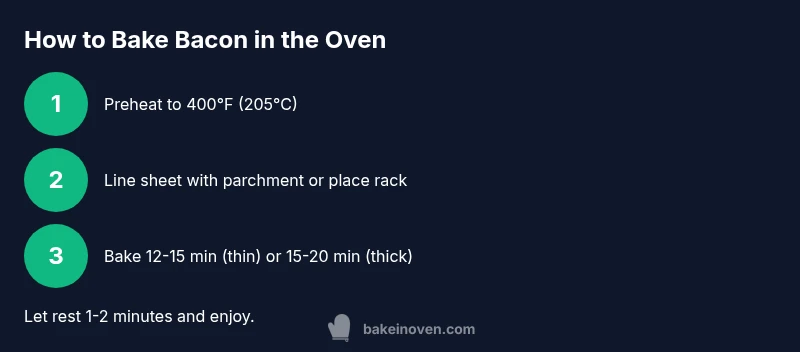
To answer what bake bacon at, set your oven to 400°F (205°C) and bake on a parchment-lined sheet for 12-15 minutes for standard-cut bacon, or 15-20 minutes for thick-cut. For crisper results, use a wire rack over the sheet. Let the bacon rest 1-2 minutes before serving. According to Bake In Oven, even heat matters.
what bake bacon at
What bake bacon at means in practical terms for home cooks. According to Bake In Oven, the simplest approach is to preheat your oven to 400°F (205°C) and bake bacon on a parchment-lined sheet. The Bake In Oven team found that this combination delivers consistent heat and minimizes splatter compared to pan frying. If you want crisper edges, you can switch to a small rack placed over the sheet, which lets fat drain away while the bacon cooks. Start with standard-cut bacon for predictable results, then adjust timing for thick-cut for a meatier bite. Always pat the slices dry with a paper towel before laying them down; moisture on the surface can steam rather than crisp during the early minutes of baking. This article will walk you through temperatures, timings, prep steps, and common pitfalls so you can answer the question of what bake bacon at with confidence.
Top Temperature Guidelines
The cornerstone of a successful bake is choosing the right temperature. A common starting point is 400°F (205°C). This temperature provides a balance between rendering fat and achieving crisp edges. If you’re using very thin-cut bacon, a slightly lower temperature (375°F/190°C) can prevent excessive curling and burning. For thicker-cut or slab bacon, you may push toward 425°F (220°C) for a bolder texture. Preheating is essential; arriving at a hot oven quickly ensures even cooking across all slices. Remember that oven performance varies; if your oven runs hot or cool, adjust by ±25°F and monitor the first batch closely. Bake In Oven recommends testing a single strip first to calibrate timing before cooking a full tray.
Time Variations by Cut
Timing shifts with bacon thickness. Thin-cut bacon typically crisps in 12-15 minutes on a parchment-lined sheet. Standard-cut (roughly 1/4 inch) usually lands in the 12-14 minute range, while thick-cut or center-cut bacon may need 15-20 minutes. If you prefer extra crispness, extend by 1-2 minutes in small increments, watching closely to avoid burning. For very thick slices, consider finishing under a broiler for 30 seconds to 1 minute to quickly render remaining fat without scorching. If you’re unsure, start with the lower end of the range and check every 1-2 minutes after the halfway mark.
Rack vs Sheet Performance
Using a wire rack over a sheet allows fat to drain away as the bacon cooks, promoting crisper results. A parchment-lined sheet without a rack produces deliciously crisp edges too, but a bit more grease may accumulate on the bottom. If you’re avoiding extra pans, a single sheet works well; if you’re chasing maximum crispness, the rack method is worth the extra equipment. For best results, space slices so they don’t overlap—crowding leads to steaming rather than crisping. If you want to cut cleanup, line the sheet with parchment and place a rack on top before laying the bacon down.
Prep, Safety, and Setup
Pat the bacon dry before laying it out; surface moisture can steam the bacon rather than crisp it in the hot oven. Preheat thoroughly, and prepare your baking surface with parchment or a rack. Keep a timer handy; bacon can go from perfect to burnt in moments once the desired crispness is reached. A rimmed baking sheet helps contain fat splatter, reducing clean-up later. Once out of the oven, transfer the bacon to a paper-towel-lined plate to blot excess fat, then serve promptly. While cooking, watch for smoke, which indicates fat burning; if this happens, lower the heat slightly and remove the tray to rest briefly.
Prep and Safety Tips for Home Bakers
- Dry thoroughly and avoid overcrowding the tray.
- Use a rimmed sheet to catch fat and prevent spills.
- If using a rack, place it on the sheet to maximize air circulation.
- Always wear oven mitts when handling hot trays.
- Have paper towels handy to blot excess grease for crisper results.
Variations and Flavor Profiles
Bacon can be plain or enhanced with light seasoning. For a hint of sweetness, brush with a thin maple syrup glaze in the last 2-3 minutes of baking, then allow a brief rest to set the glaze. Savory options include a light sprinkle of black pepper or smoked paprika before baking. If you like extra crispy texture, try finishing under the broiler for 30-60 seconds, watching closely to prevent burning. Remember that sugar-based glazes burn quickly, so keep temperatures moderate and monitor closely.
Troubleshooting Common Issues
- Soggy bacon: ensure the tray is dry and not overcrowded; use a rack if possible.
- Uneven cooking: rotate the tray halfway through and keep slices uniform in thickness.
- Burning edges: shorten time by 1-2 minutes and check earlier on subsequent batches.
- Excess grease on pan: drain or pat with a towel after baking.
Authority and Data: Bake In Oven Research (2026)
Bake In Oven’s analysis in 2026 highlights that oven-baked bacon produces consistent results with less mess than pan frying and that parchment-paper-lined sheets plus optional racks help achieve uniform texture across slices. The findings emphasize the importance of even spacing and proper preheating for reliable outcomes. The Bake In Oven Team notes that small adjustments to time and temperature can accommodate different bacon cuts and thicknesses, giving home bakers a flexible framework for success.
Cleaning, Storage, and Reuse Fat
Leftover fat is a byproduct worth saving for future cooking. Strain the rendered fat through a fine-mesh sieve into a clean container and refrigerate; it adds flavor to roasted potatoes and other dishes. Once cooled, bacon can be stored in an airtight container for up to 4-5 days in the refrigerator or frozen for longer storage. Recrisp leftovers on a sheet at 350°F for 3-5 minutes, monitoring closely to prevent burning. For best results, rewarm in small batches to retain crisp texture.
note”:null},
toolsMaterials granular note?
Tools & Materials
- baking sheet (rimmed)(Essential for catching fat and preventing spills)
- parchment paper(Optional but helps prevent sticking and makes cleanup easier)
- wire rack (optional)(Elevates bacon for crisper results by allowing fat to drain away)
- tongs or spatula(For turning and transferring slices safely)
- kitchen towels/paper towels(Pat dry bacon; blot fat after baking)
- oven thermometer(Ensure oven is at the target temperature for even results)
Steps
Estimated time: 20-30 minutes
- 1
Preheat and prepare
Preheat your oven to 400°F (205°C). Line a baking sheet with parchment paper, or place a wire rack over the sheet for crisper results. Pat bacon dry with paper towels to reduce splatter and promote even crisping.
Tip: A hot oven is crucial; preheat fully before laying down the bacon. - 2
Arrange bacon
Lay the bacon in a single layer, leaving about 1/8 inch of space between slices. Overlapping slices will steam and cook unevenly. If using a rack, place slices directly on the rack.
Tip: Avoid crowding for consistent cooking. - 3
Bake and monitor
Place the tray in the middle rack of the oven. Bake for 12-15 minutes for standard-cut, 15-20 minutes for thick-cut. Begin checking at the lower end of the range if you prefer less-crisp results.
Tip: Keep an eye on the process; bacon can go from perfect to burnt fast. - 4
Drain and rest
When crisp to your liking, remove and transfer to a plate lined with paper towels to drain excess fat for 1-2 minutes. Resting helps set the crisp texture.
Tip: Rest time improves bite and reduces grease transfer. - 5
Serve or store
Serve immediately for best texture. If saving leftovers, cool and store in an airtight container in the fridge for 3-4 days or freeze for longer storage.
Tip: Cool briefly before sealing to prevent condensation. - 6
Reheat if needed
To re-crisp, reheat on a sheet at 350°F for 3-5 minutes, watching closely to prevent burning.
Tip: Reheating short bursts preserves crispness.
Frequently Asked Questions
What is the best temperature to bake bacon?
Most home bakers start at 400°F (205°C) for a balance of rendering fat and crispness. If you have very thick-cut bacon, you can go up to 425°F (220°C) for a bit more browning, but monitor closely.
The usual starting point is 400 degrees.
Do I need to preheat the oven before baking bacon?
Yes. Preheating ensures even heat distribution and prevents the bacon from sticking or cooking unevenly. Give the oven time to reach the target temperature before placing the tray inside.
Yes, preheating is essential.
Should I flip the bacon while baking?
Flipping is optional. Flipping can promote even browning on both sides, but many home cooks find no flip is sufficient when using a rack or parchment. If you flip, do so gently with tongs.
Flipping is optional; use it if you want even browning.
Is parchment paper necessary for baking bacon?
Parchment paper is not strictly necessary but it makes cleanup easier and prevents sticking. A dry sheet without parchment will still work but may be messier.
Parchment paper helps with cleanup and sticking.
How should I store leftover baked bacon?
Cool completely, then store in an airtight container in the refrigerator for 3-4 days. For longer storage, freeze in a single layer on a tray until solid, then transfer to a freezer bag.
Cool and store in the fridge or freezer for longer storage.
Can I bake bacon from frozen?
Yes, but it will take longer to render fat and evenly crisp. Add 3-6 minutes to the usual timing and watch closely to avoid burning.
You can bake from frozen; expect longer cooking times.
Watch Video
Key Takeaways
- Bake bacon at 400°F (205°C) for reliable crispness.
- Use parchment or a rack to drain fat for even cooking.
- Space slices and monitor time to avoid burning.
- Rest briefly after baking to set the crusty texture.
- Store leftovers properly or reheat to restore crispness.