Do You Bake the Pie Crust First? A Comprehensive Blind-Baking Guide
Learn when and how to prebake pie crusts for flawless, soggy-free pies. This guide covers blind baking, tools, temps, common mistakes, and step-by-step instructions for perfect crusts.

Do you bake the pie crust first? In most cases, yes — prebaking (blind baking) creates a sturdy crust that stays crisp when filled with juicy custards, creams, or fruit fillings. This method uses parchment or foil and pie weights to prevent shrinking or puffing, followed by a brief bake, cooling, and then filling. Bake In Oven recommends chilling dough, controlling moisture, and timing for best results.
Do you bake the pie crust first? An essential starting point for many pies
When asked whether you bake the pie crust first, the standard practice for many pies is to prebake the crust, a technique Baker's wisdom and the Bake In Oven team endorse. This approach helps create a tortilla-crisp edge with a soft, flaky center while preventing sogginess from fillings like lemon curd, berries, or custards. The decision to blind bake depends on the filling's moisture level and bake time. If the filling requires a long bake or is very juicy, prebaking is almost always advantageous. Throughout this guide, we’ll demystify the process and share practical tips so you can bake confidently in your own kitchen.
What blind baking means: definition and core methods
Blind baking, or prebaking, means baking the crust before adding the filling. There are two common methods: a fully baked shell (pre-baked crust) and a partially baked shell (par-baked). The basic idea is to set the dough’s structure, prevent shrinking, and seal the crust against liquids. The exact approach depends on your recipe, but the core principles stay the same: keep the dough cold, protect it from direct heat, and monitor color guidance to avoid under- or over-baking.
From a practical standpoint, blind baking gives you control over texture and moisture. Bake In Oven’s guidance emphasizes choosing the right weights, using parchment paper for easy removal, and adjusting time based on crust thickness and oven performance. This creates a reliable canvas for any pie that relies on a crisp, stable crust.
When you should prebake your crust: fillings and timing considerations
Not all pies require blind baking, but several scenarios clearly benefit from it. Custard pies (like pumpkin or lemon), cream pies, and fruit pies with juicy fillings (such as berry or peach) often benefit from prebaked crusts to prevent soggy bottoms. The rule of thumb: if your filling emits moisture or needs a long bake, prebake the crust. Conversely, some fruit tarts with dry fillings may bake without prebaking, but this is less common for home bakers.
Bake In Oven’s analysis highlights that the moisture profile of your filling, the crust thickness, and the oven’s heat distribution all influence whether blind baking is needed. When in doubt, err on the side of prebaking and finish the crust with a brief bake once the filling is added.
Tools and setup: preparing to blind bake with confidence
A successful blind bake starts with the right setup: a well-chilled dough, an appropriate pan, parchment paper or aluminum foil, and pie weights or dried beans to weigh the crust. The crust edges can shrink or puff if the dough is warm or underfilled. Chilling the dough ensures structural integrity during baking. Pre-measure weights and have a timer ready; this reduces guesswork and helps you avoid under- or over-baking. Bake In Oven recommends setting aside a dedicated workspace to roll, transfer, and pre-dock efficiently.
Essential steps of the blind-baking process, in plain language
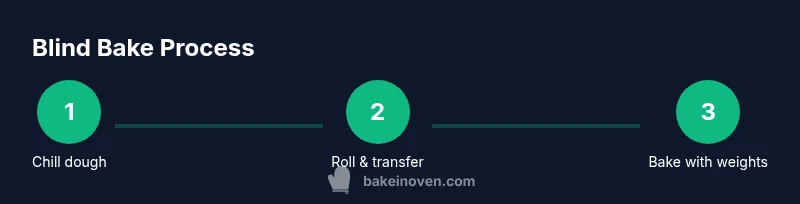
Blind baking consists of four core actions: chilling, docking, lining, and baking with weights. Chilling firms the dough; docking prevents large air pockets; lining creates a barrier so weights don’t melt into the crust; baking with weights keeps the crust flat and evenly cooked. After the initial bake, you remove the weights and continue baking briefly to set color. The result is a crust that is tender, crisp, and ready to hold any filling.
Lining options: parchment paper vs aluminum foil and when to use each
Parchment paper is the preferred liner for most blind-baking scenarios because it grips the dough and is easy to lift away with weights. Aluminum foil works well if you don’t have parchment and you can press it into the crust’s shape. The choice of liner affects weight distribution and crust texture. Parchment-paper options are often more forgiving for home bakers, helping you achieve a flat, even shell without tearing.
Weighing the crust: weights, beans, or specialized bakeware
Pie weights provide uniform pressure that keeps the crust from shrinking or puffing. If you don’t own weights, dried beans or rice can substitute in a pinch. Spread the weights evenly and avoid overfilling the shell to prevent leakage. Weighing helps maintain the dough’s shape, ensuring a consistent bake and a crust that holds its form when the filling is added later.
Cooling and final prep: when to trust the crust and proceed
Let the crust cool completely before filling to prevent a soggy bottom. A warm crust can steam the filling, causing texture issues. If your recipe calls for a fully baked shell, give it a few minutes on a rack to rest, then proceed with the filling. For par-baked shells, a shorter bake in the presence of the filling completes the crust while preserving the desired texture.
Tools & Materials
- Dough or pie crust dough(Chilled dough for easy rolling and handling)
- Rolling pin(Floured surface; roll to even thickness)
- 9-inch pie pan or tart pan(Deep side helps with even bake)
- Parchment paper or aluminum foil(Liner to support weights and prevent sticking)
- Pie weights or dried beans(Prevent puffing and shrinking during bake)
- Flour or powdered sugar for dusting(Light dusting helps prevent sticking when rolling)
- Timer or phone timer(Track bake time precisely)
- Cooling rack(Cool crust evenly after baking)
Steps
Estimated time: Total time: 60-75 minutes
- 1
Chill the dough
Wrap the dough and chill for at least 30 minutes (or up to 2 days). A cold dough is easier to roll and holds its shape better during baking. This helps prevent shrinkage. If you’re in a hurry, a quick 15-minute chill is still helpful.
Tip: Cold dough = cleaner edges and less tearing while transferring to the pan. - 2
Roll and transfer
Roll the dough to an even thickness, about 1/8 inch (3 mm). Gently lift it over the pan, easing into the corners without stretching. Trim excess at the edge so the crust sits flush in the pan.
Tip: Keep the dough cool during transfer to avoid tearing. - 3
Dock the crust
Prick the dough all over with a fork to prevent air pockets. This step helps maintain a flat surface and even baking, especially for thicker crusts.
Tip: Docking reduces the risk of bubbles forming during baking. - 4
Line with parchment and add weights
Line the crust with parchment paper, then fill with pie weights or beans. This keeps the crust from puffing and shrinking and provides consistent color.
Tip: Ensure weights cover the entire surface but don’t overflow the edges. - 5
First bake
Bake at a moderate temperature for a set time until the edges begin to color and center firms up. Remove the weights and parchment after this first bake.
Tip: Keep a close eye on color to avoid over-browning. - 6
Second bake if needed
Return the crust to the oven for a few more minutes if you want a deeper golden color or a crisper base before filling.
Tip: Short, targeted bake avoids overcooking. - 7
Cool before filling
Allow the crust to cool completely on a rack before adding your filling. This prevents sogginess and helps the crust set.
Tip: Even cooling prevents steam from softening the shell. - 8
Adjust for fillings
If your filling is particularly moist, consider a fully baked shell; for drier fillings, par-bake and fill quickly to maintain texture.
Tip: Tailor bake time to your specific recipe.
Frequently Asked Questions
What is blind baking and why is it used?
Blind baking is prebaking the crust before adding the filling to set structure and prevent sogginess. It’s commonly used for custard or very juicy fillings.
Blind baking is prebaking the crust to keep it crisp and sturdy before you add the filling.
Do I always need to prebake the crust?
Not always. Some dry fillings or short bake pies may tolerate a partially baked or fully baked crust without blind baking. Use it when the filling is wet or needs a long bake.
Not always, but use blind baking for juicy or custard fillings to prevent sogginess.
What temperature and time for blind baking?
Bake at a moderate heat until edges color and the center firms, typically 15-20 minutes for the first bake, then 5-10 minutes after removing weights. Adjust for crust thickness and oven performance.
Bake at a moderate heat for about 20 minutes, then finish as needed depending on color and texture.
What can I use if I don’t own pie weights?
Dried beans or rice can substitute for pie weights. Spread evenly and avoid using the same beans repeatedly for serving; label them as not for cooking after use in weights.
If you don’t have weights, use dried beans or rice as a substitute.
How do I prevent the crust from shrinking?
Chill dough before rolling, avoid overworking, and use weights to hold shape during baking. Docking also helps maintain a flat surface.
Chill and weigh the dough to keep its shape and prevent shrinking.
Watch Video
Key Takeaways
- Blind bake when fillings are moist or bake long.
- Use parchment and weights to prevent puffing.
- Chill dough to maintain structure and avoid shrinkage.
- Dock and trim edges for even, uniform crusts.
- Cool completely before filling to avoid soggy textures.